

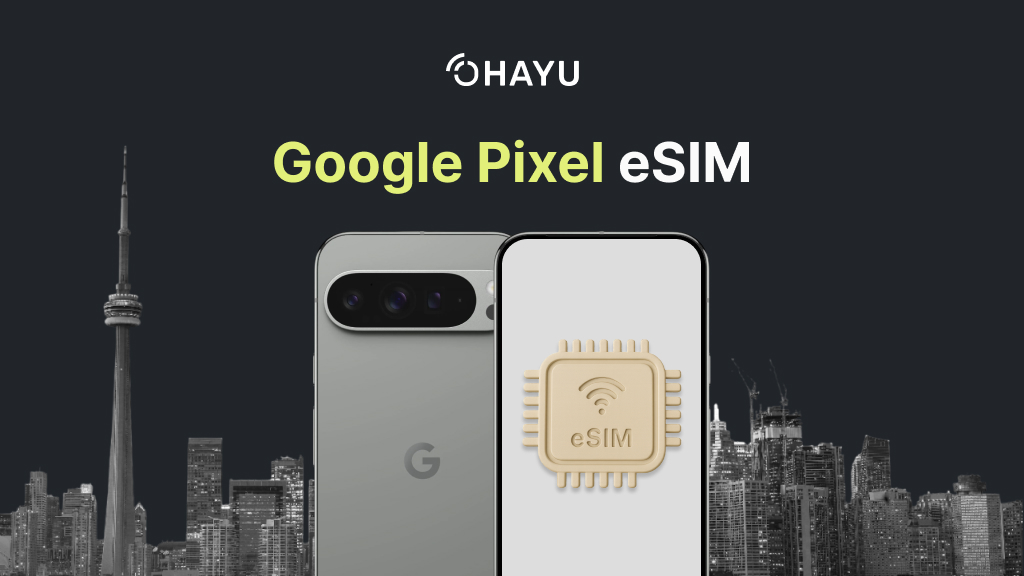
If you’re a Google Pixel fan, we’ve got some good news for you. Most Google Pixel eSIM smartphones – the latest Pixel 10, 9, 8, and 7 series, and even the older ones like 6, 5, 4, and 3 – support a digital SIM feature. In this detailed guide, we will walk you through how to verify compatibility, the simple installation process, and troubleshooting tips in case things go wrong.
Google Pixel eSIM-compatible models
The majority of the company’s smartphones are eSIM-compatible, including:
- Pixel 10, 10a, 10 Pro, 10 Pro XL, Pixel 10 Pro Fold
- Pixel 9, 9a, 9 Pro, 9 Pro XL
- Pixel 8, 8 Pro, 8a
- Pixel 7, 7 Pro, 7a
- Pixel 6, 6 Pro, 6a
- Pixel 5, 5a
- Pixel 4, 4 XL, 4a
- Pixel 3, 3 XL, 3a, 3a XL (partial eSIM support, only certain carriers and regions)
- Pixel 2, 2 XL (partial eSIM support, e.g. Google Fi)
- Pixel Fold
- Pixel Watch, Watch 3, Watch 2 (LTE / cellular models only)
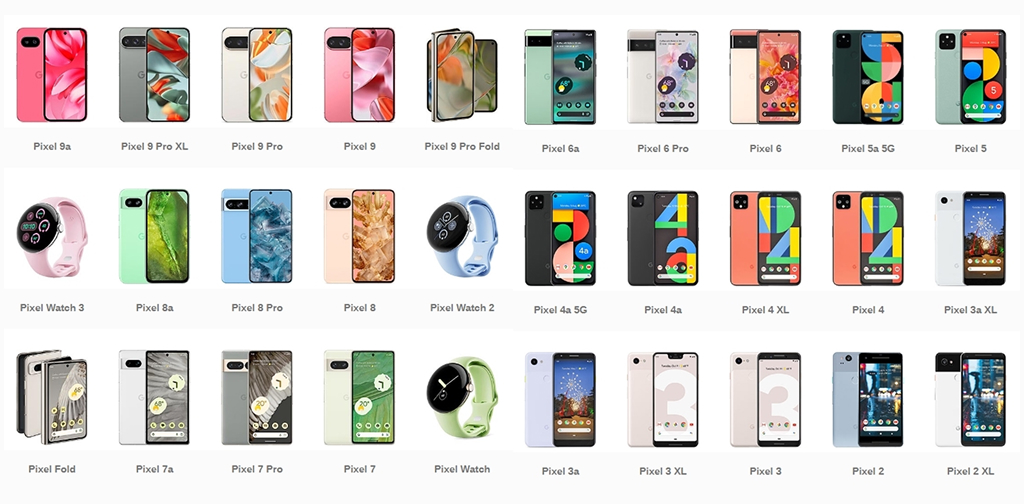
Interesting: Series 7 and newer feature dual eSIM, two active digital cellular profiles simultaneously.
Regional variations
For older models, series 3 and earlier, compatibility varies according to the country. For example:
- Pixel 3 purchased in Japan, Taiwan, or Australia does not have an embedded Subscriber Identity Module.
- Pixel 3a purchased from Verizon or Japan is also incompatible.
- Pixel 2 bought with a Google Fi plan has this feature.
Either way, it never hurts to double-check your device specs. Here are a few easy ways to do that.
How to manually verify Google Pixel eSIM availability
Check settings
- Open Settings.
- Tap Network & Internet.
- Search for SIMs.
- If it prompts you to add a new one, your phone probably supports it.
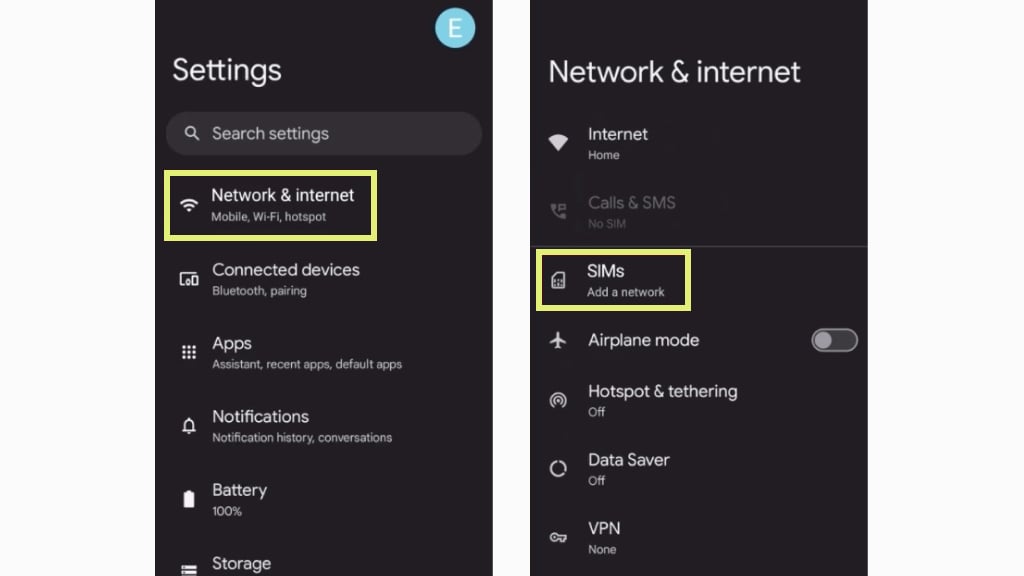
The exact wording might be slightly different based on your model and Android version.
Look for the EID
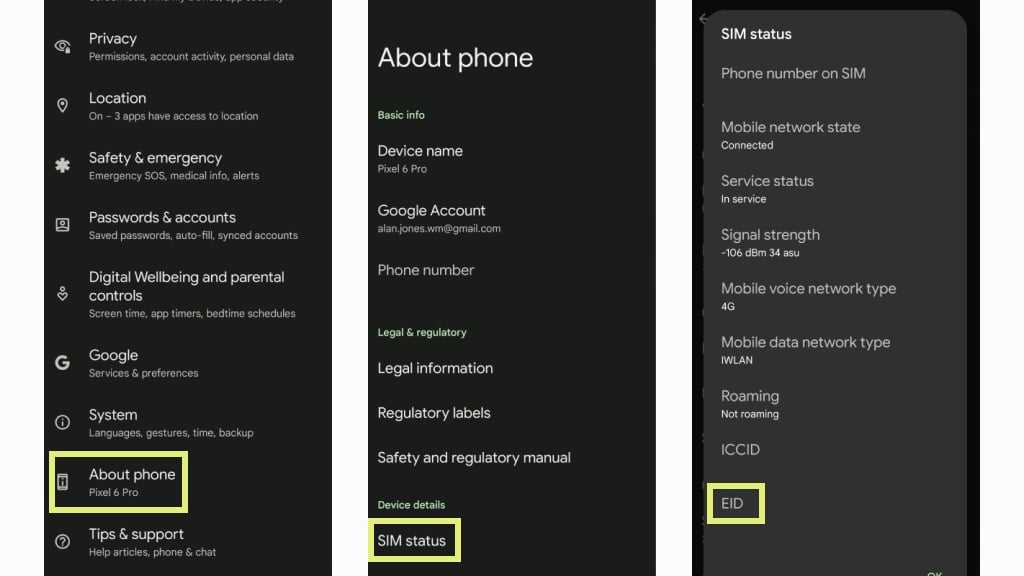
- Go to Settings.
- Navigate to About phone.
- Click on SIM status.
- Search for EID. If you find this code, your smartphone is capable of using an eSIM.
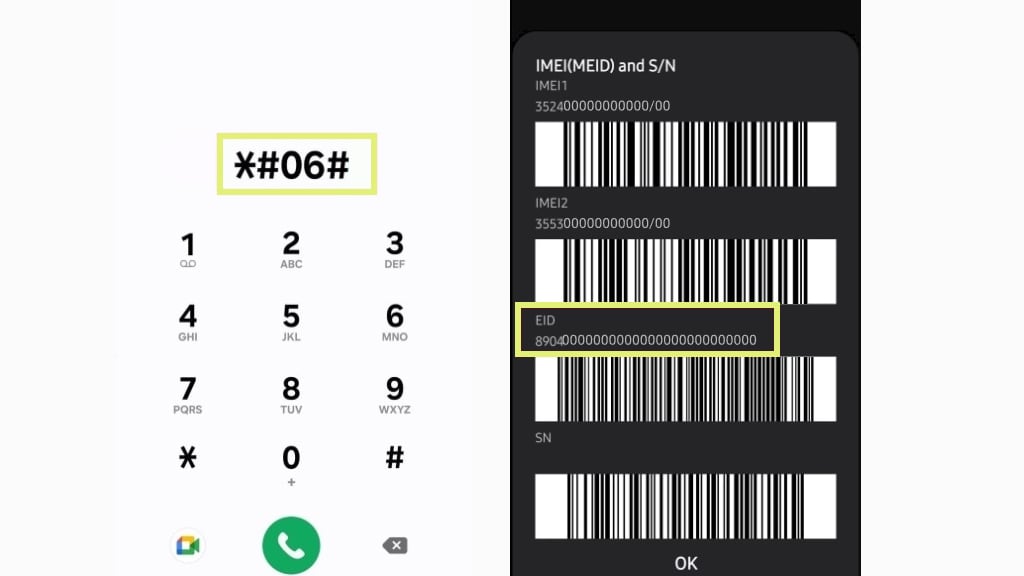
Dial *#06#
- Open the Phone app.
- Open the keypad (where you dial numbers).
- Type in the *#06# number.
- If an EID is displayed, it indicates the feature’s presence.
Check the device’s packaging or documentation
A user manual or the original box indicates whether a phone uses this technology. Scroll through the list of features/specs to find out.
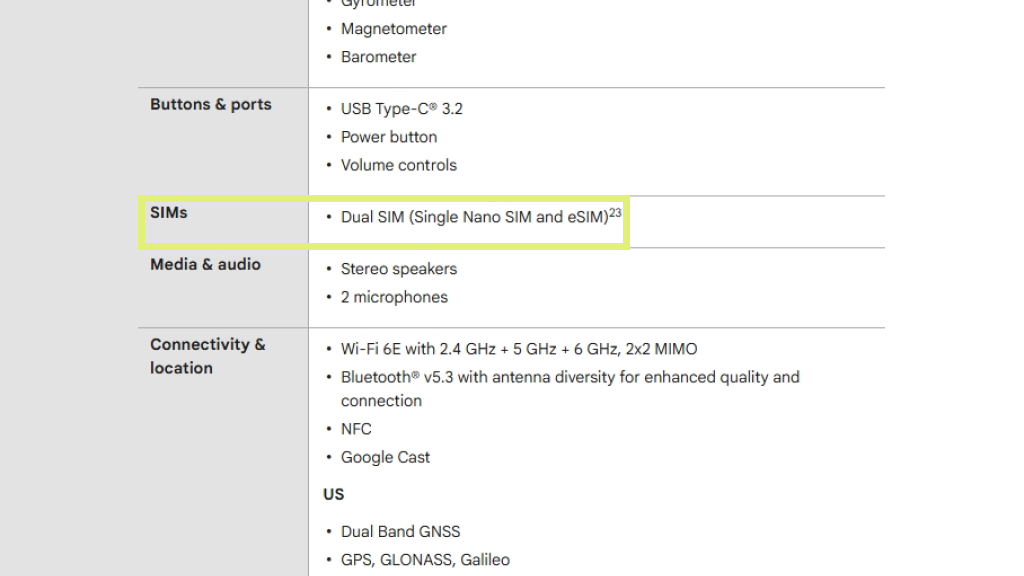
Refer to the specifications online
Visit the official website or a trusted seller like Gsmarena that lists specifications for your model. Look for SIM specs.
How to install an eSIM
There are two main ways to do this, depending on what you have available: a QR code or an activation number. e.g., Ohayu provides QR codes to set up travel eSIMs in iOS and Android apps. Just ensure you have a stable Internet connection, install the eSIM before your trip, and activate it after you arrive in the destination country.
Step-by-step setup process
1. Via QR
This is the most common and easiest way.
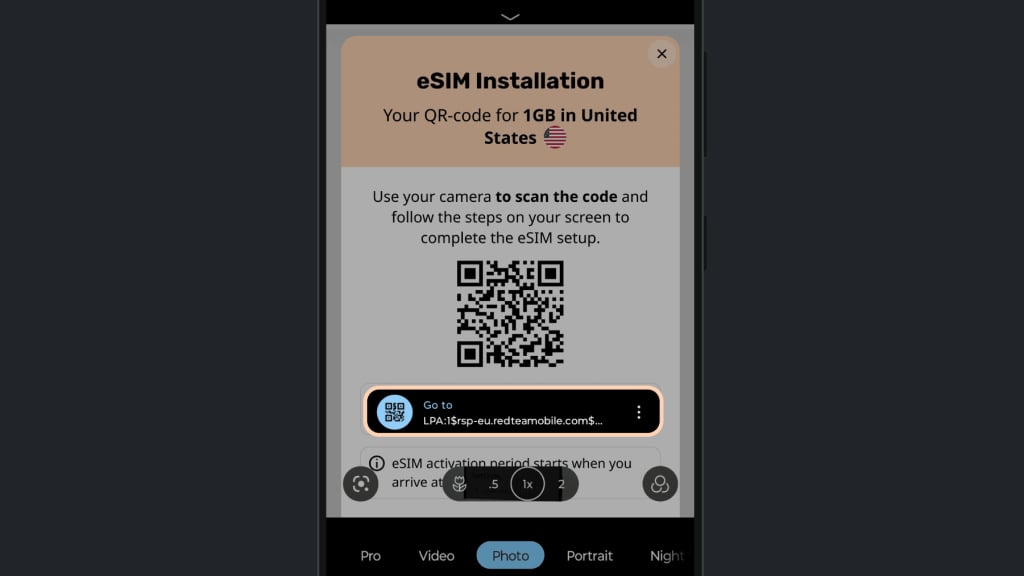
- Obtaining a QR code:
- Ohayu will provide you with a QR code. You’ll receive it in the app.
- Install eSIM using the QR code – scan a QR code from your phone’s Quick Settings menu or display it on another device’s screen and use your Camera app.
- Scanning process:
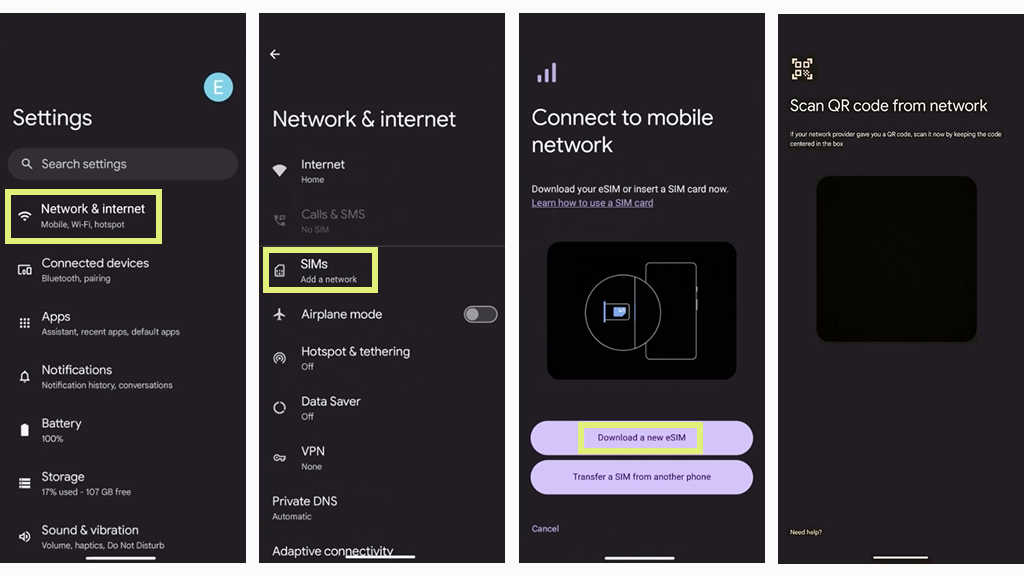
- Go to Settings.
- Click on Network & Internet.
- Tap SIMs.
- Choose Add.
- Tap Set up / Download.
- Aim the camera at the QR. Make sure it is visible within the frame and scan it.
- Wait and then click Download / Set up.
- Activation steps:
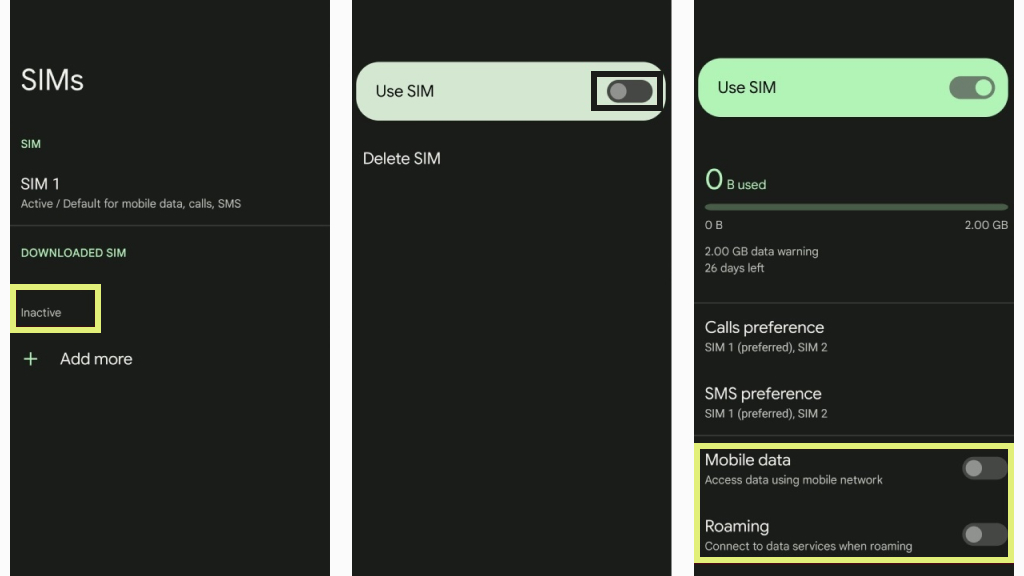
- After a successful scan, your smartphone will begin to download the profile.
- Once it has finished downloading and installing, return to the SIMs section and select your new profile (its current status is Inactive).
- Activate it by toggling it on. Remember that if you are using a travel eSIM, activate it only when you arrive in your destination country.
- Enable the Mobile data option and turn on Roaming.
2. Manual entry
Another way is to use the activation details to enter manually.
- Required information: A unique number provided by Ohayu.
- Configuration steps:
- Refer to the first five steps of the Scanning process via QR.
- After that, tap Need help at the bottom left (or Try these troubleshooting steps above the camera frame), and then select Enter it manually.
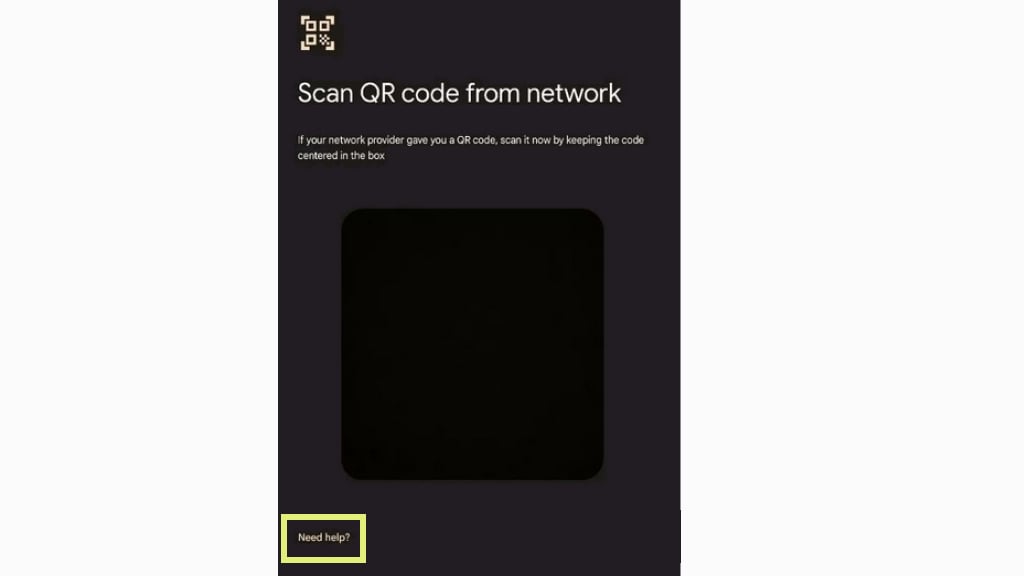
- Enter the Activation code accurately.
- Tap Continue.
- Follow the Activation steps from the setup process via QR.
Troubleshooting common issues
Sometimes, there could be trouble with installation. Here is a guide to help you fix common problems.
Connectivity issues
Problem: You might see errors if there is no stable connection.
Solution: Make sure you are connected to a strong Wi-Fi signal. If you want to use mobile data, check that your primary cellular profile (if you have one) is working and has internet access. You can also try switching between Wi-Fi and cell service to see if that helps.
QR scanning failures
Problem: The camera might not be able to read the QR properly.
Solution:
- Make sure the QR is in a bright light and not covered by any shadows.
- If the camera lens is dirty or has a smudge, it can make detection harder.
- Try moving the camera closer to or farther away.
- If it is unscannable, ask the Ohayu support team at support@ohayu.com.
- If it doesn’t work after a few tries, use the manual entry method instead.
When to contact an eSIM provider
- Trouble reading QR or entering the details by hand, even after trying many times.
- Issues with calls or data connection, even after trying simple fixes.
- A provider has confirmed that your phone should work, but it isn’t working.
- You think there is a problem with your account.
Other solutions and workarounds
- Restart your device: This is a simple way to fix many issues. Just turn it off and then on again.
- Toggle Airplane mode: Switch on Airplane mode for a few seconds, then switch it off. This can help your smartphone connect better to the network.
- Check for updates: Go to Settings > System > System updates. If there are any updates, make sure to install them.
- Reset network configurations: System > Reset options > Reset Wi-Fi, mobile & Bluetooth. This will erase your current network parameters, so you will have to connect to your Wi-Fi again.
Caution: If you do a factory reset, it will delete all your data. You should only do this if you have no other options.
When to choose a digital over a physical SIM

Think about choosing a digital option if you:
- Often travel to different countries and want to use local data plans without changing physical cards.
- Want two different profiles (one for personal use and one for work; one for calls and one for the internet), so you don’t have to carry two devices.
- Want an easier way to manage your cell service online?
- Like the idea of activating the plan digitally, which is more convenient.
Conclusion: enjoying the easy use of Google Pixel eSIM
For Google Pixel users, using eSIM makes it easier to manage a mobile connection. This tech is beneficial for those who travel a lot or want a simple way to stay connected. Undoubtedly, Google Pixel eSIM provides a modern and flexible way to handle cell services.