
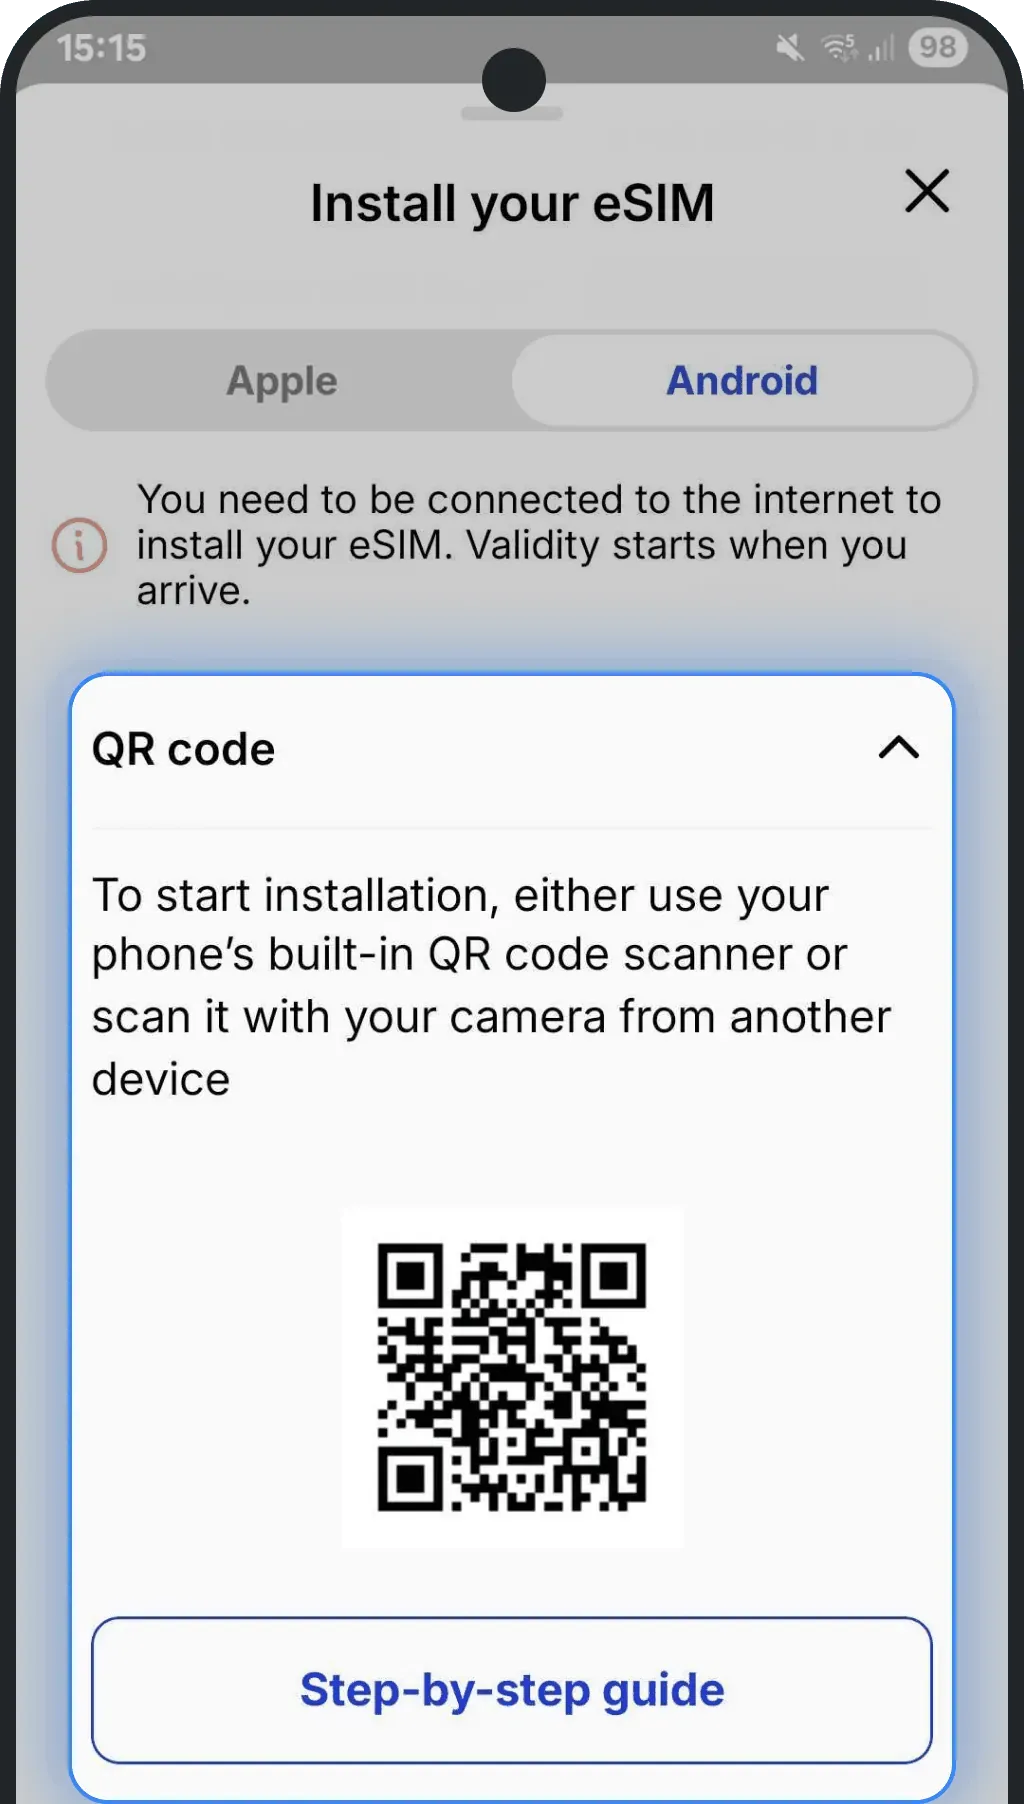
How can I install an eSIM on Android (Samsung, Google, Xiaomi, etc.) devices via QR code?
Installation
NOTE: You need to be connected to the internet to install the eSIM.
NOTE 2: If you have problems finding a QR code, please follow steps from the article: Where do I find my QR code for eSIM installation?
NOTE 3: Screenshots may differ slightly from what you see on your device due to variations between device models.
1. Use your Camera to scan the QR code
Scan the QR code with the camera of the device you'll be installing the eSIM on
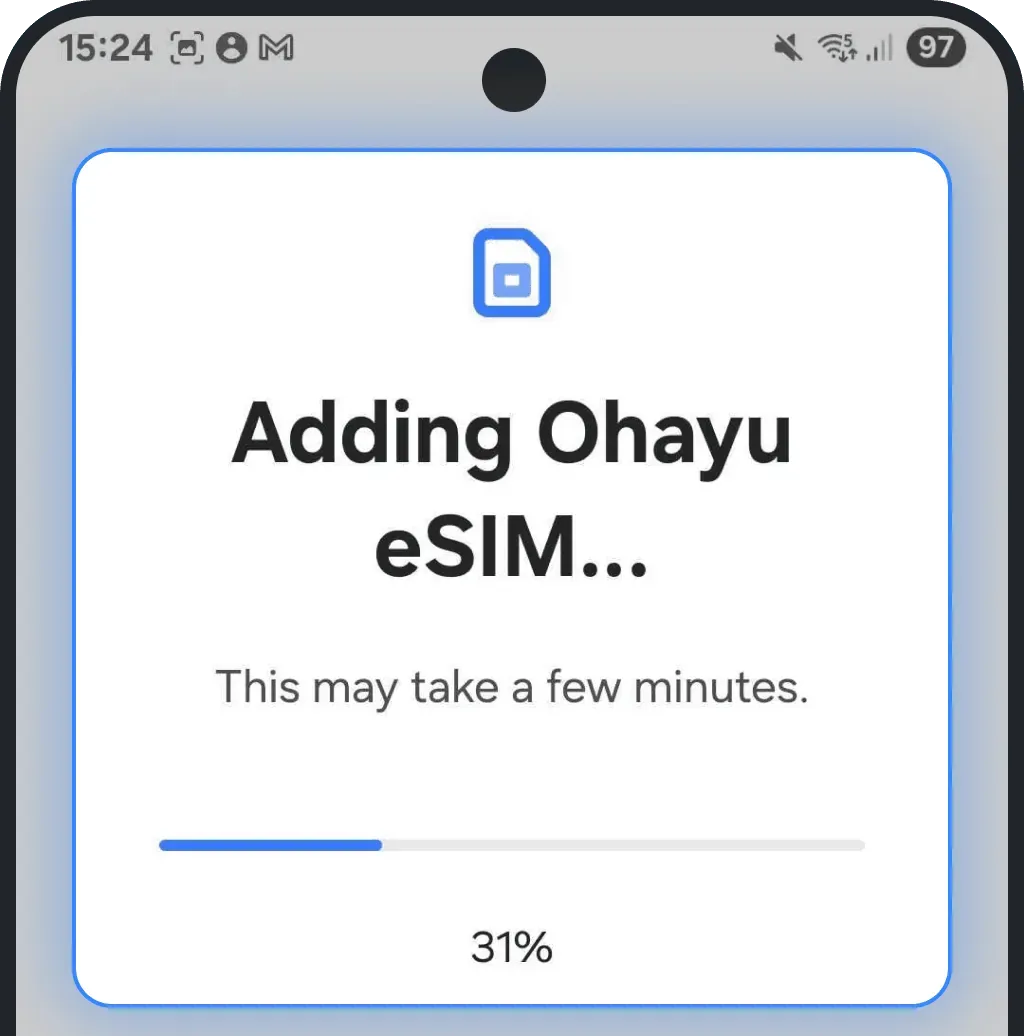
2. Install your eSIM
Press "Add"
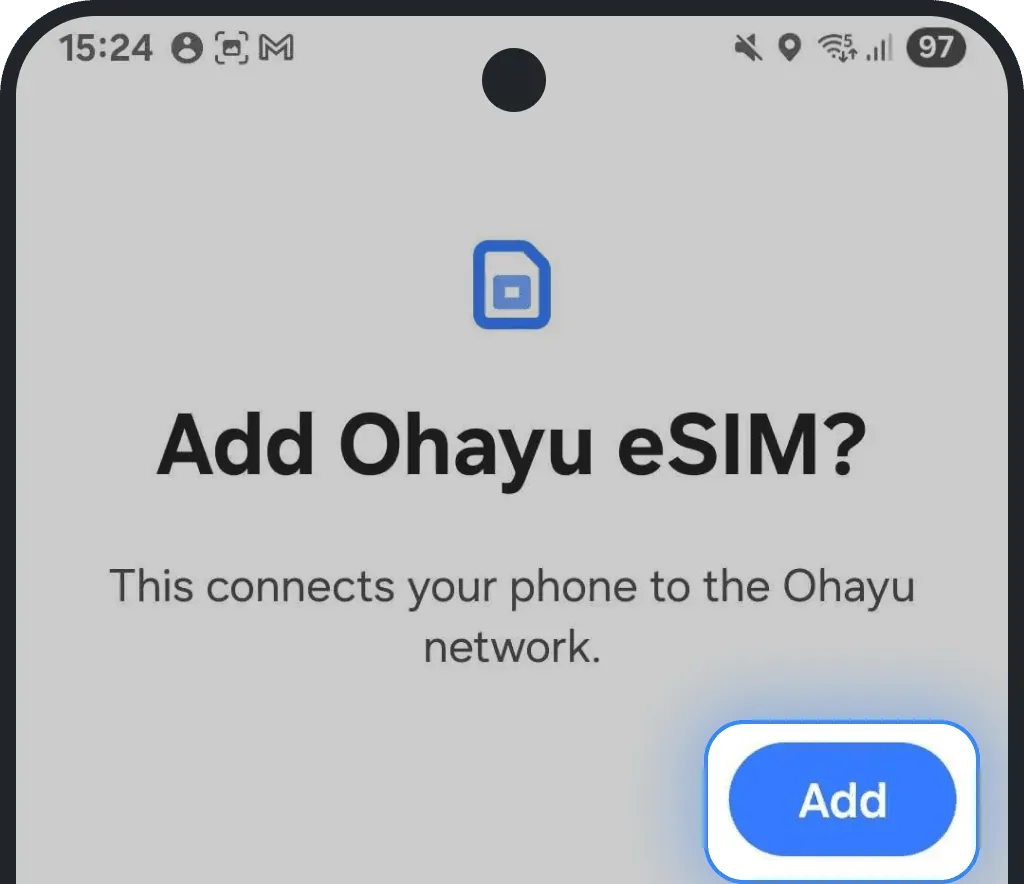
Stay on the screen while your eSIM installs (usually takes less than 2 minutes)
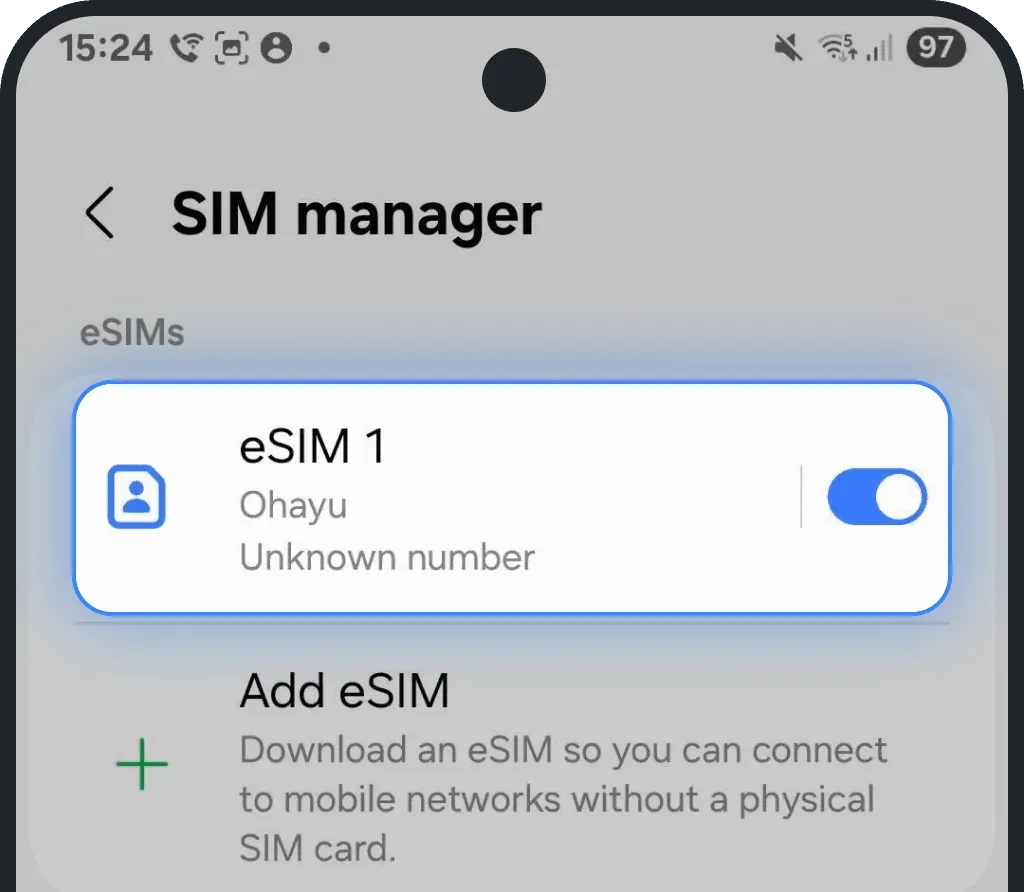
3. Confirm successful installation
Once installed, you will see your eSIM in your list of eSIMs in your Settings
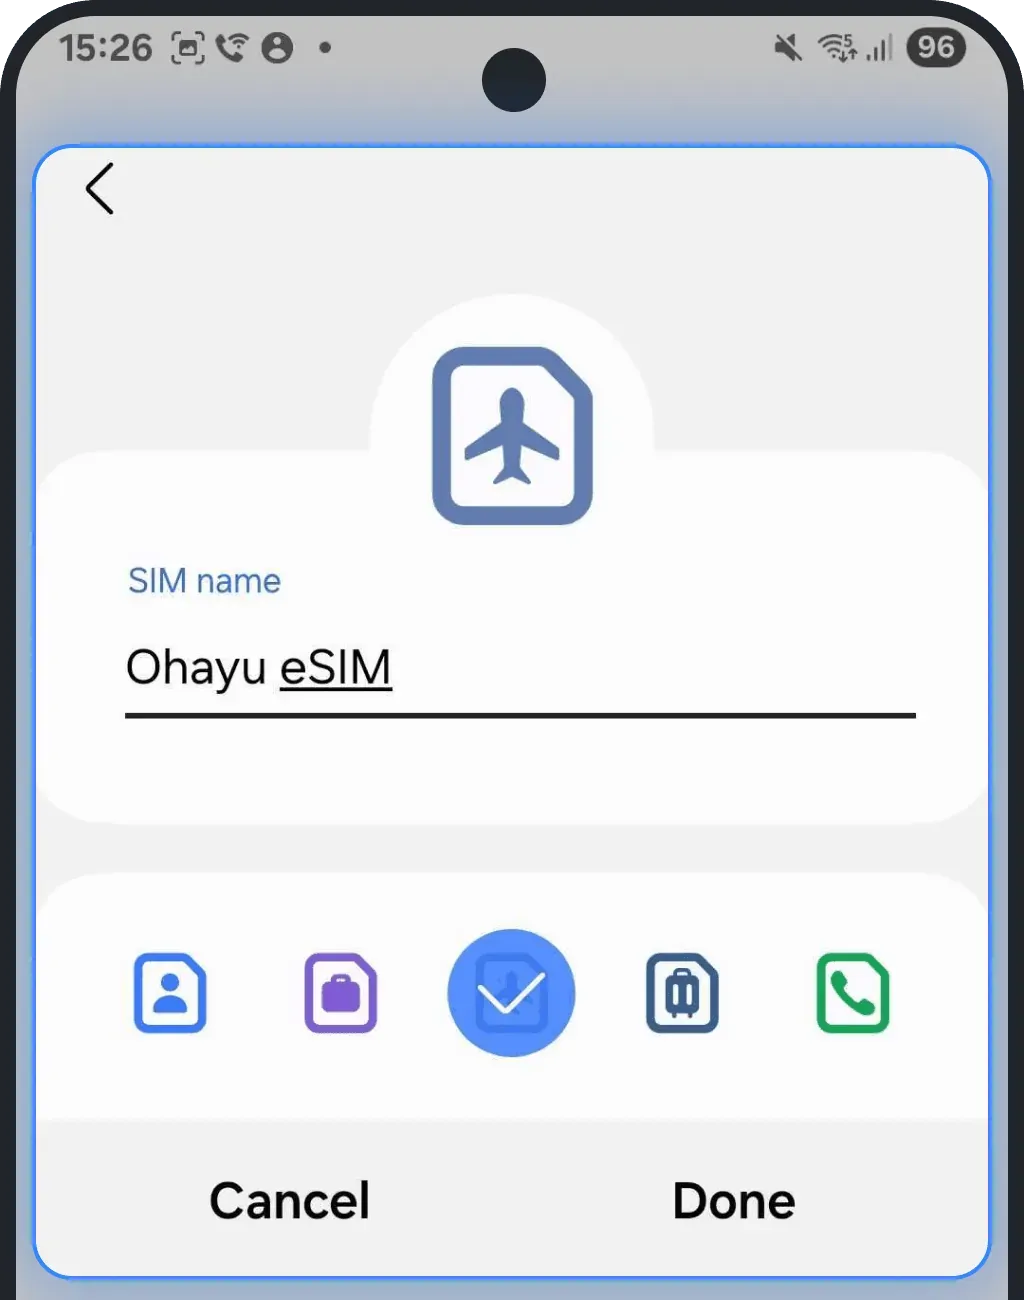
4. Choose a name for your new eSIM
Select the just-installed eSIM
Tap "Edit name and icon"
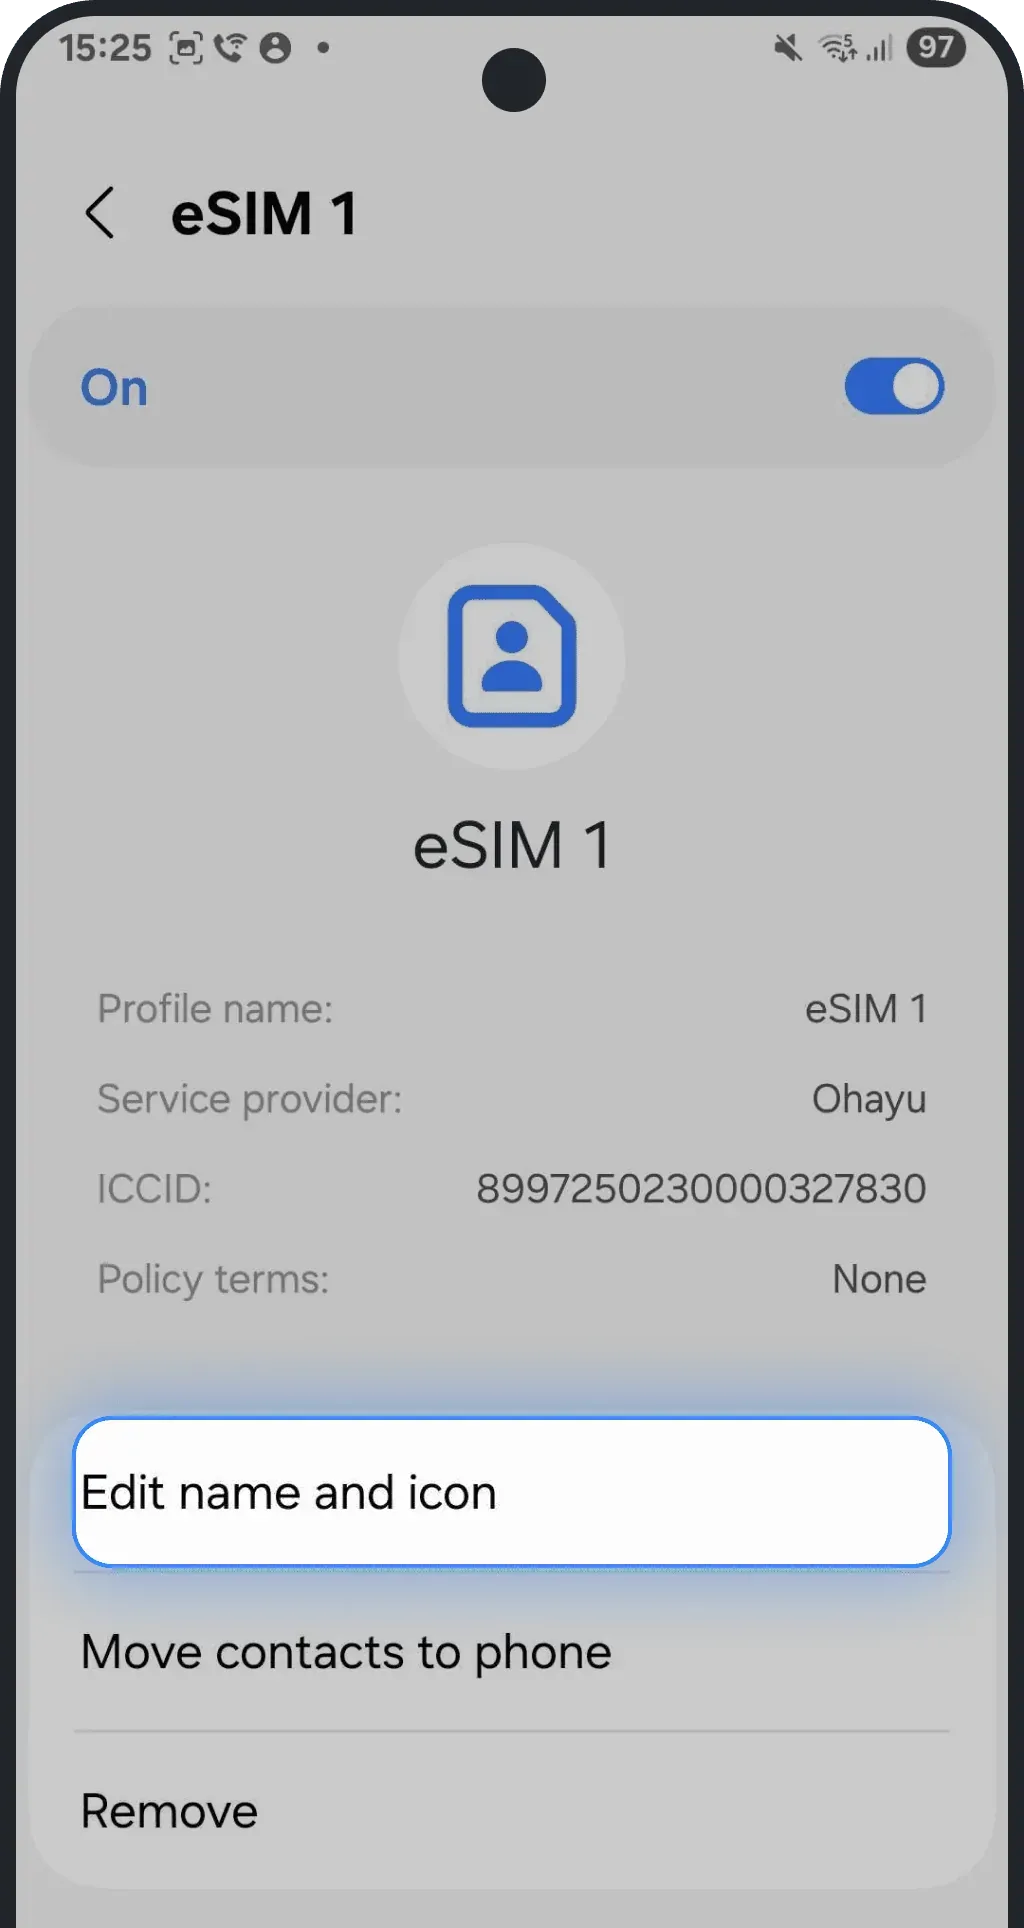
Rename it to a recognizable name (e.g. Ohayu eSIM)
Activation
NOTE: These steps are recommended, but on some devices or networks, they may already be applied automatically.
1. Start activation
We recommend doing this once you're at your destination as activation switches your primary data operator. This could interrupt your current internet if done too early
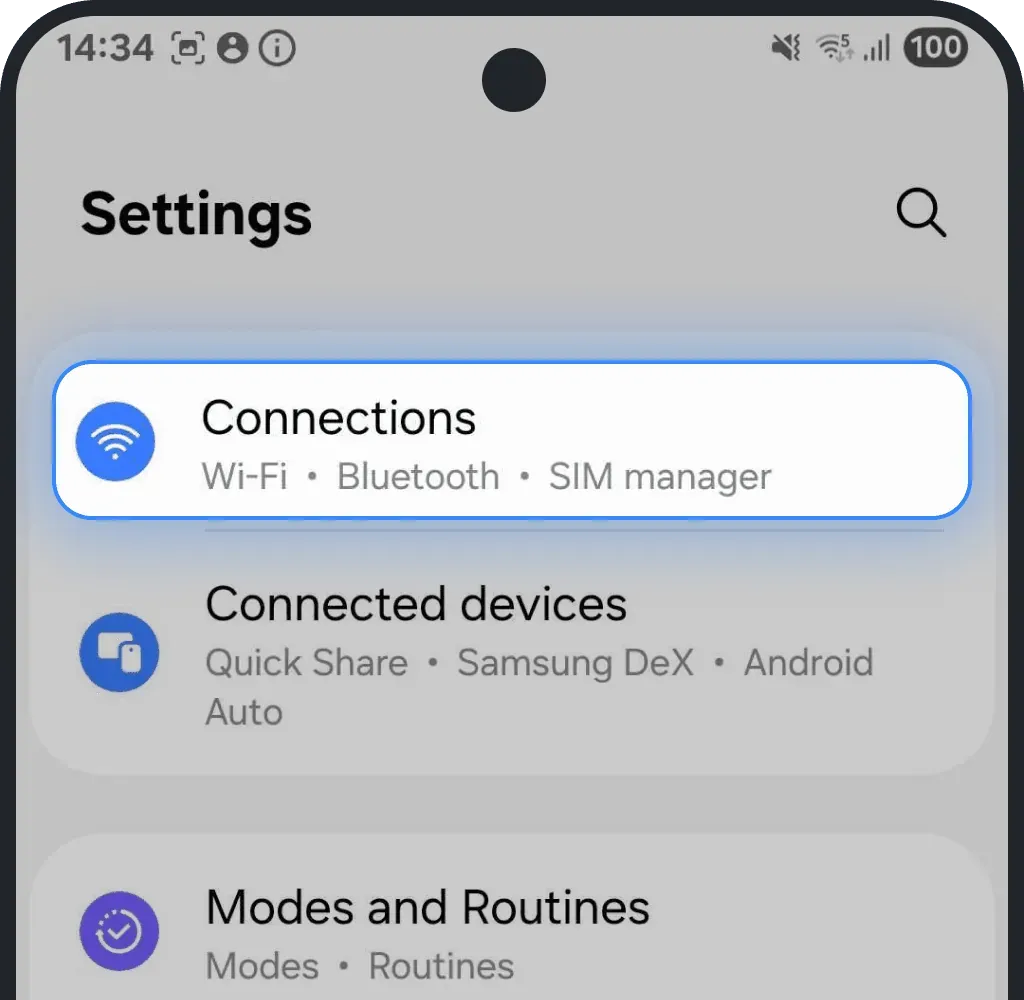
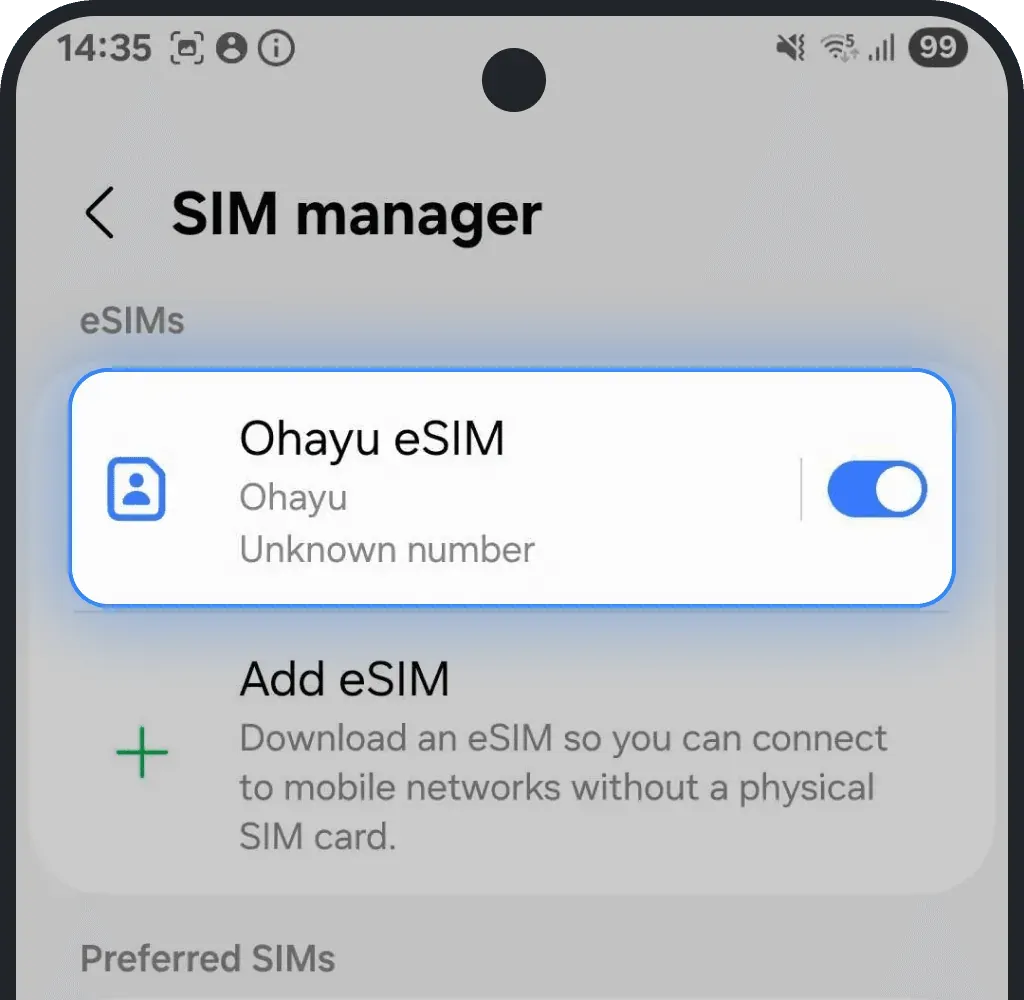
2. Turn on your eSIM
Go to Settings and tap "Connections" (or "Network & Internet" - wording may vary by device)
Tap SIM manager
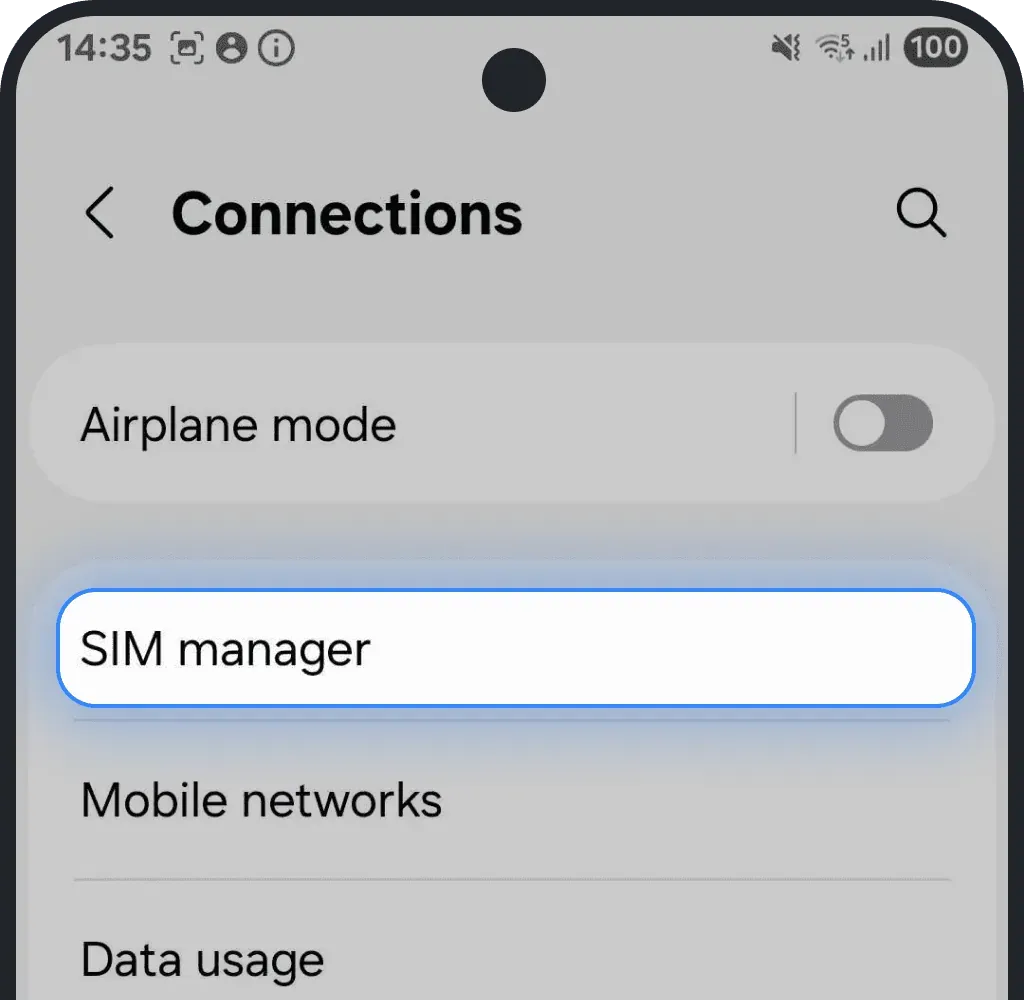
Find your installed eSIM in the list, tap it, and turn on the toggle to enable it
3. Set eSIM as your preferred data plan
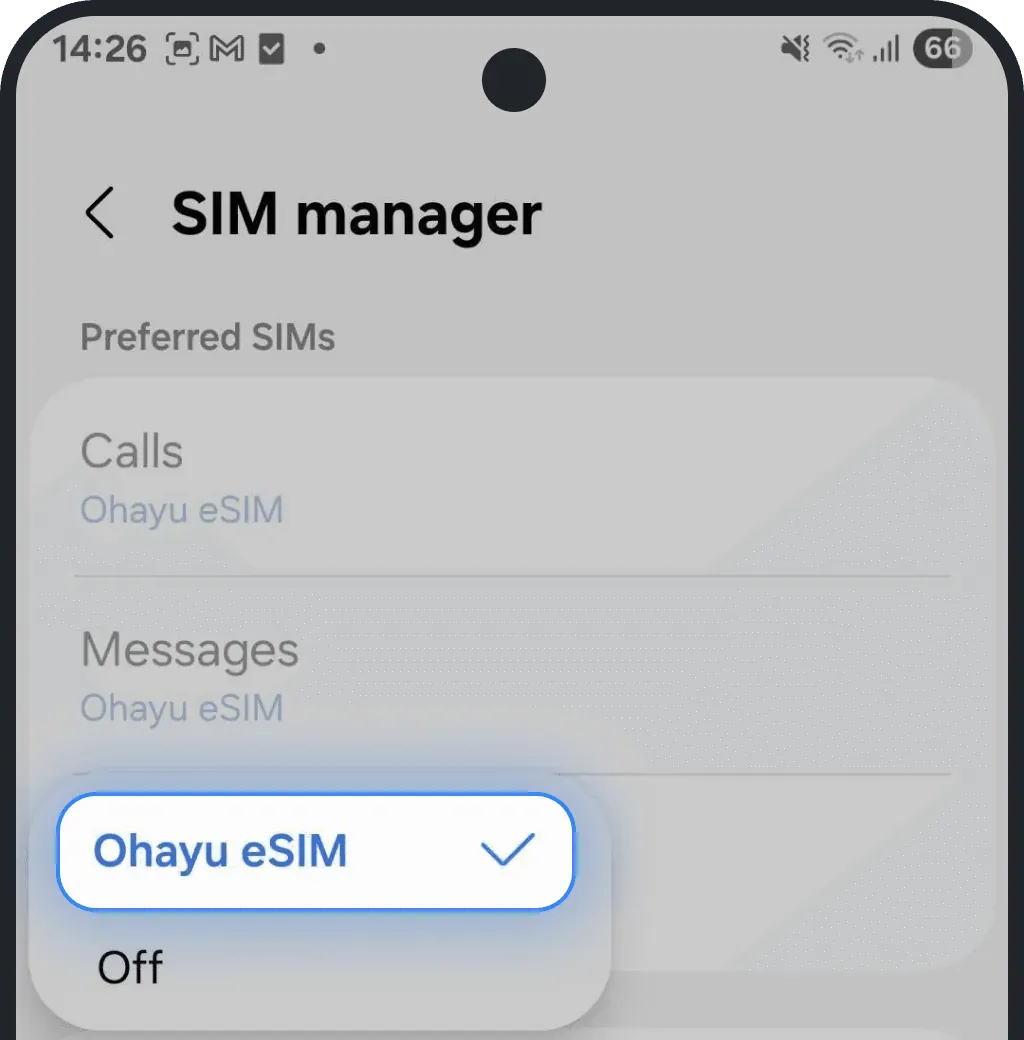
Inside the SIM manager tap on "Mobile data"
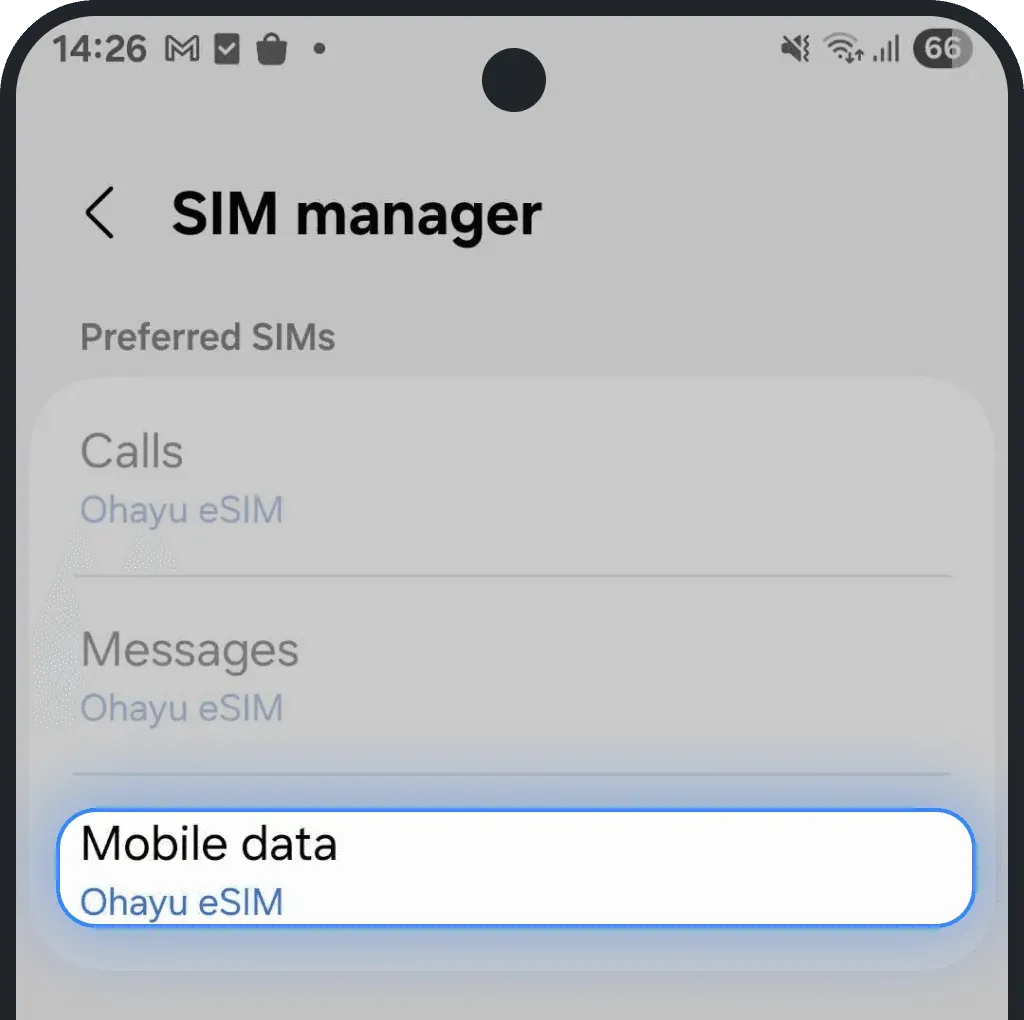
Select your installed eSIM
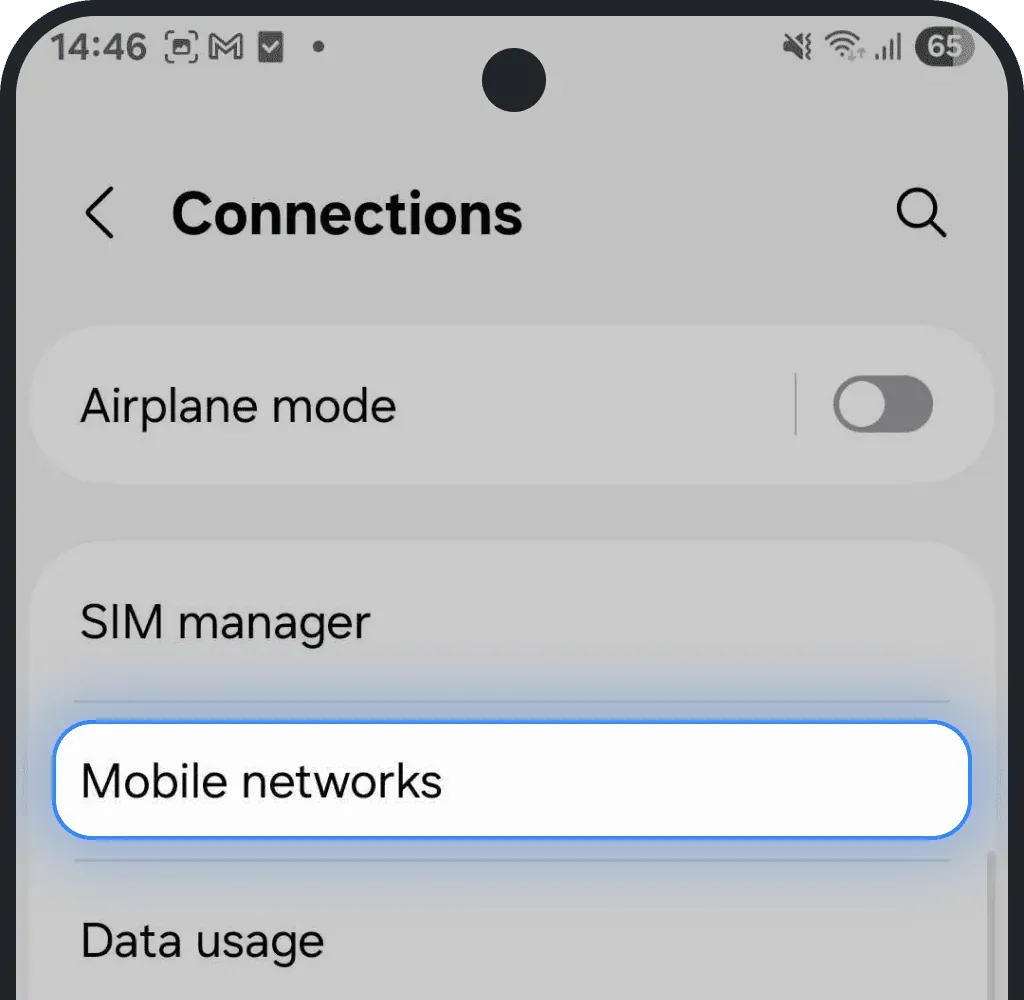
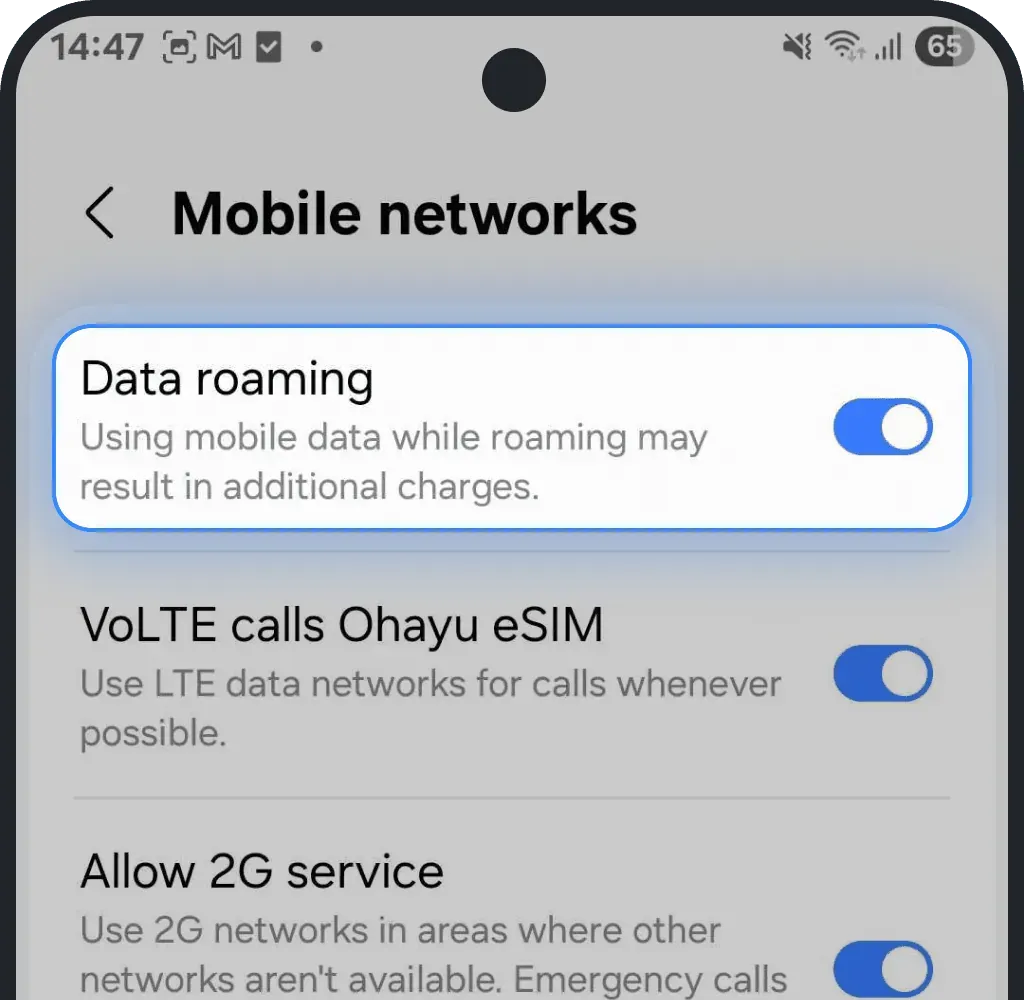
4. Enable data roaming
Go back to "Connections" and tap "Mobile networks"
Toggle on Data roaming
Was this article helpful?
Your feedback helps us improve our FAQ
We use cookies to run our site and personalize it for you. See our Cookie Policy.