How can I install an eSIM on Apple devices manually?
Installation
NOTE: You need to be connected to the internet to install the eSIM.
1. Add eSIM
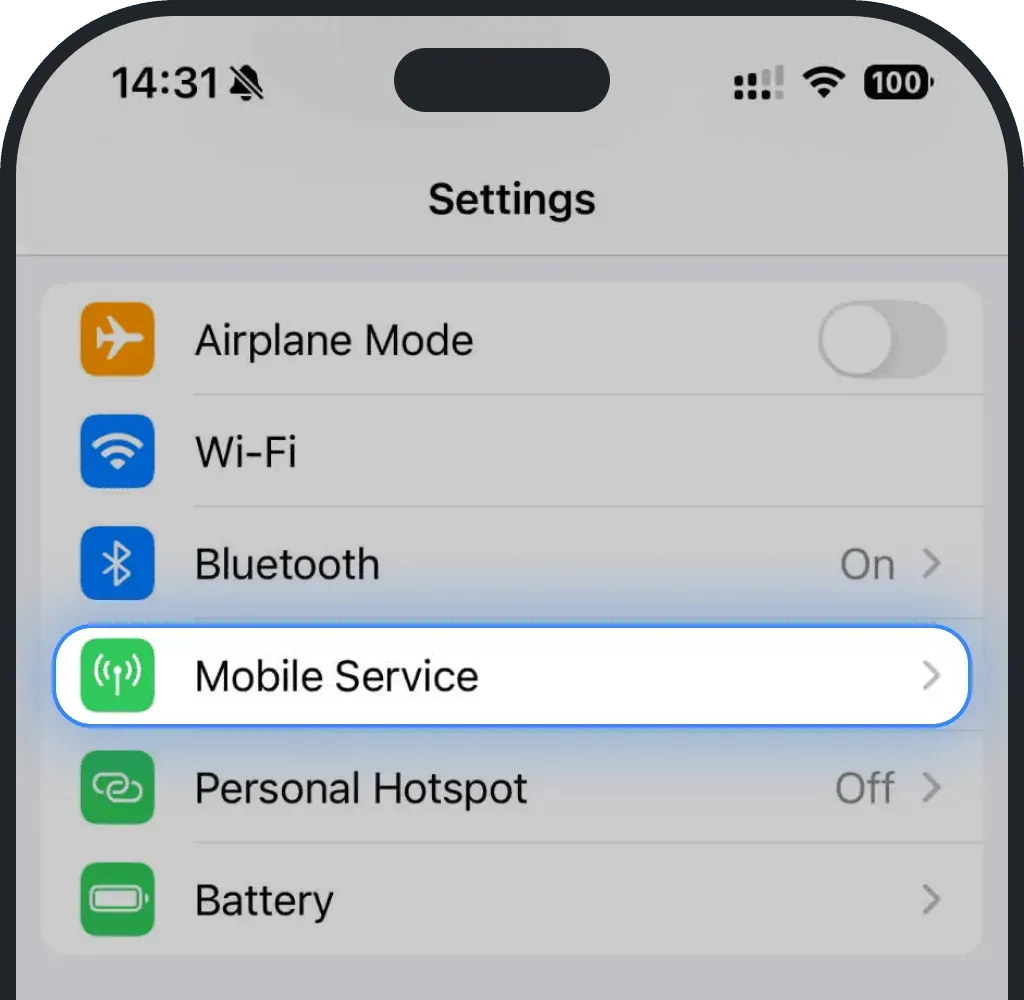
In your Settings, tap on "Mobile Service" ("Mobile Data" for iOS 16 and earlier versions)
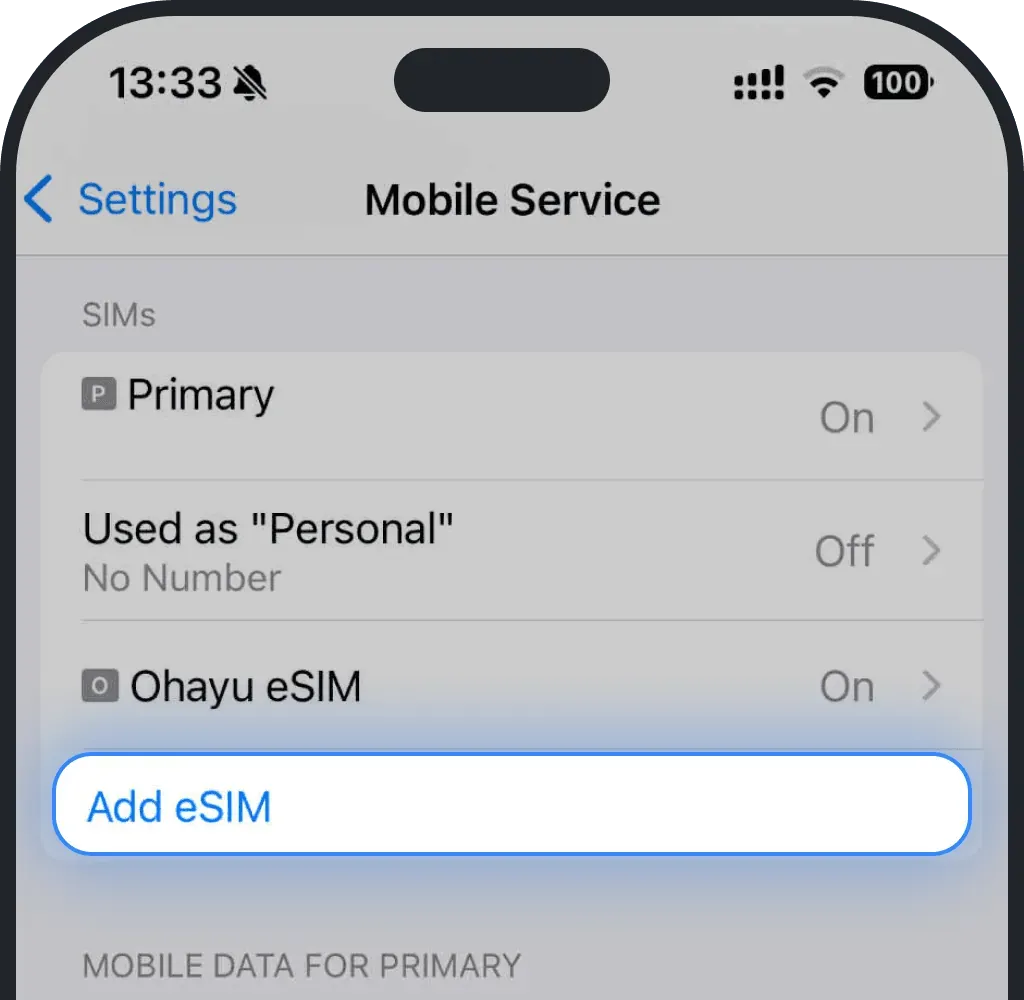
Tap on "Add eSIM" ("Add Data Plan" for iOS 16 and earlier versions)
2. Use QR Code
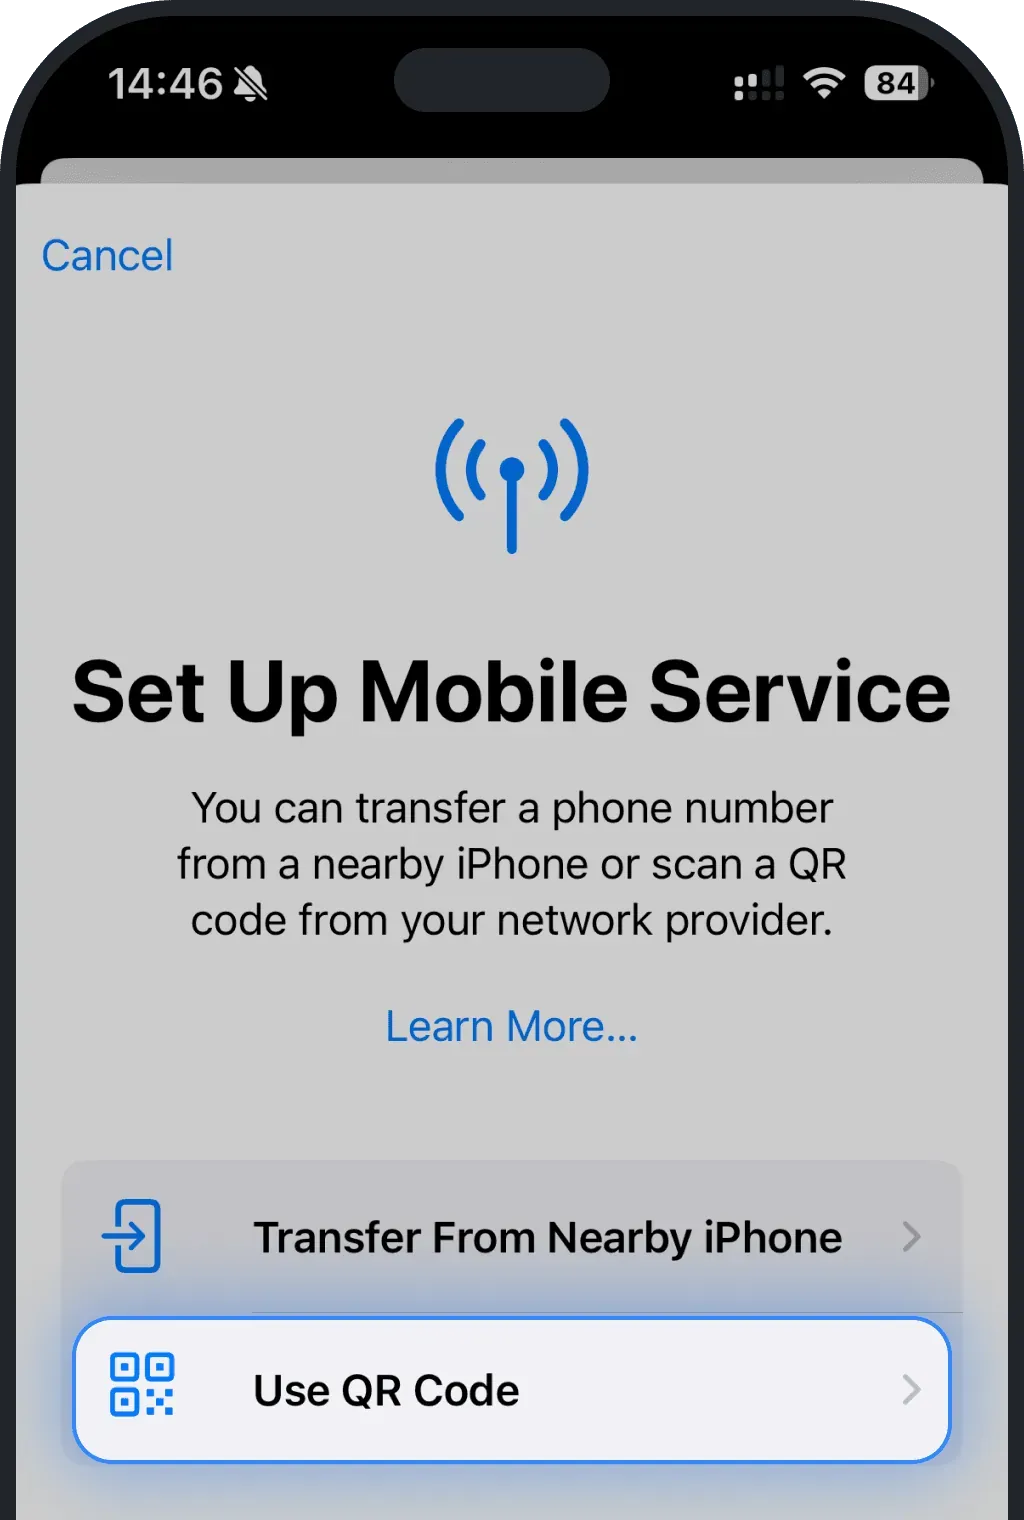
Tap on "Use QR Code" (this will lead to screen with manual installation option)
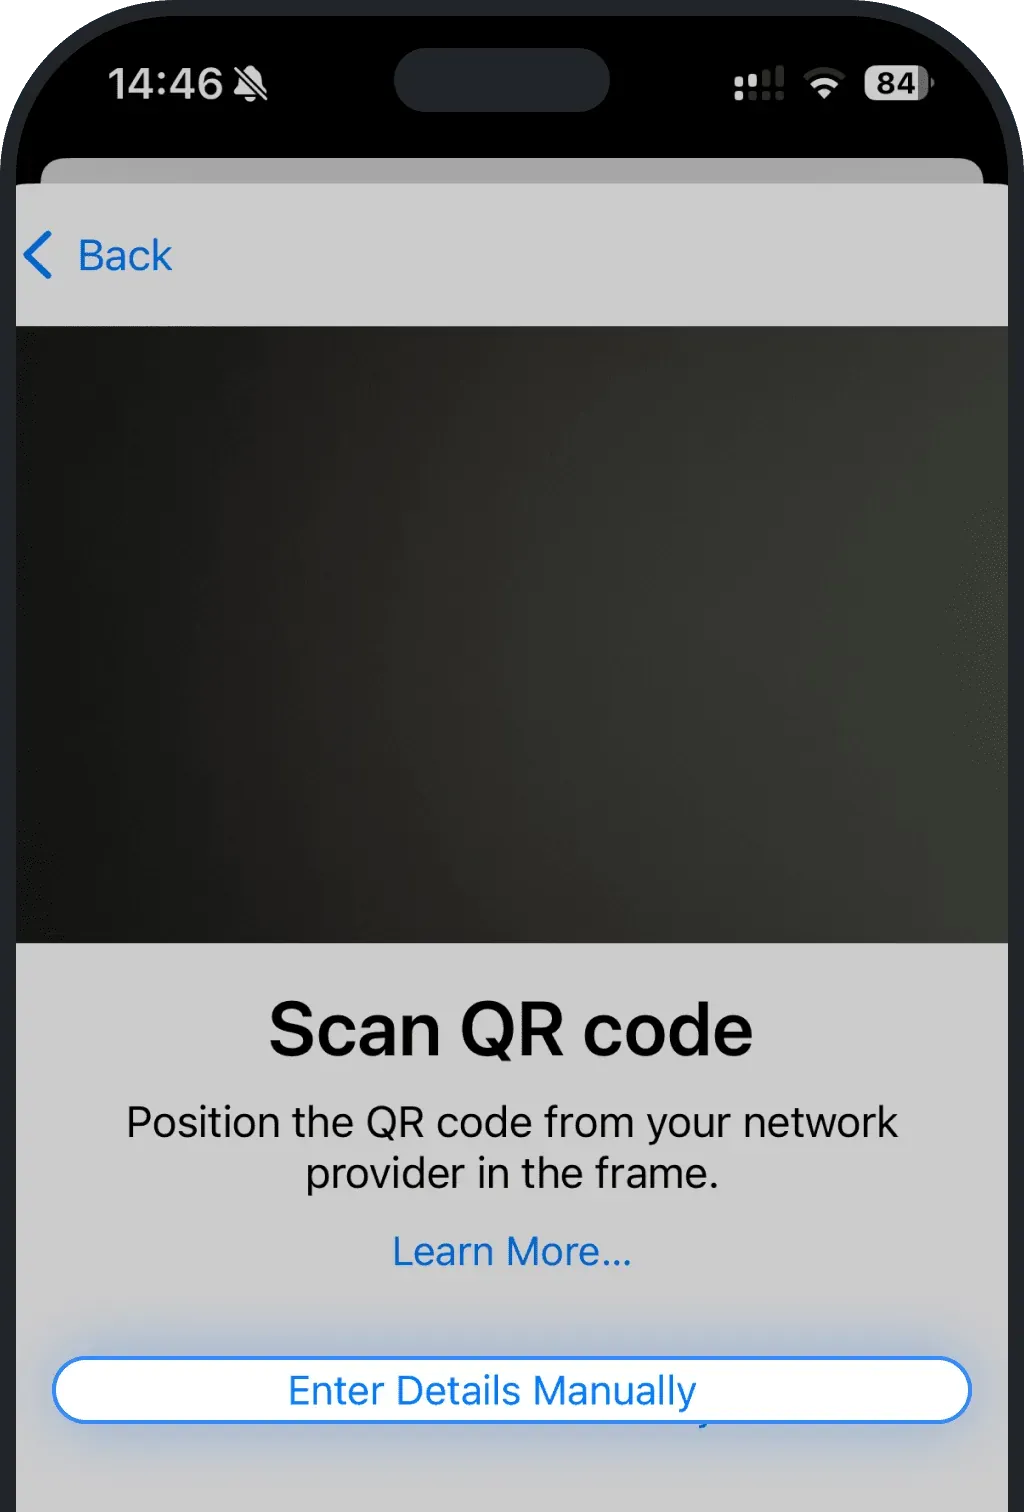
Tap on "Enter Details Manually"
3. Enter SM-DP+ Address
Enter the SM-DP+ address in the corresponding fields and click "Next" at the top right corner to finish set-up
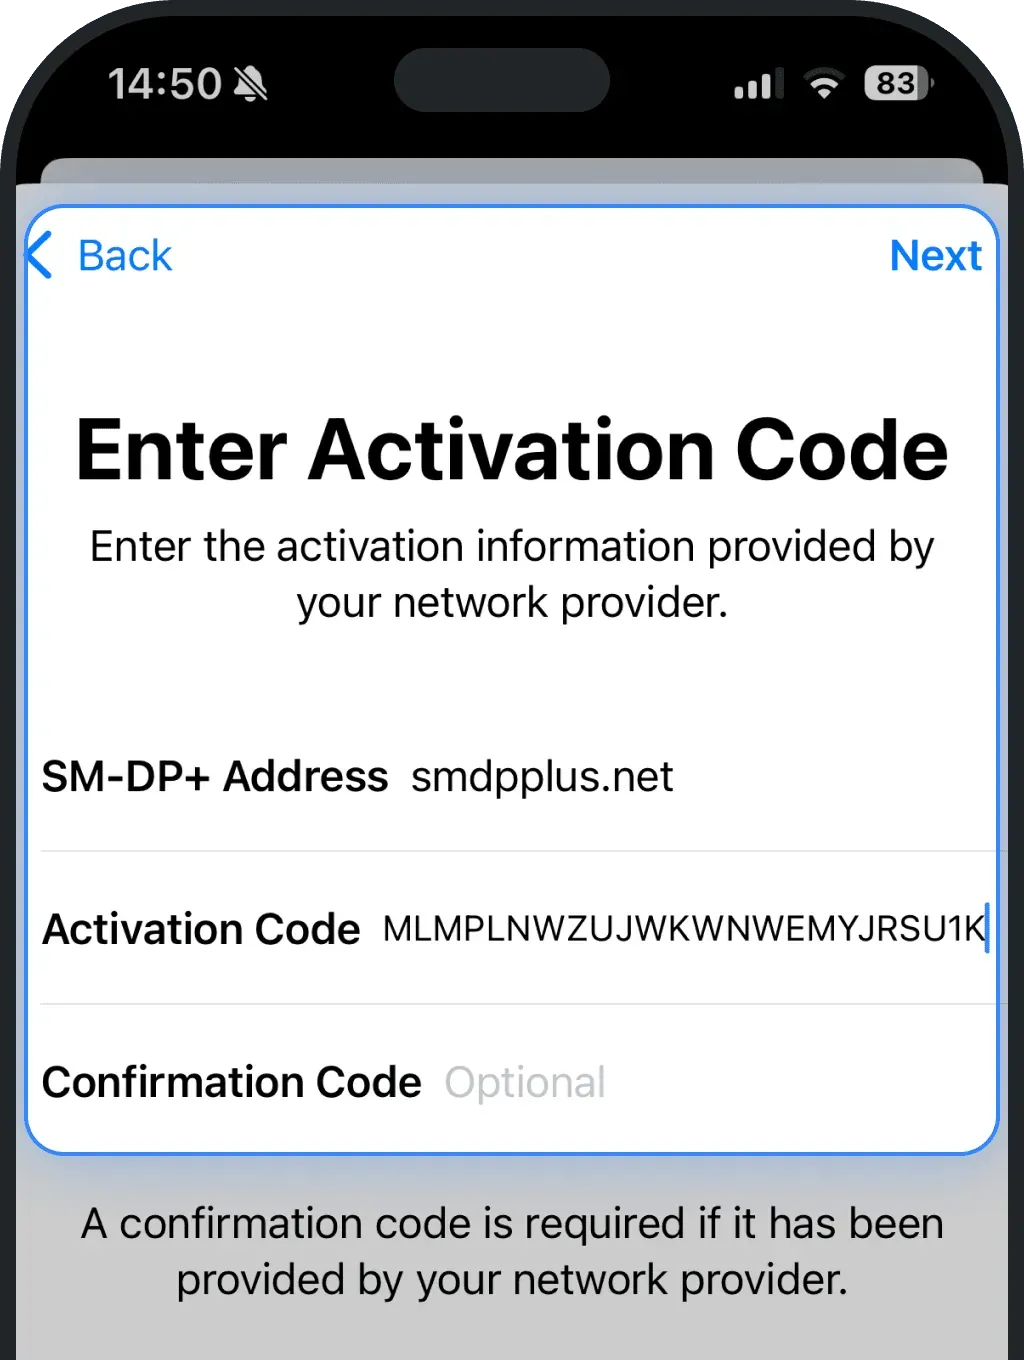
4. Install your eSIM
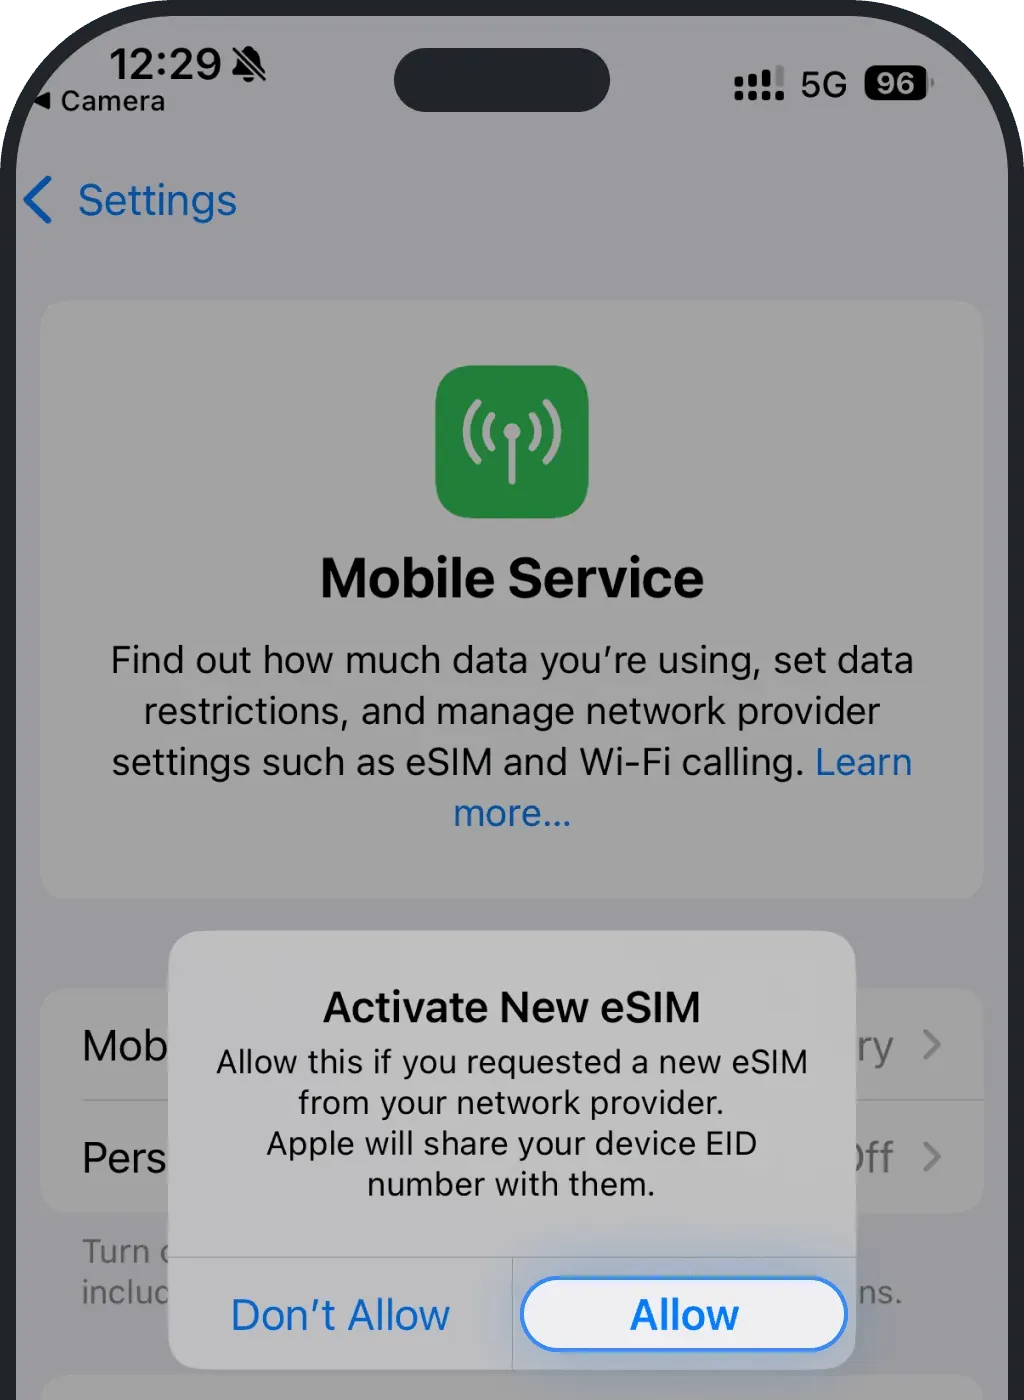
Allow the eSIM to be installed to your device
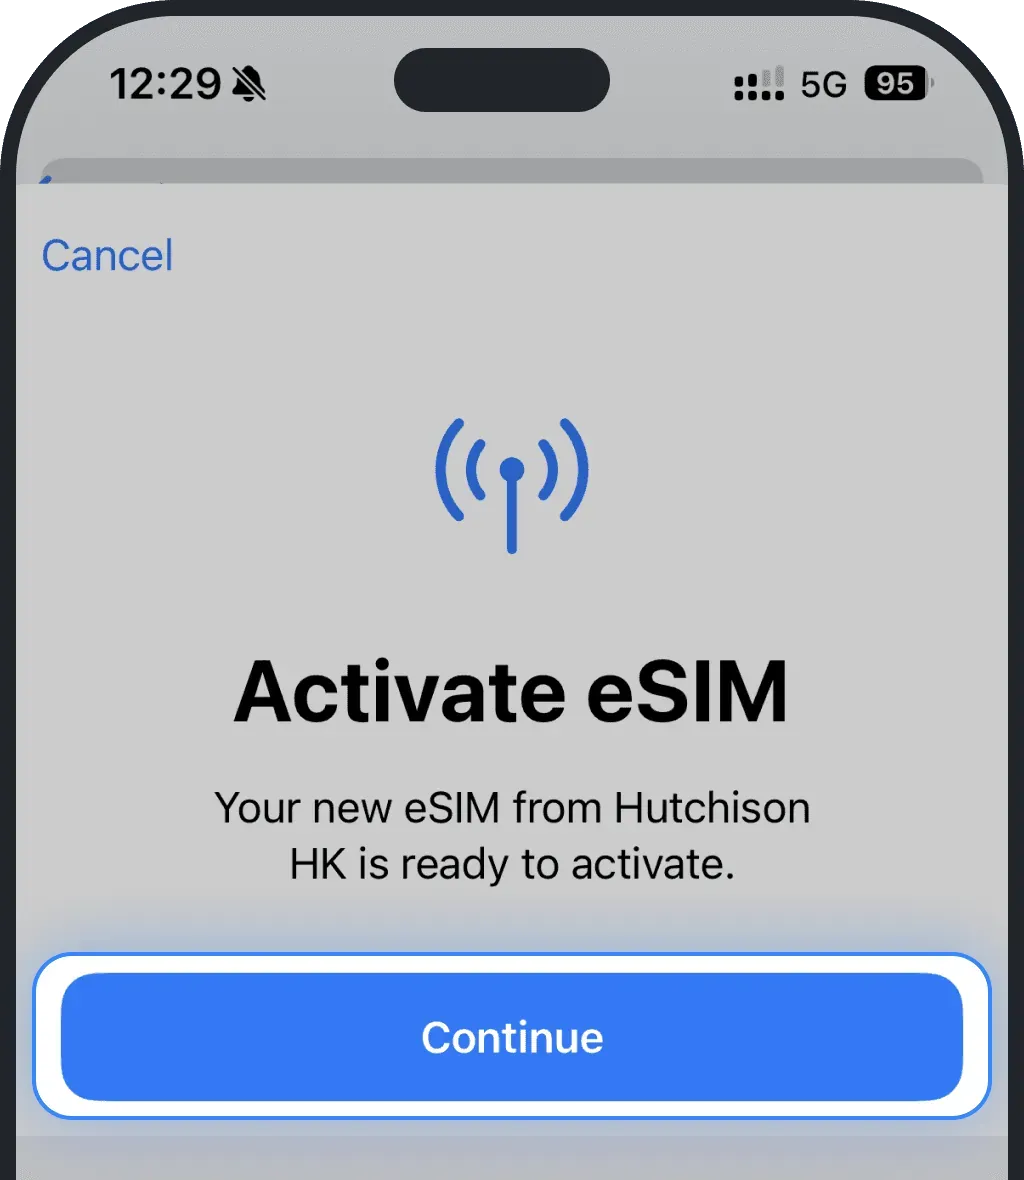
Press "Continue"
Stay on the screen while your eSIM installs (usually takes less than 3 minutes)
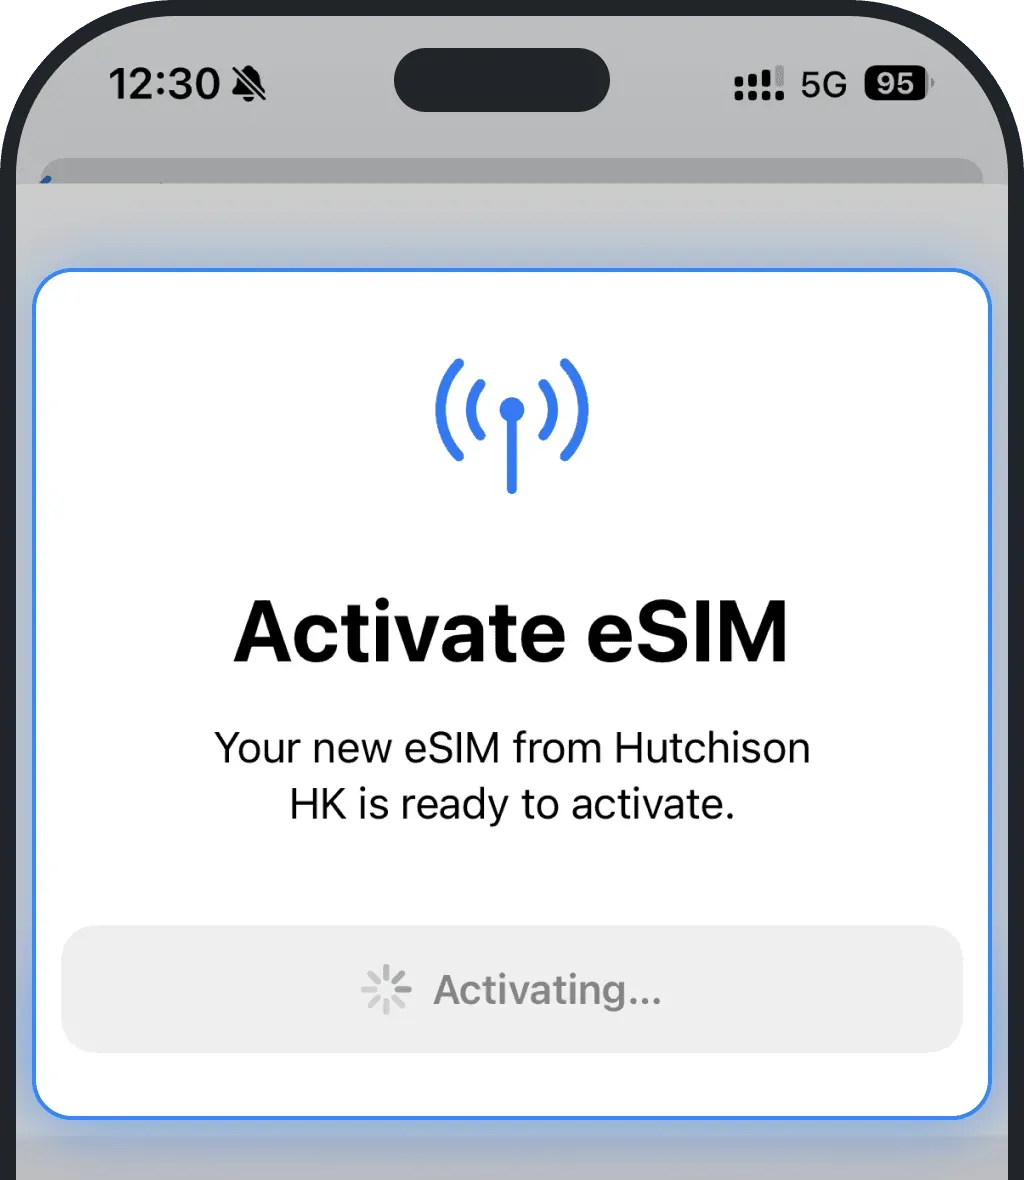
Instead of Ohayu, as name of the eSIM during activation, you might see a different name depending on the operator (e.g. Plus, Carrier etc)
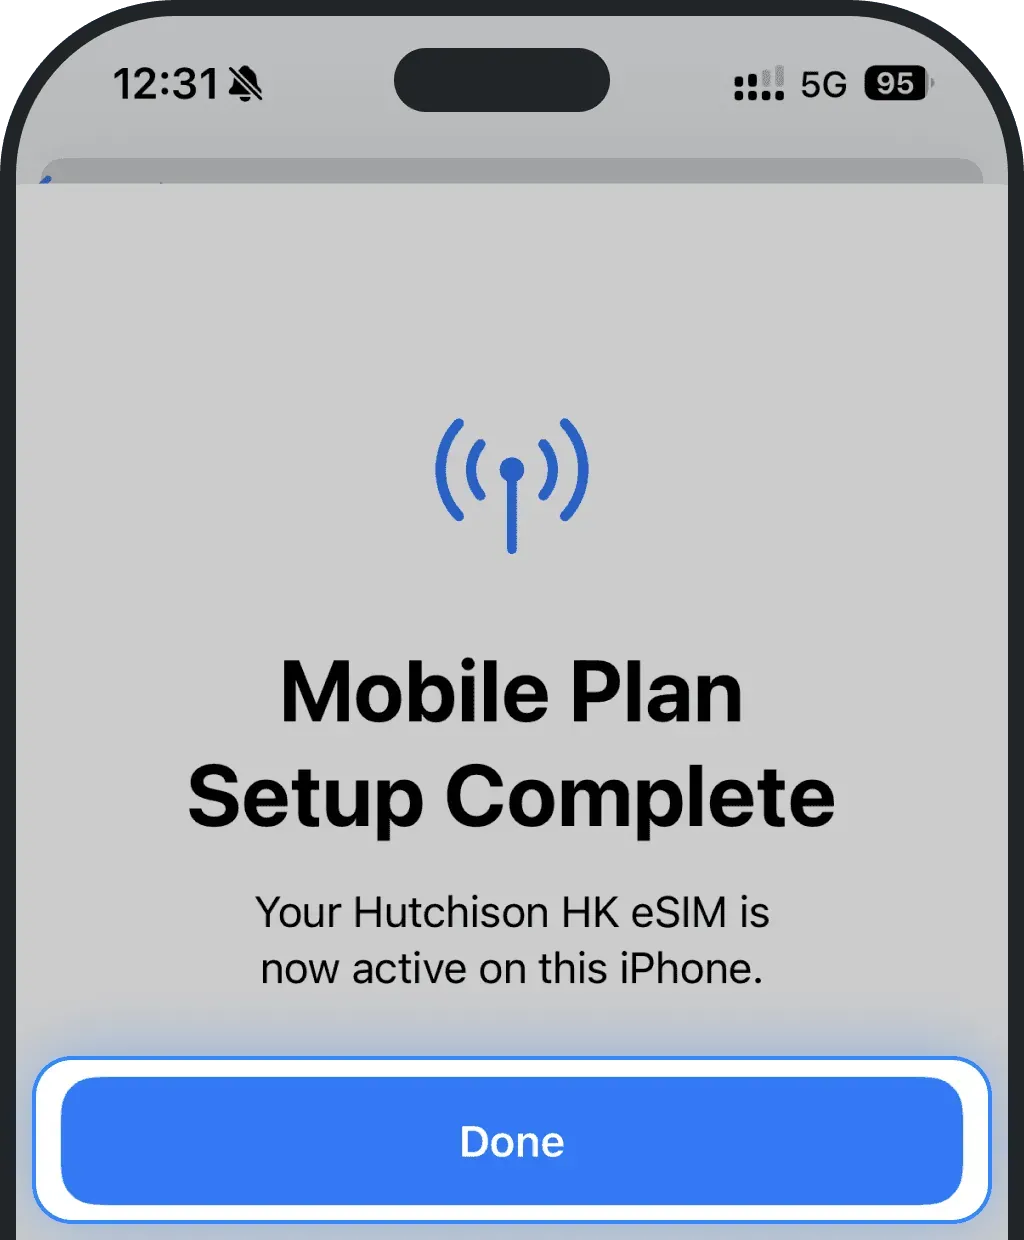
*If you have iOS 26:
You might see a different setup step during installation (especially if you bought the eSIM before traveling)
Select Data Only. Ohayu travel eSIMs provide mobile internet access only and do not support calls or SMS.
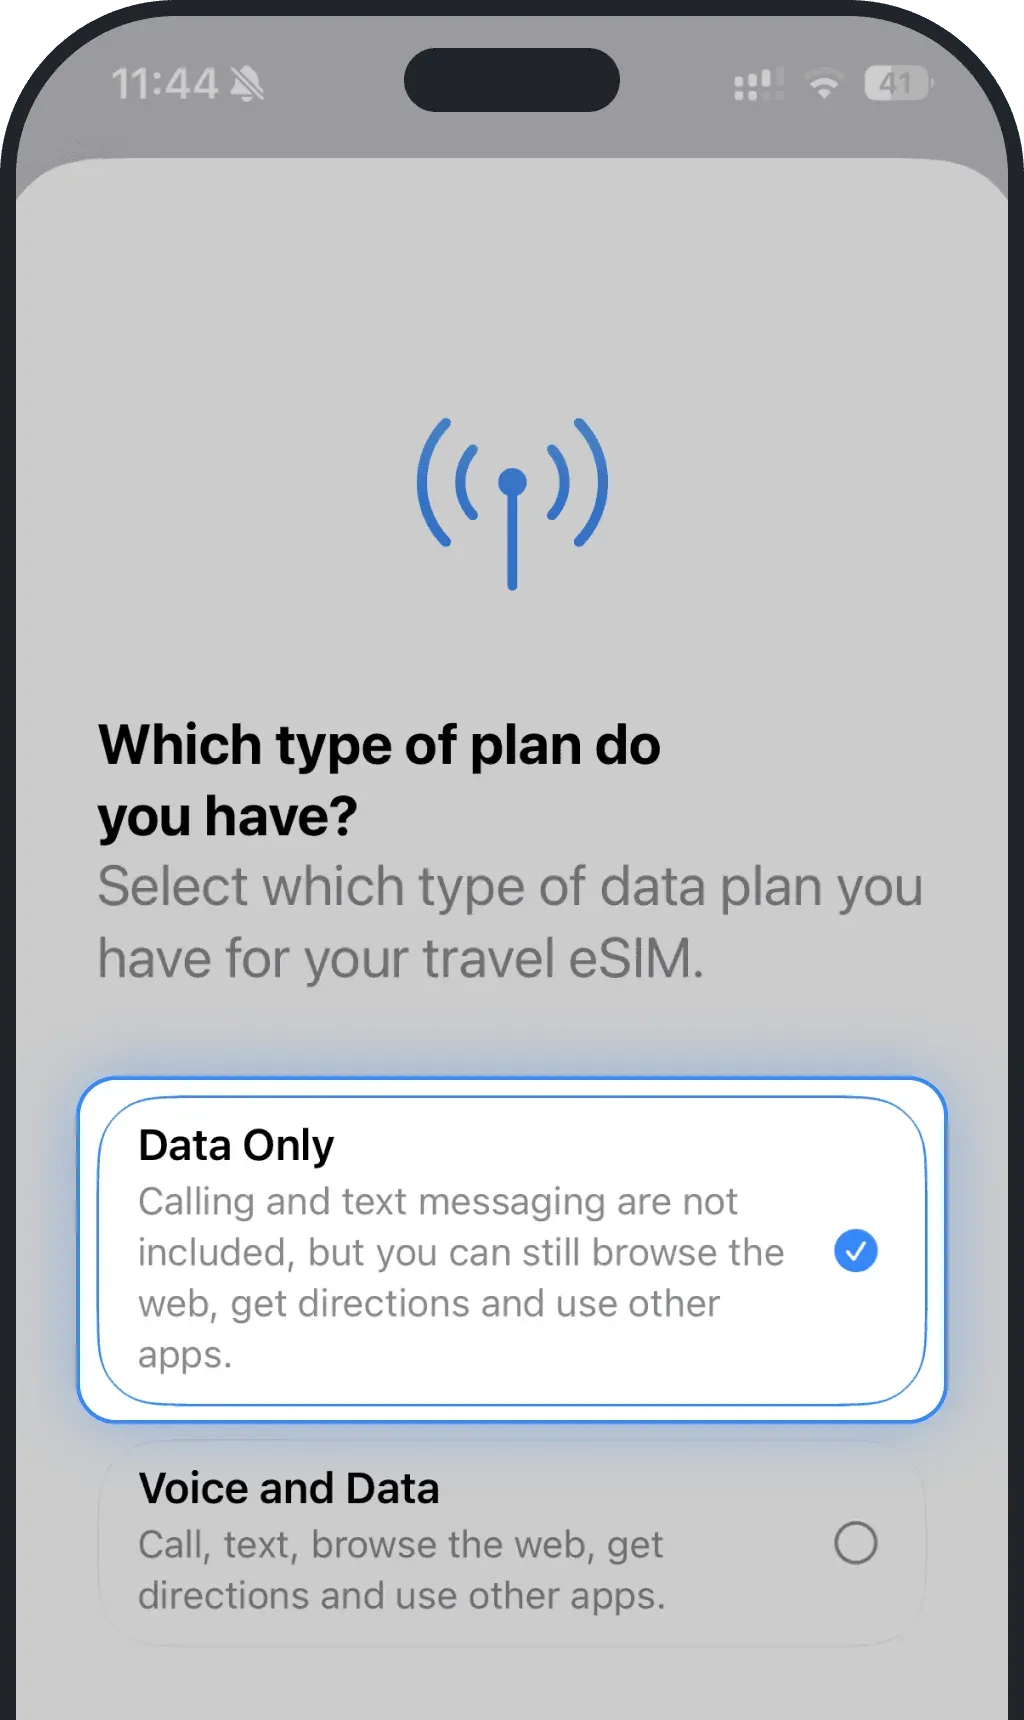
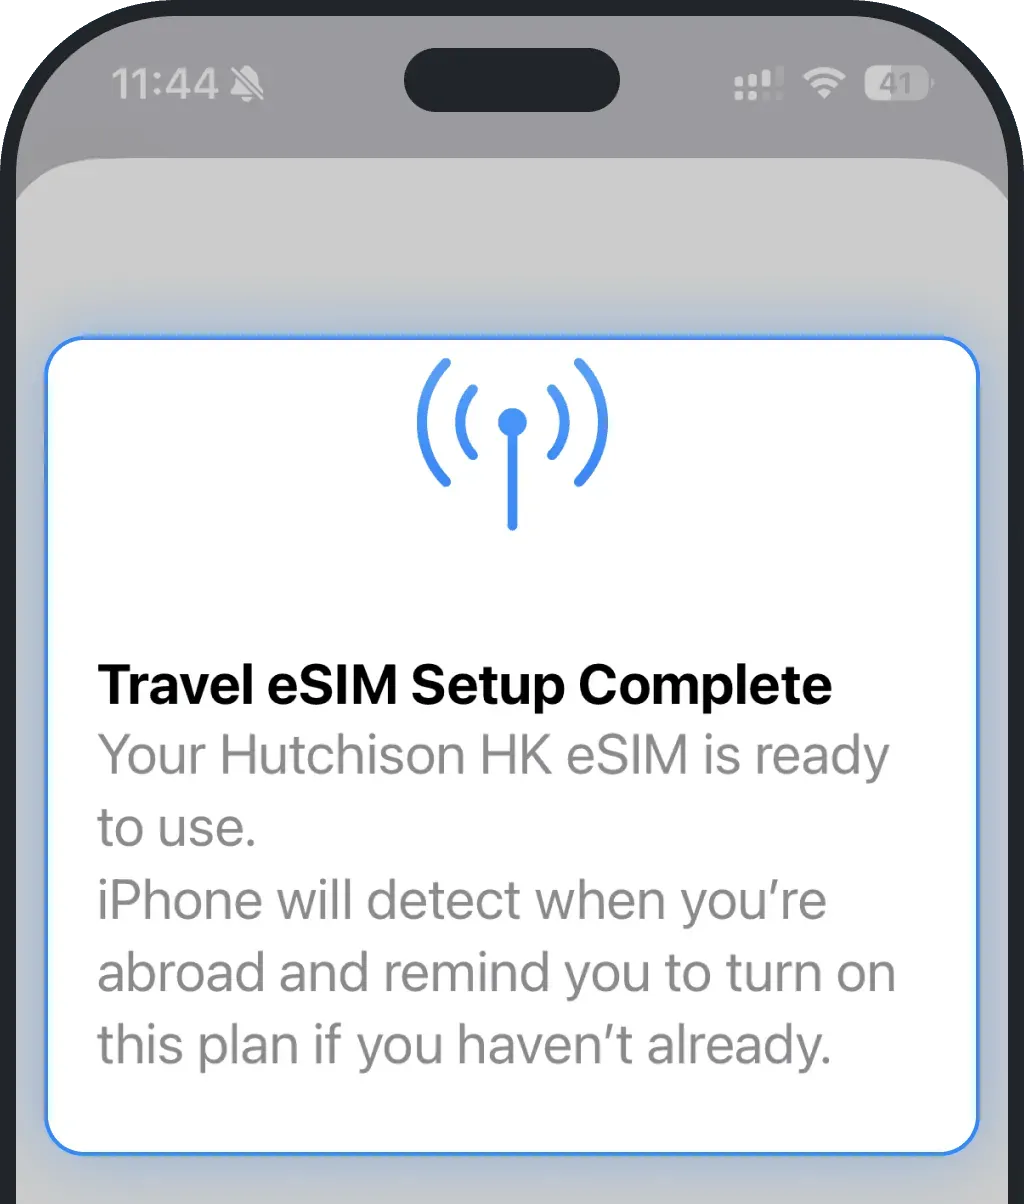
After installation, you may see a confirmation screen saying that your Travel eSIM is ready to use. This means your iPhone will automatically detect when you are abroad and remind you to turn on the travel eSIM if it’s not active yet.
5. Choose a name for your new eSIM
Select the just-installed eSIM
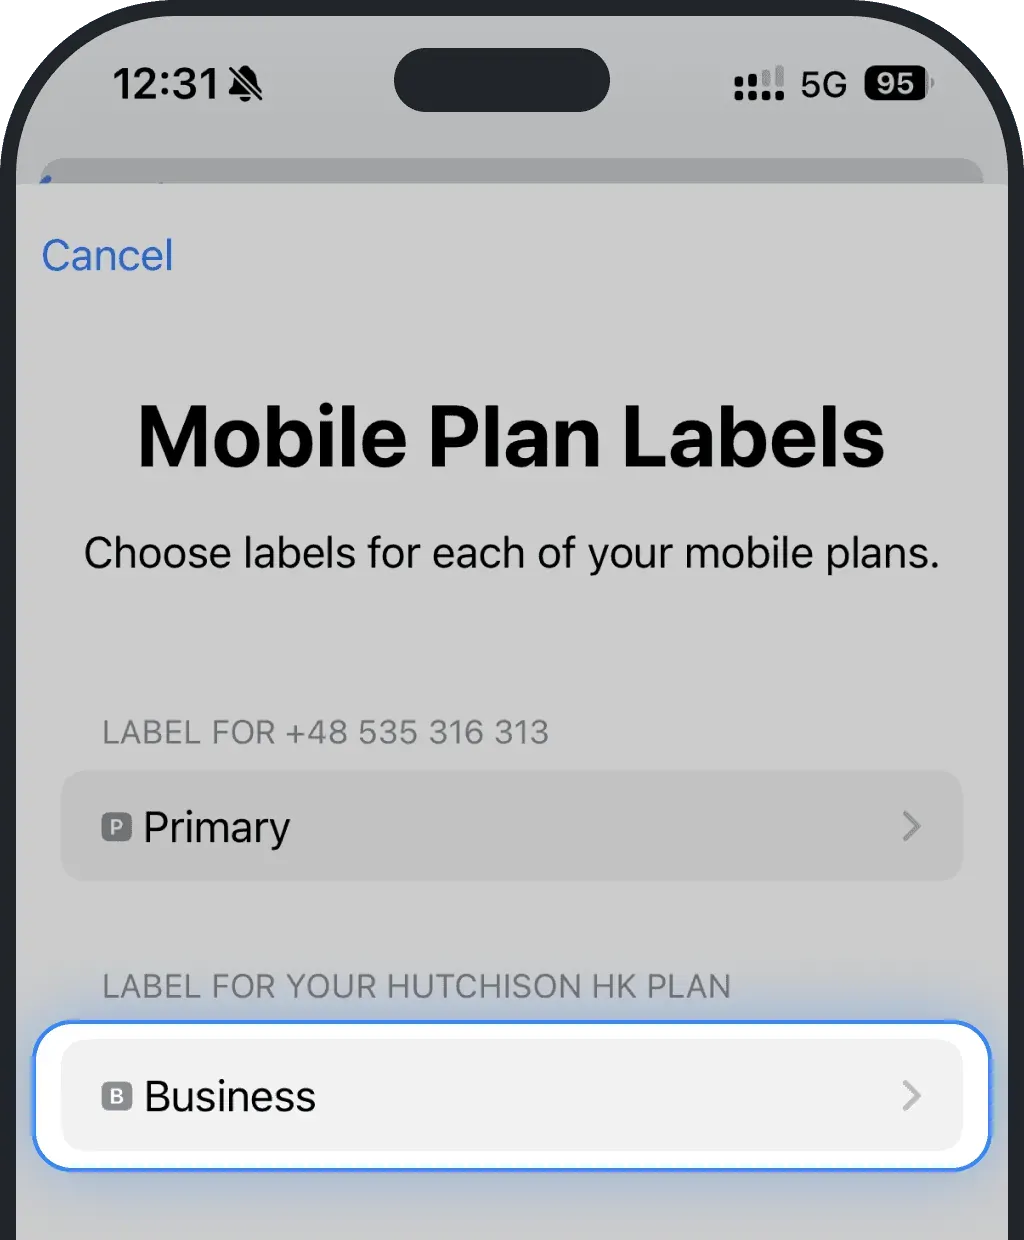
Rename it to a recognizable name (e.g. Ohayu eSIM)
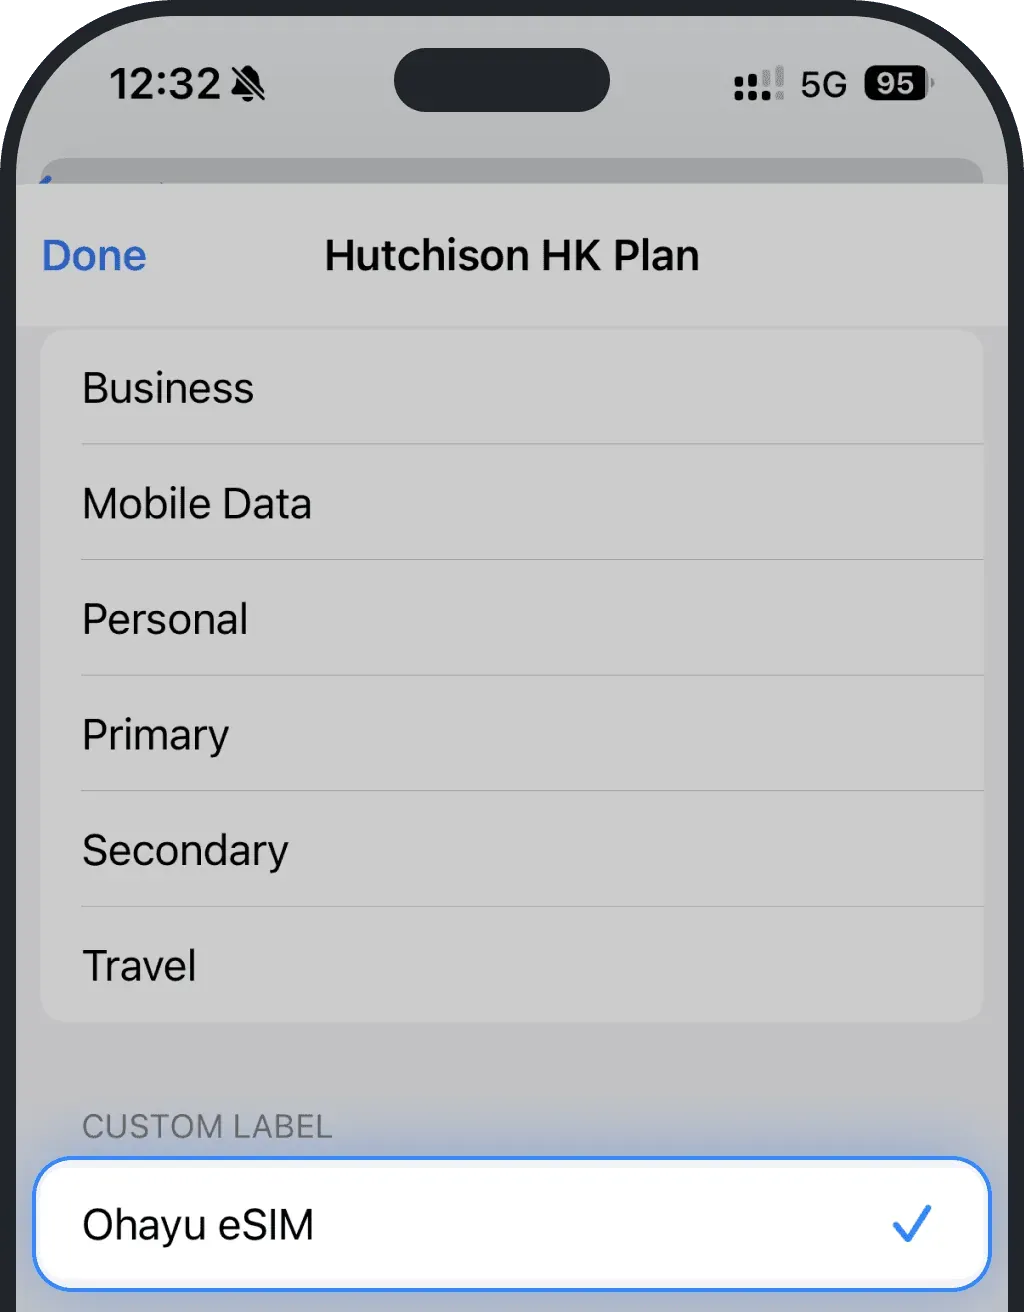
6. Complete installation
Choose your personal SIM for Default Line (calls, SMS)
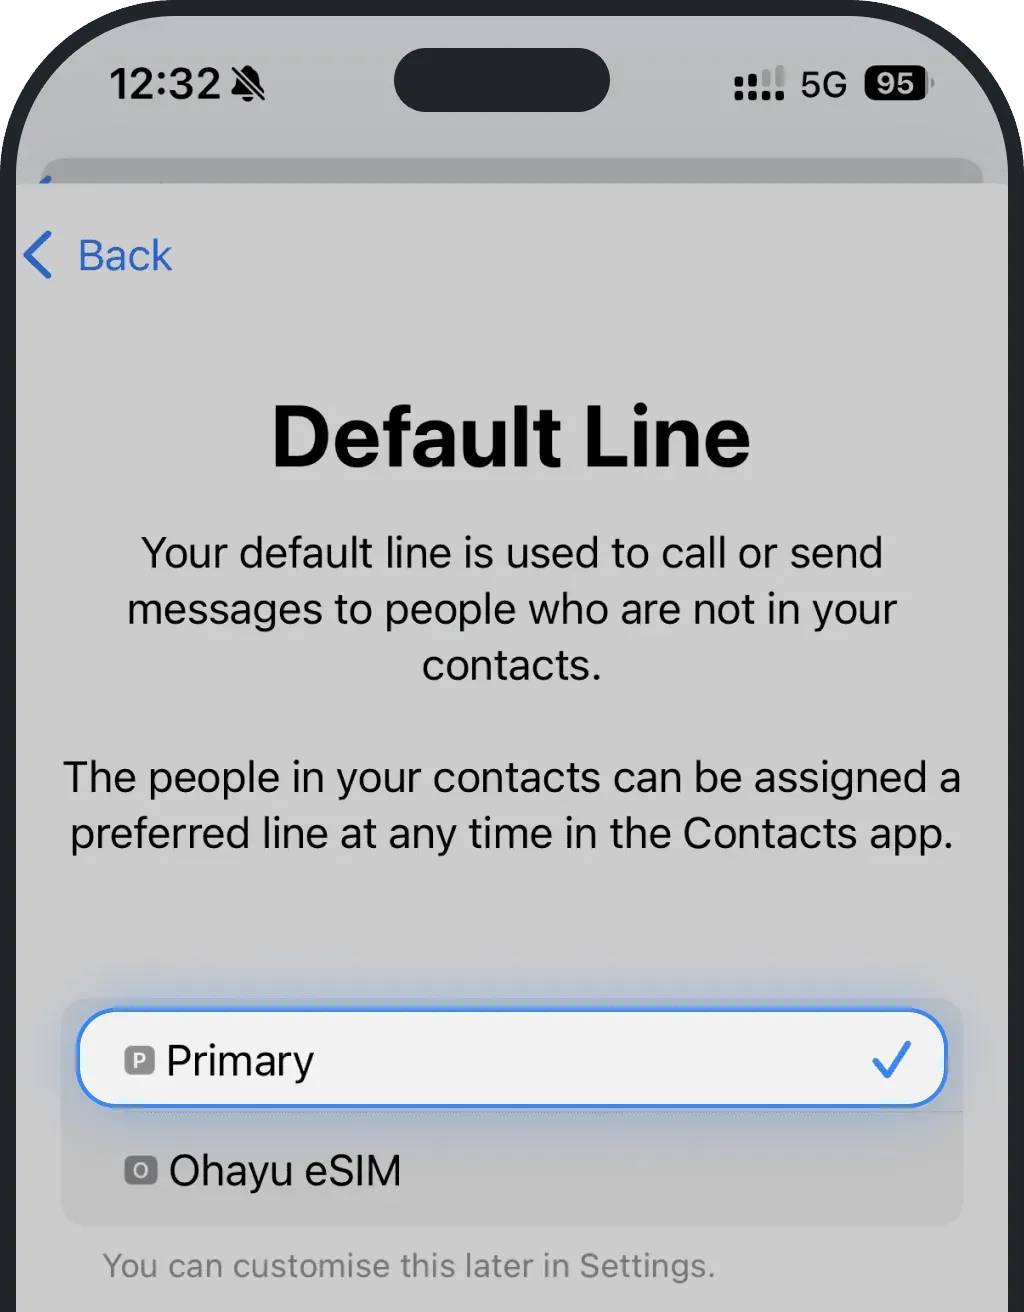
Choose your personal SIM for iMessage & Facetime to keep using your phone number. Your eSIM is for data only
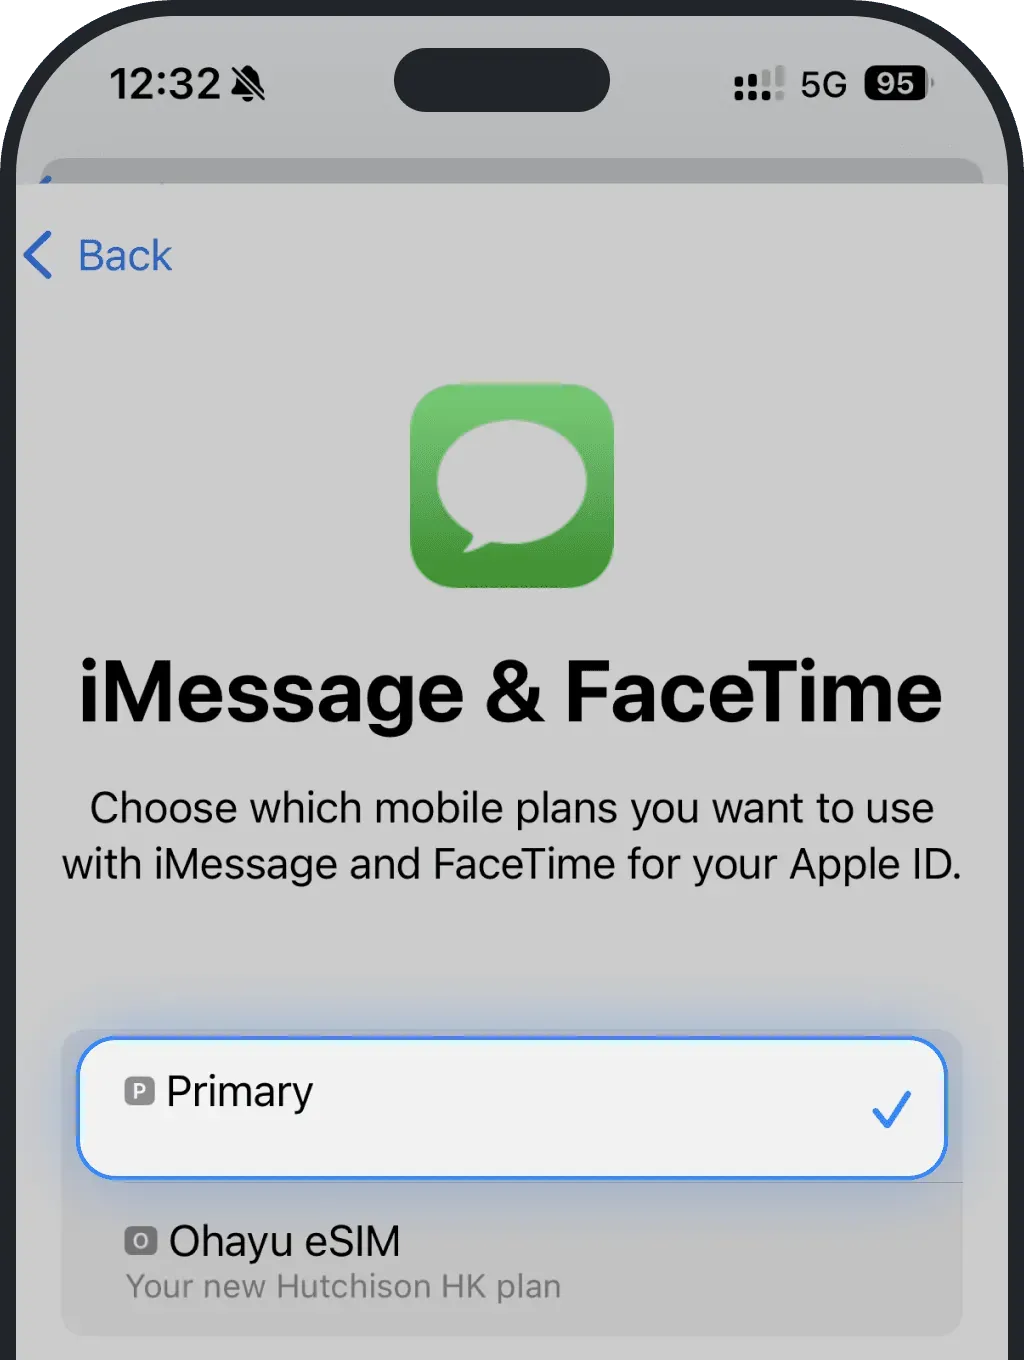
7. Complete installation
If you are ready to start using your eSIM, select it as the default line for "Mobile Data"
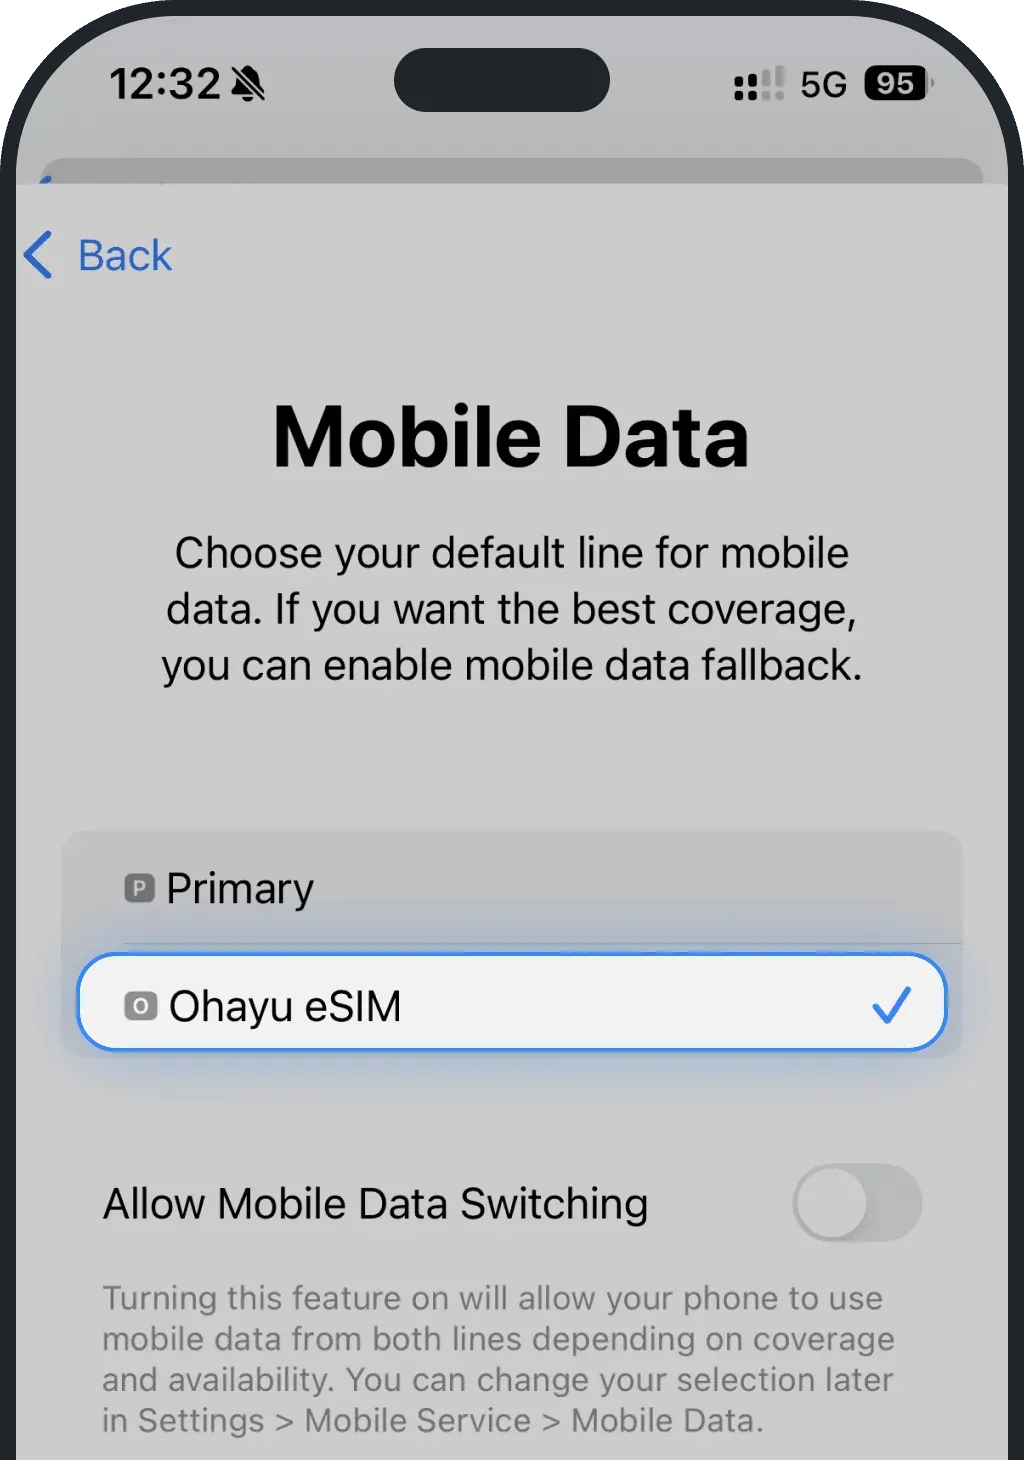
If not, select your primary SIM for now. You can always change it in Settings
8. Confirm successful installation
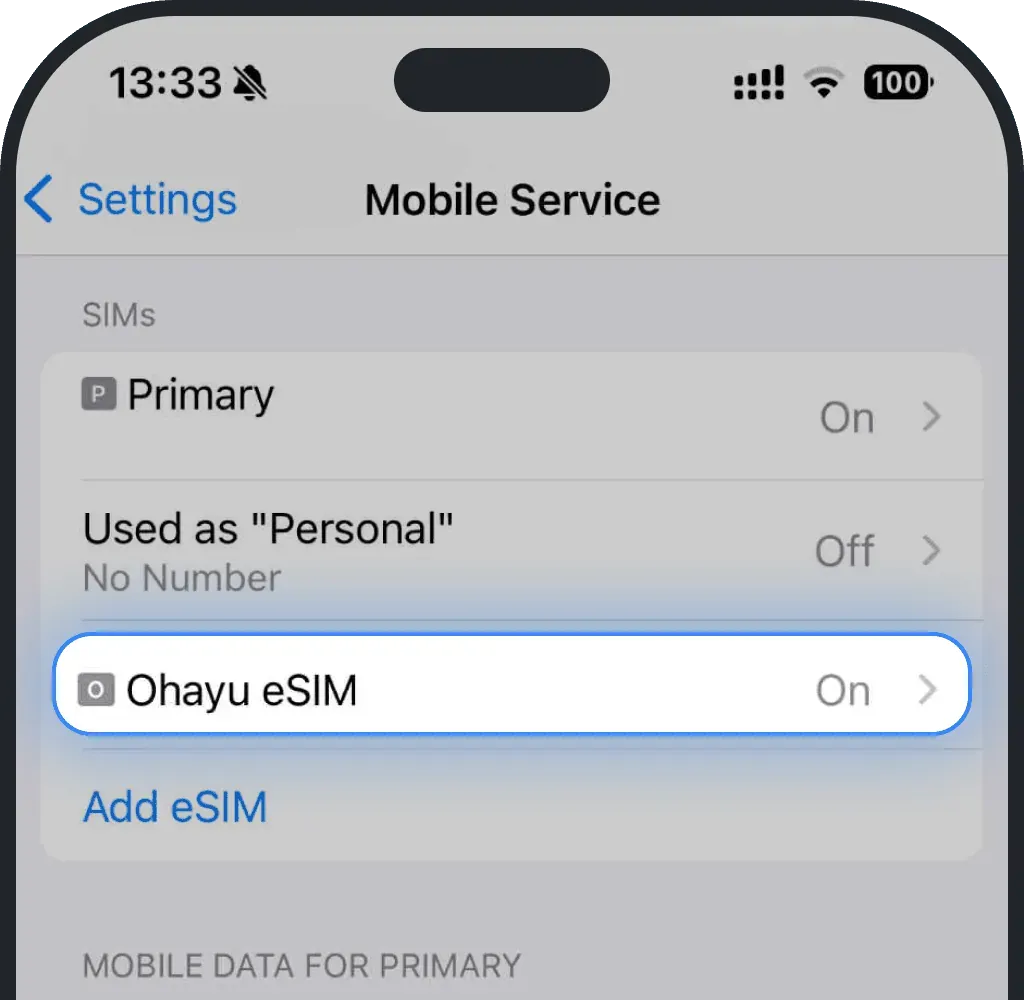
Once installed, you will see your eSIM in your list of "SIMs" in your "Mobile Service" Settings
Activation
NOTE: These steps are recommended, but on some devices or networks, they may already be applied automatically.
1. Start activation
We recommend doing this once you're at your destination as activation switches your primary data operator. This could interrupt your current internet if done too early
2. Enable data roaming
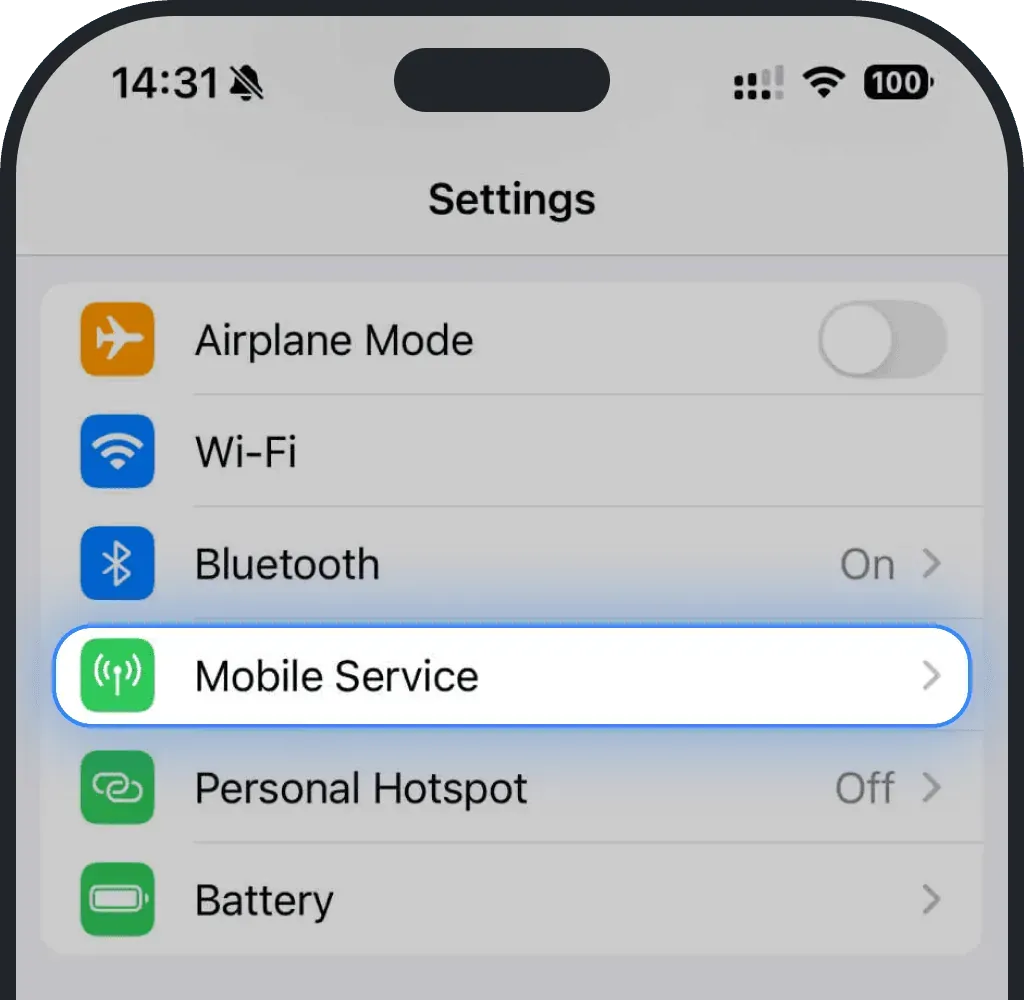
Tap Mobile Service
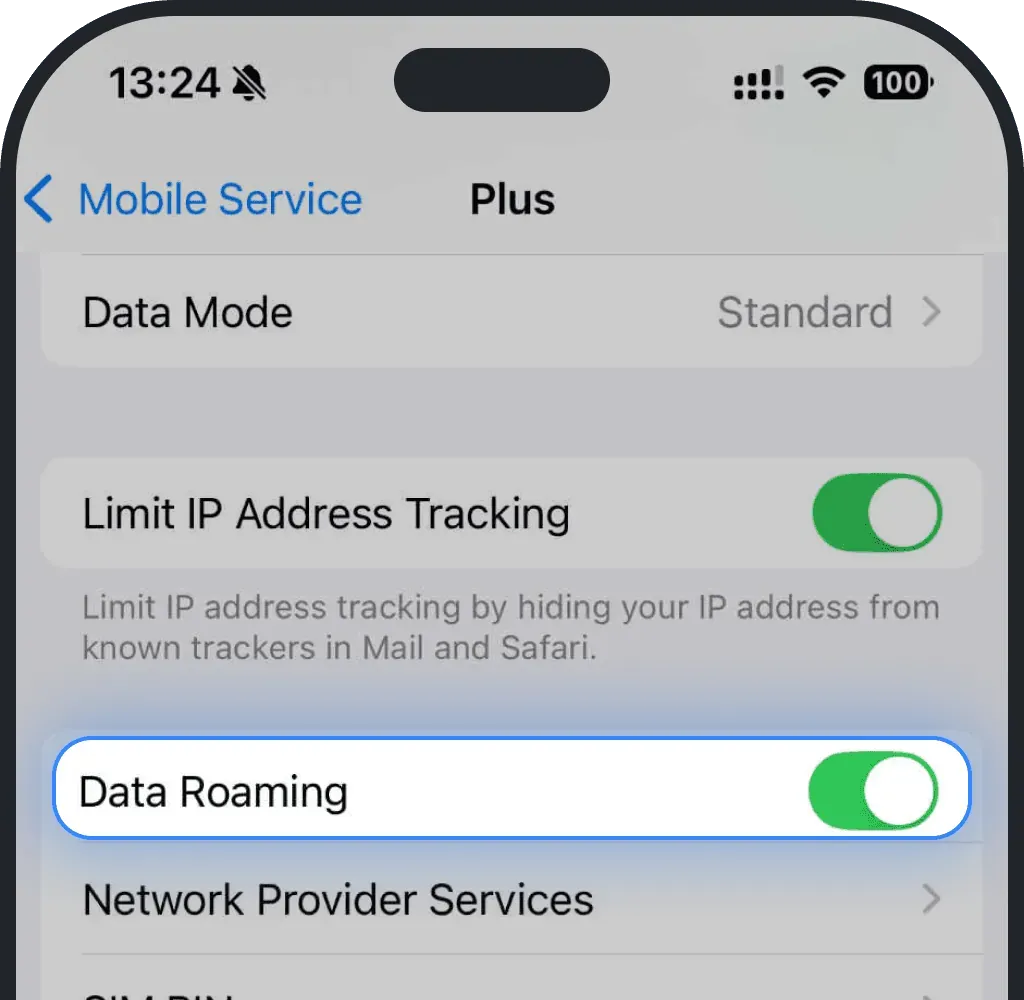
Tap on your newly added eSIM plan
And turn on "Data Roaming" with the help of the toggle
3. Make sure eSIM is the default line for "Mobile data"
Go back to "Mobile Service" and then go to "Mobile Data"
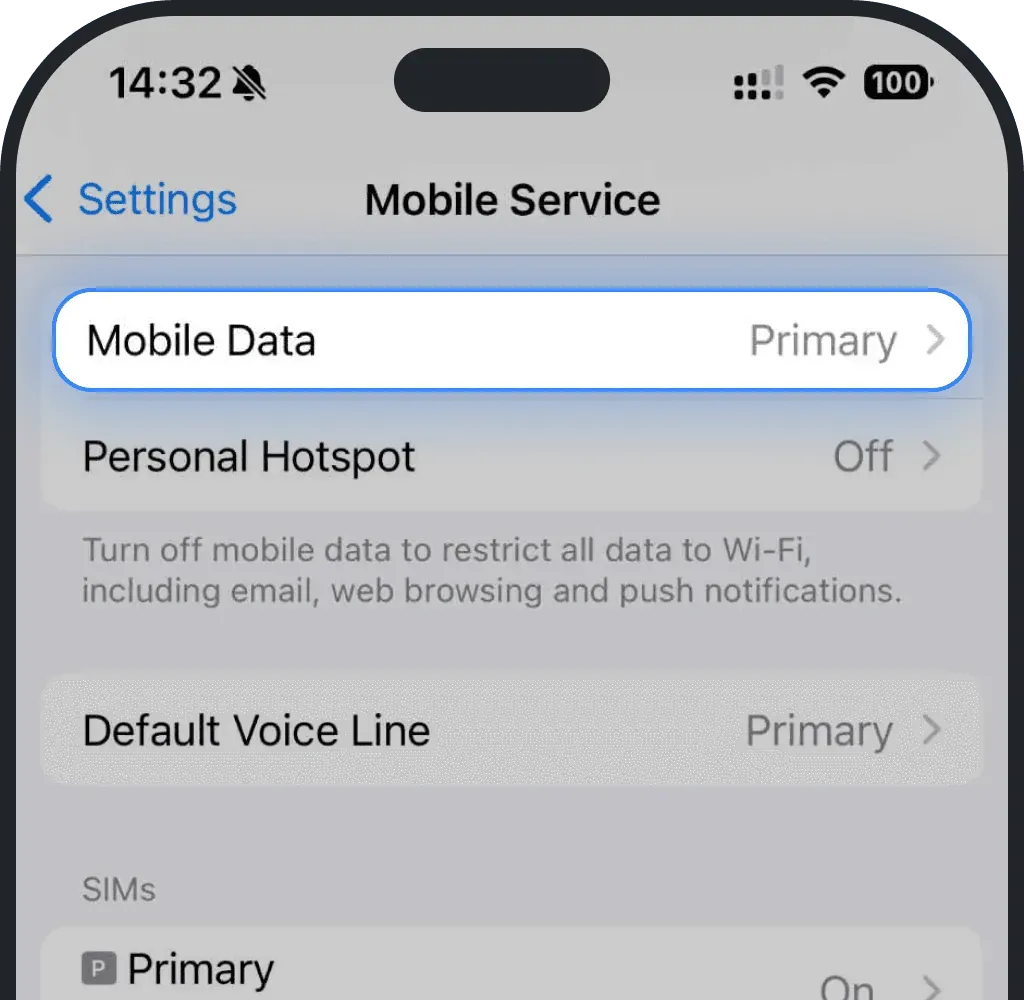
Click on your newly installed eSIM plan to use it as a source of internet data
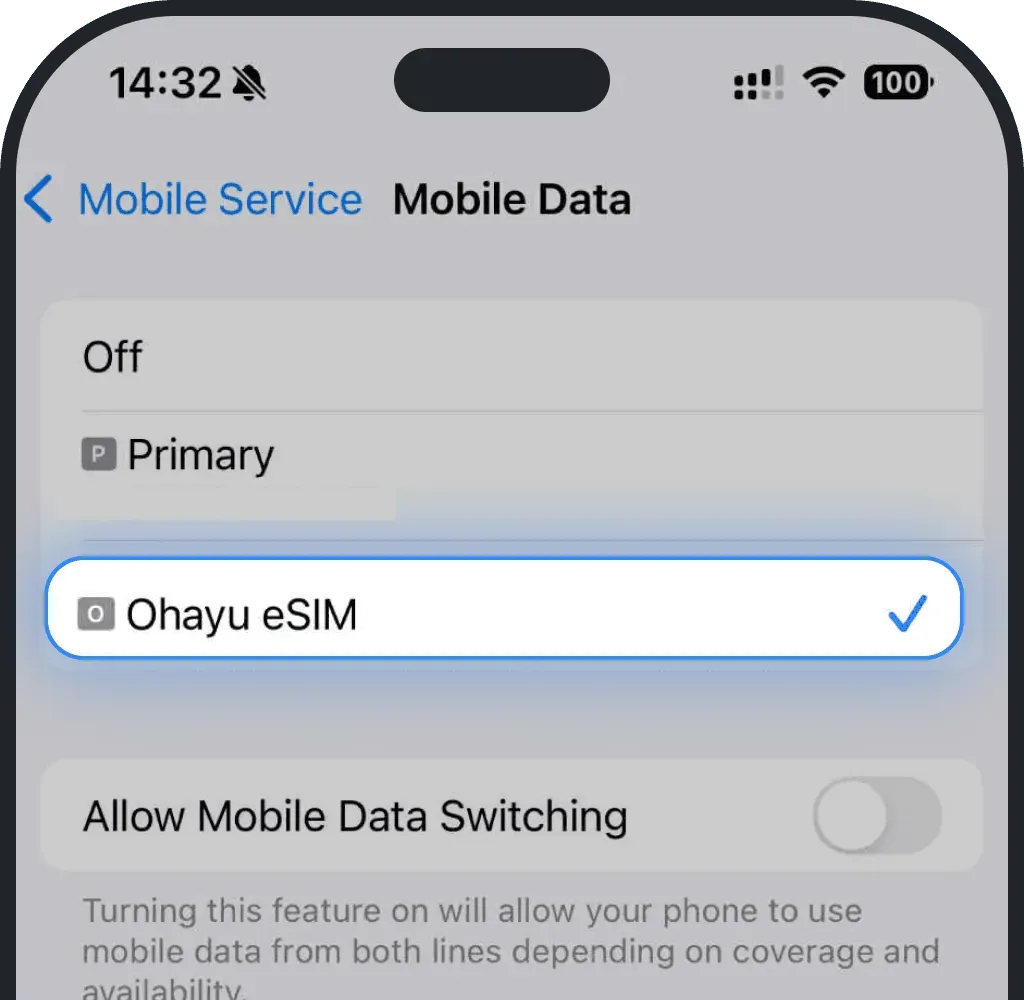
Keep "Allow mobile data switching" toggle off
*If you have iOS 26:
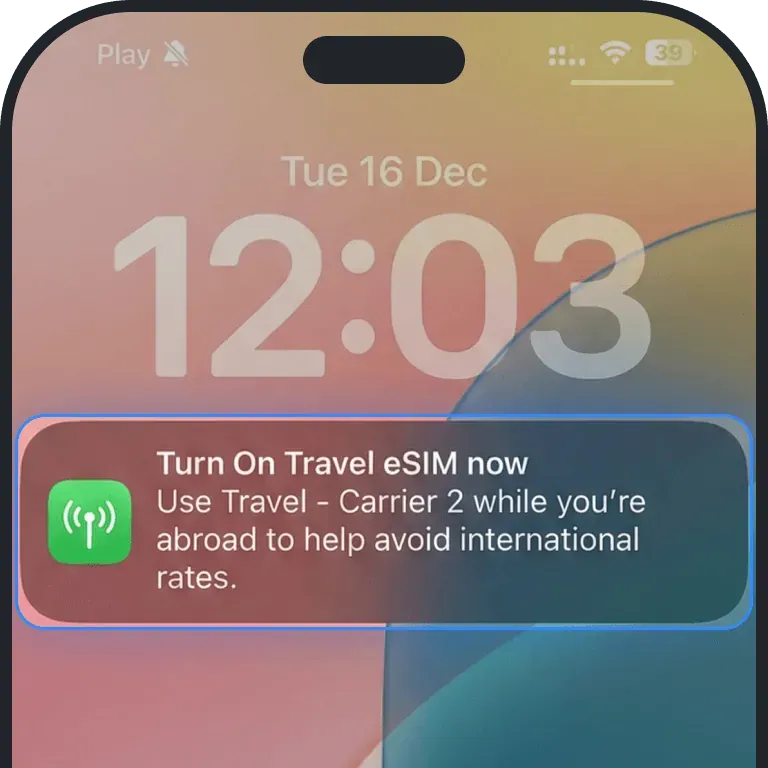
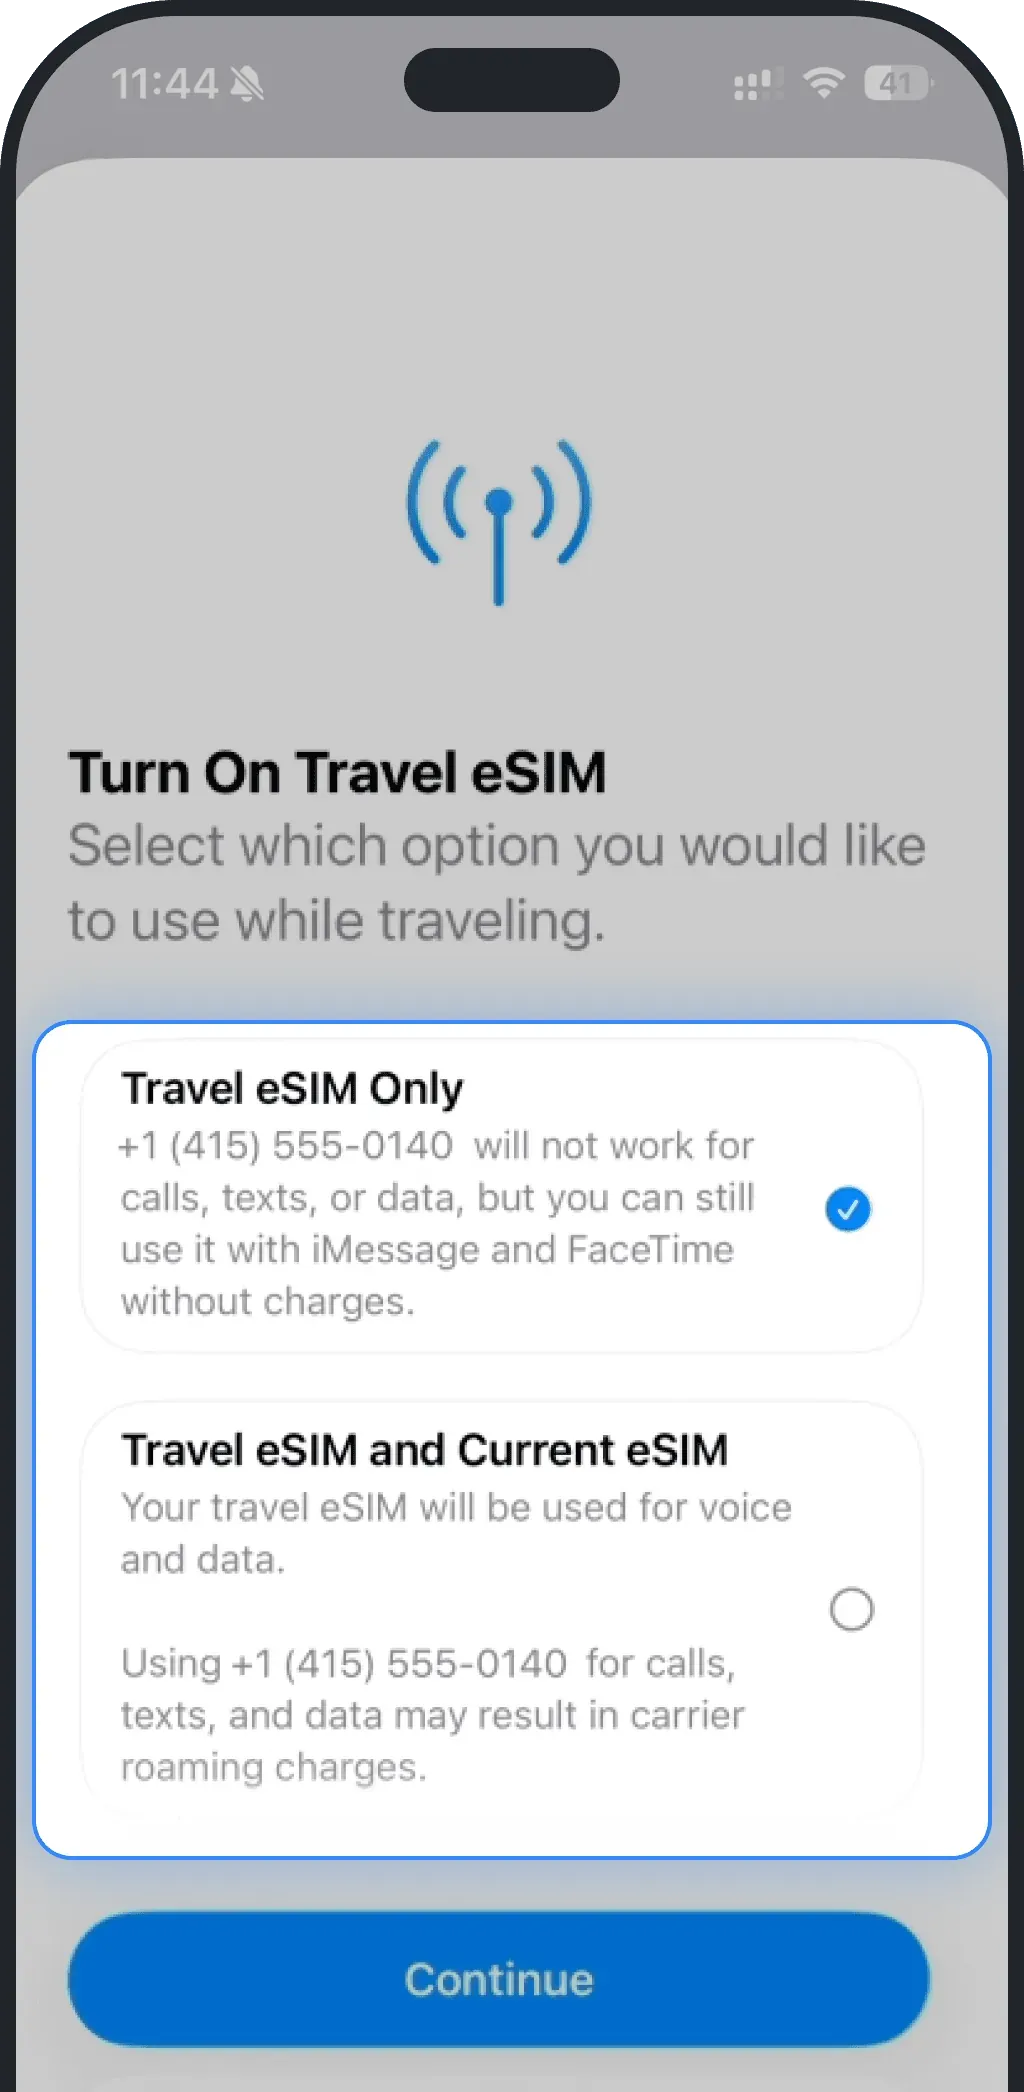
When you arrive at your destination and you already have a travel eSIM, you might receive a notification to Turn On Travel eSIM. You will be asked to choose how you want to use your eSIM.
- Travel eSIM only (recommended choice for most users) — select this if:
- you want to avoid roaming charges,
- you only need mobile internet while traveling,
- you’re fine with calls and SMS being turned off on your home number.
- iMessage and FaceTime will still work on your home number over mobile data or Wi-Fi
- Travel eSIM and Current SIM — select this if:
- you want to keep using your home number for calls and SMS,
- you’re okay with possible additional charges from your home carrier
Select and tap Continue:
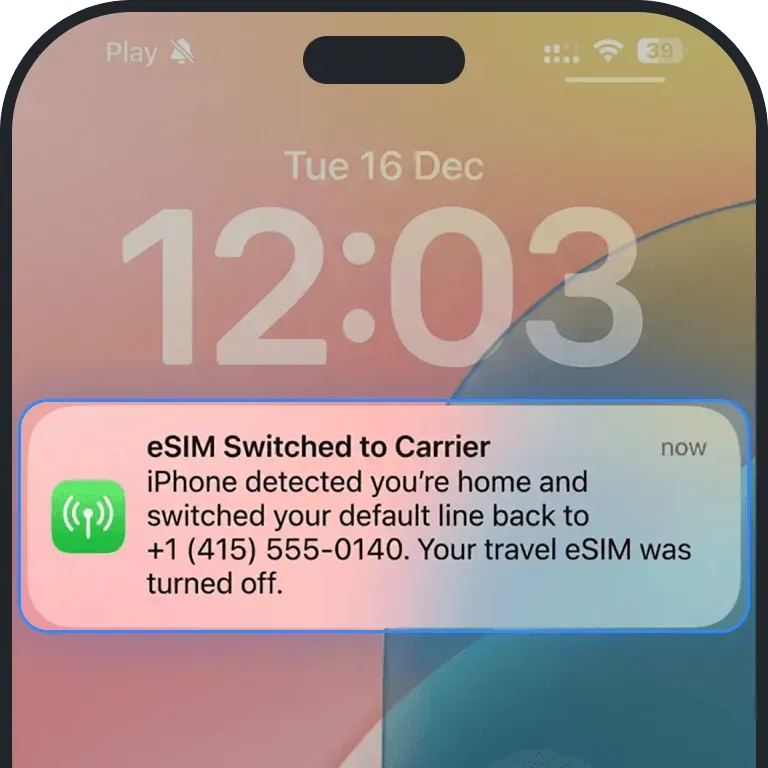
When your trip ends and you return home, iOS 26 will automatically turn off your Travel eSIM and turn your Home line back on.
Was this article helpful?
Your feedback helps us improve our FAQ