eSIM is installed, but is not working
- 1. Check if the eSIM was properly installed or activated
- 2. You are not in your destination country
- 3. Check if the eSIM is enabled and chosen as the preferred plan
- 4. Check if Data Roaming is enabled
- 5. You are in a weak or no-coverage area
- 6. Check APN settings (Access Point Name)
- 7. Enable and disable Airplane Mode
- 8. Select Network Operator manually
- 9. Your VPN might be the reason why your eSIM is not working
- 10. Disconnect from Wi-Fi
- 11. Restart your device
- 12. Uninstall and install eSIM again in the target country
If your eSIM is installed but not working, don’t worry — it usually means there’s a small setting or network issue preventing the connection.
Most problems can be fixed in a few minutes by following the steps below.
Common reasons include being outside your destination country, having data roaming or mobile data turned off, or temporary network conflicts.
Most issues are easy to fix — you’ll find a simple, step-by-step checklist below to help you get your eSIM working again. The steps look slightly different for iOS (iPhone 16) and Android (Samsung Galaxy S20), so just follow the section that matches your phone.
1. Check if the eSIM was properly installed or activated
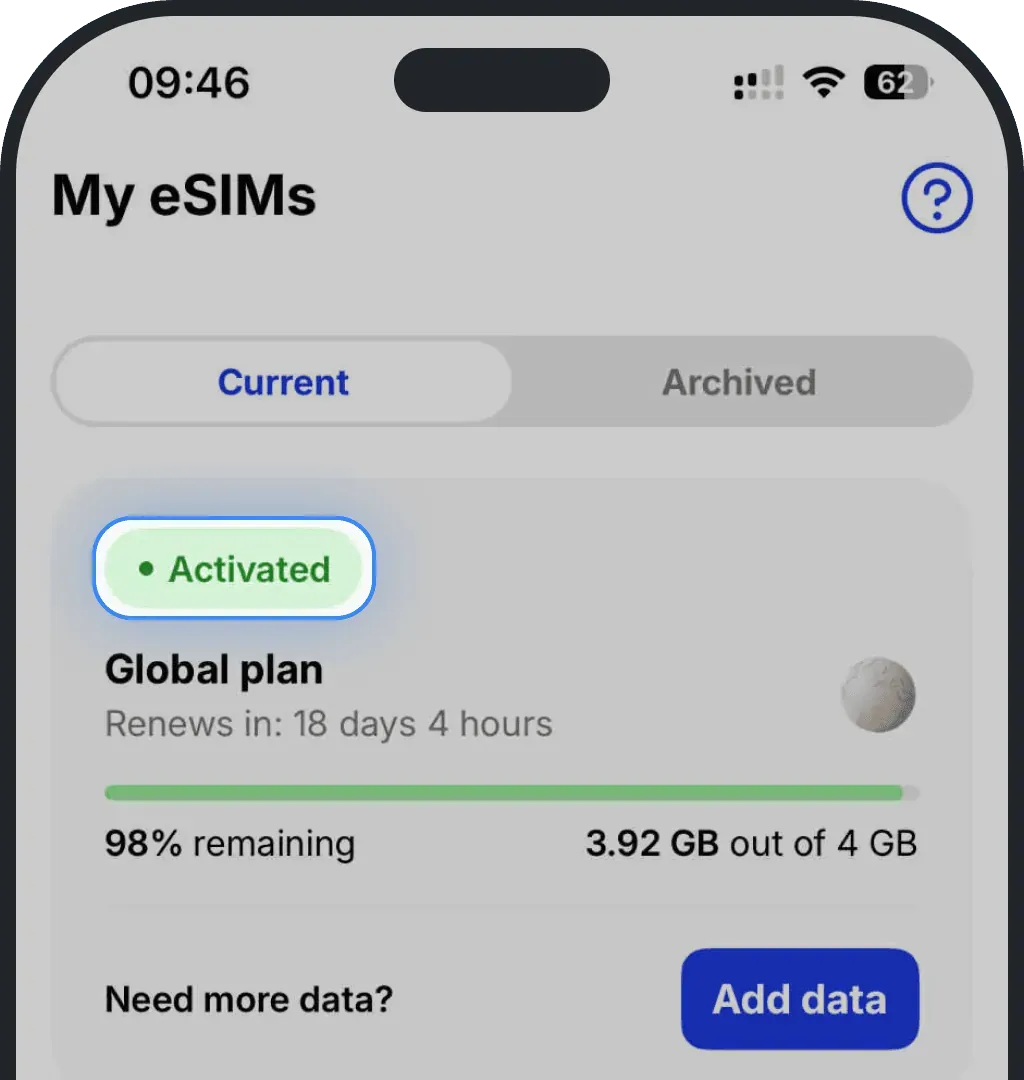
If your eSIM isn’t working, it might not be installed or activated correctly. Open the Ohayu app and go to the My eSIMs section. If the status shows “Installed”, your eSIM is on the device but still needs to be activated. If it shows “Activated”, your eSIM was properly activated and should be working.
2. You are not in your destination country
If you haven’t reached your destination yet, it’s normal for the eSIM to be inactive. It only switches on once your phone connects to a local network in the country you’re traveling to. Arrive, wait a moment for a signal, and try again.
Until then, you may see “activating”, “activation failure” or no internet at all — that’s fine. You already installed the eSIM but it's just waiting for the right network. It won’t activate at your home airport, during a layover, or while you’re still in transit.
3. Check if the eSIM is enabled and chosen as the preferred plan
If your eSIM is installed but still not connecting, check if it’s turned on and set as the main data line. Make sure your Ohayu eSIM is active and selected as the default for mobile data.
iOS (iPhone)
Go to Settings
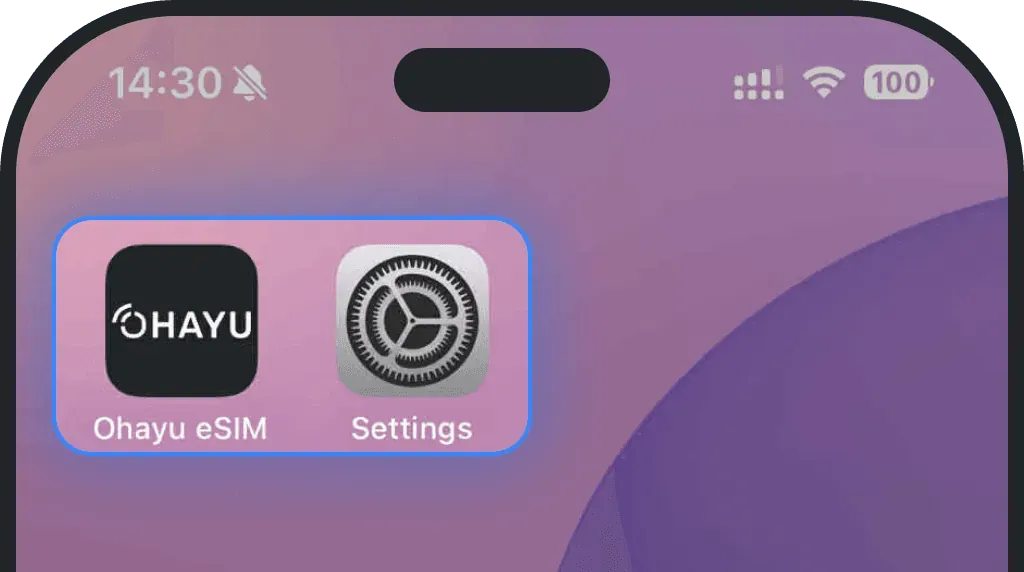
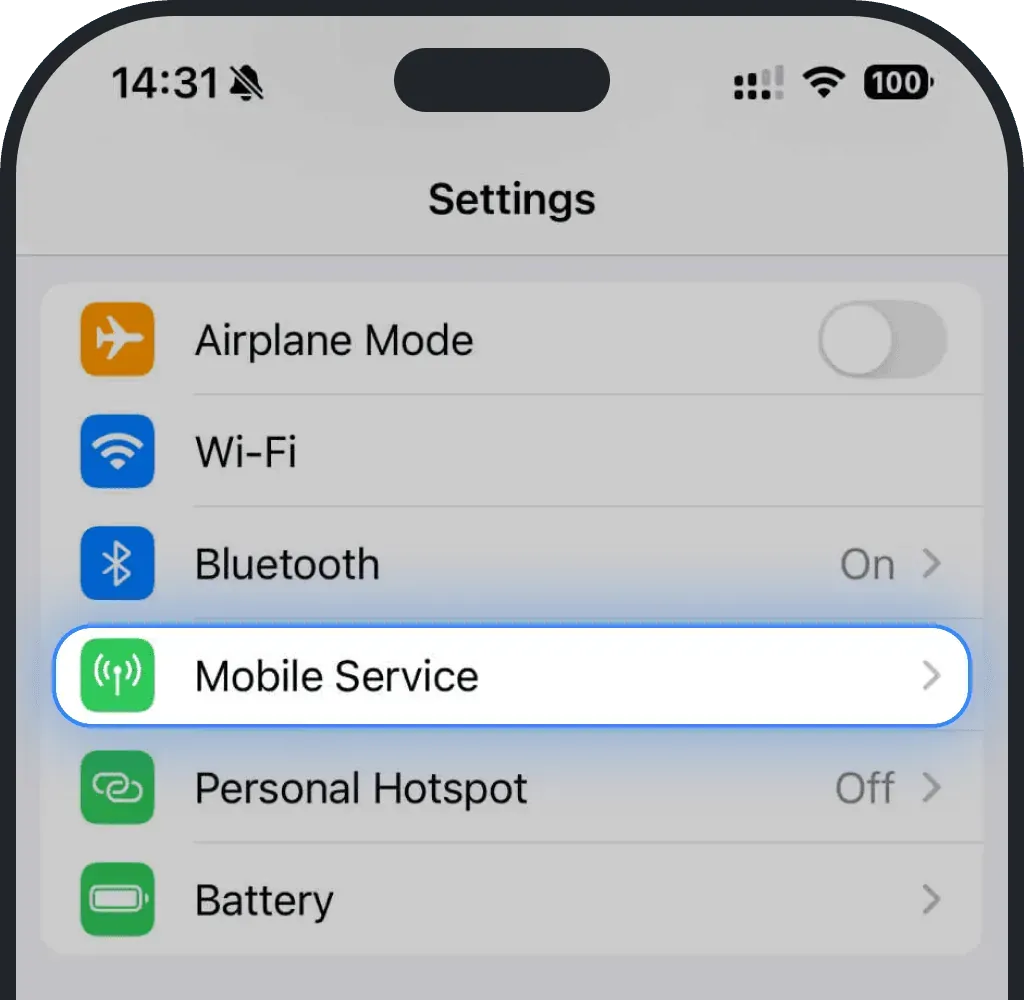
Tap Mobile Service or Cellular
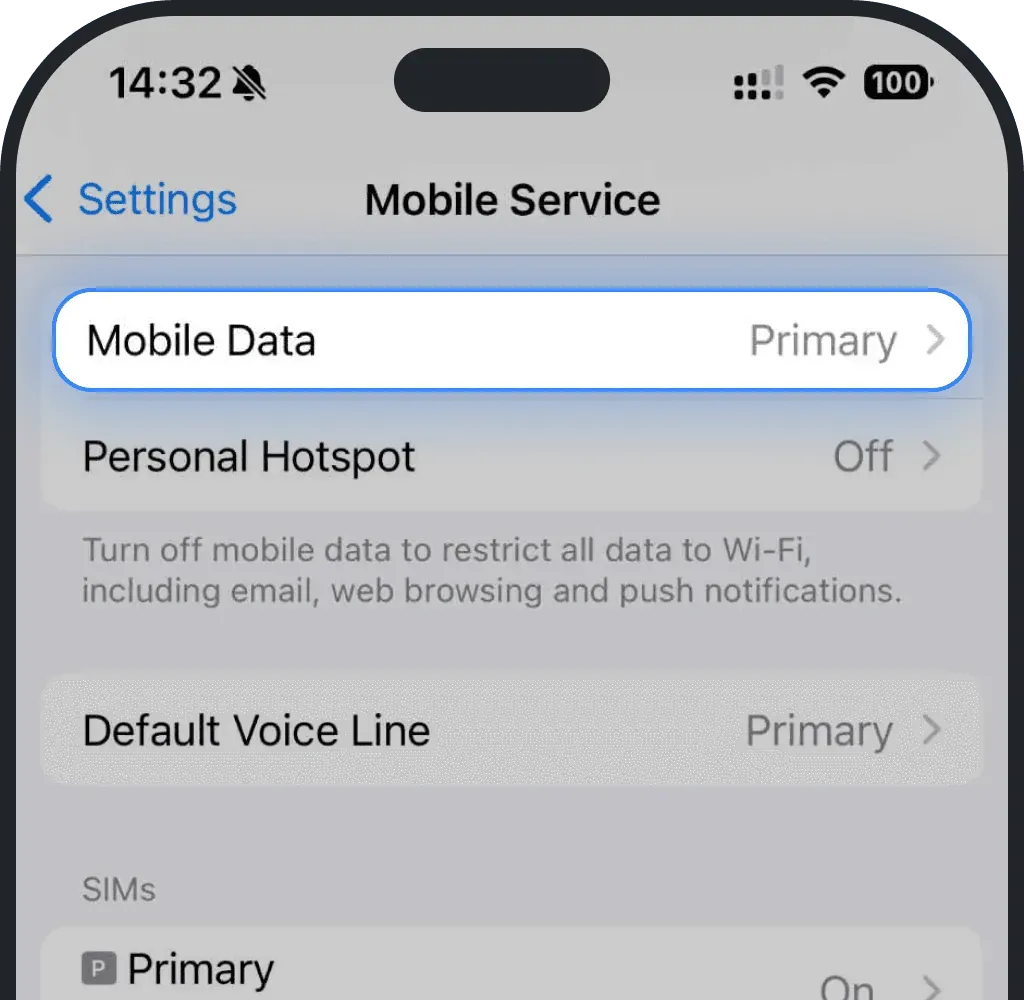
Tap Mobile Data or Cellular
Select your eSIM (shown as Ohayu, Secondary, or another name you set up during the installation process)
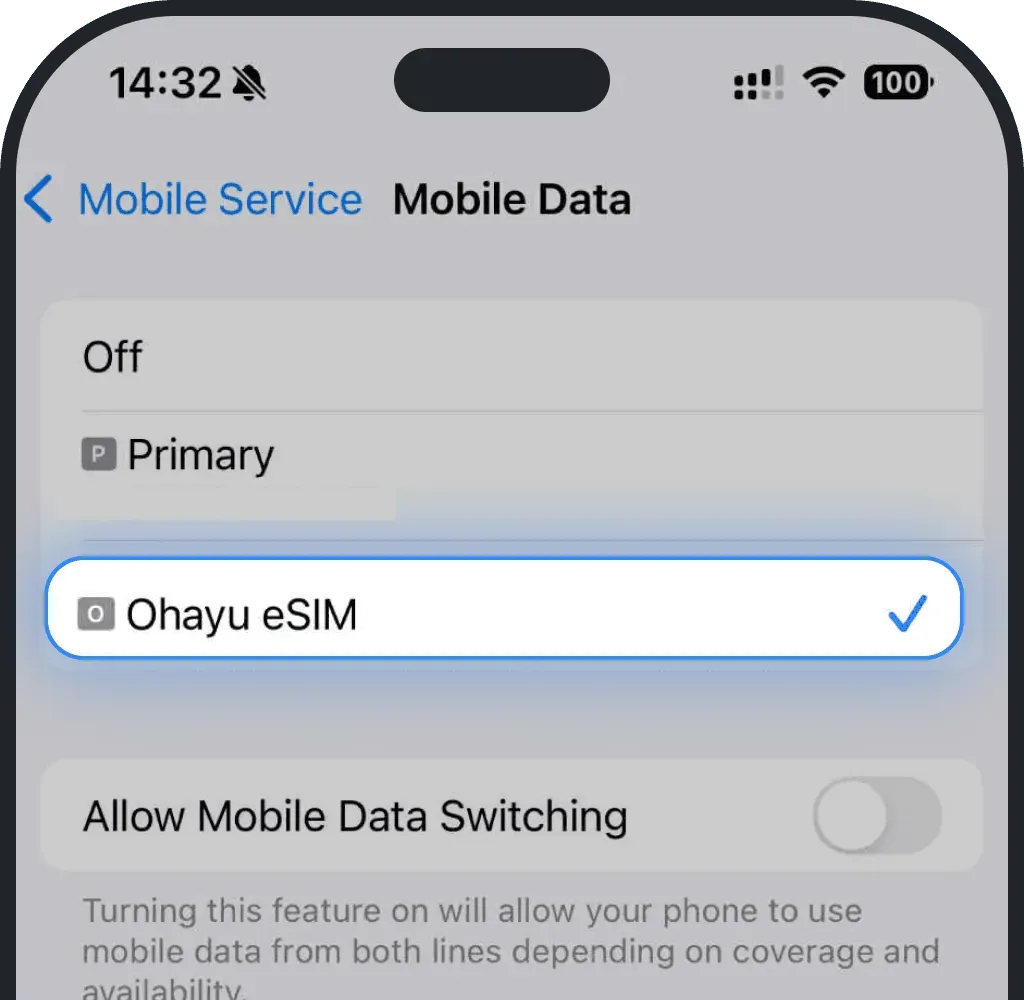
Also make sure Allow Data Switching is turned off so your iPhone doesn’t fall back to another SIM.
Android
Go to Settings
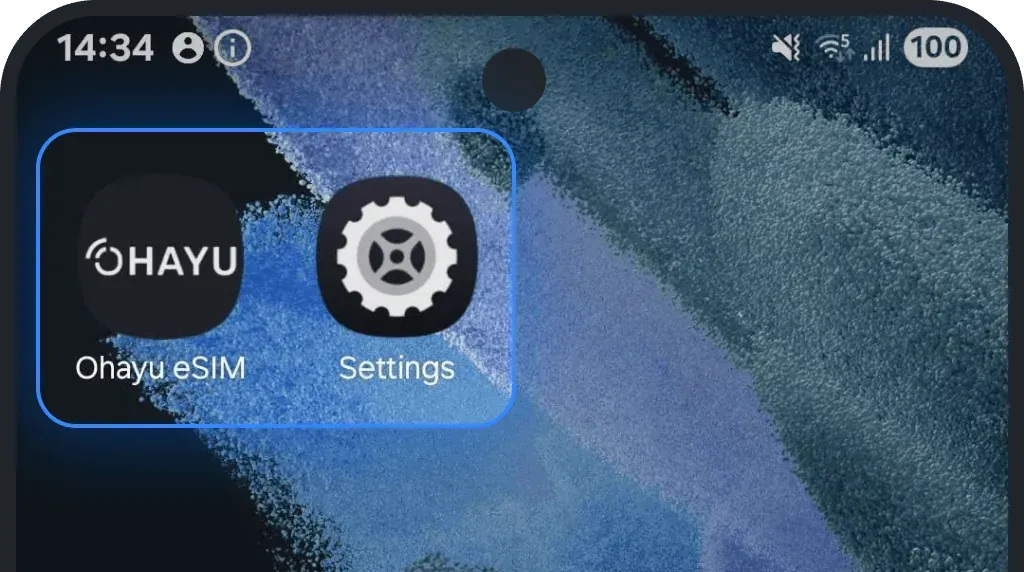
Tap Connections
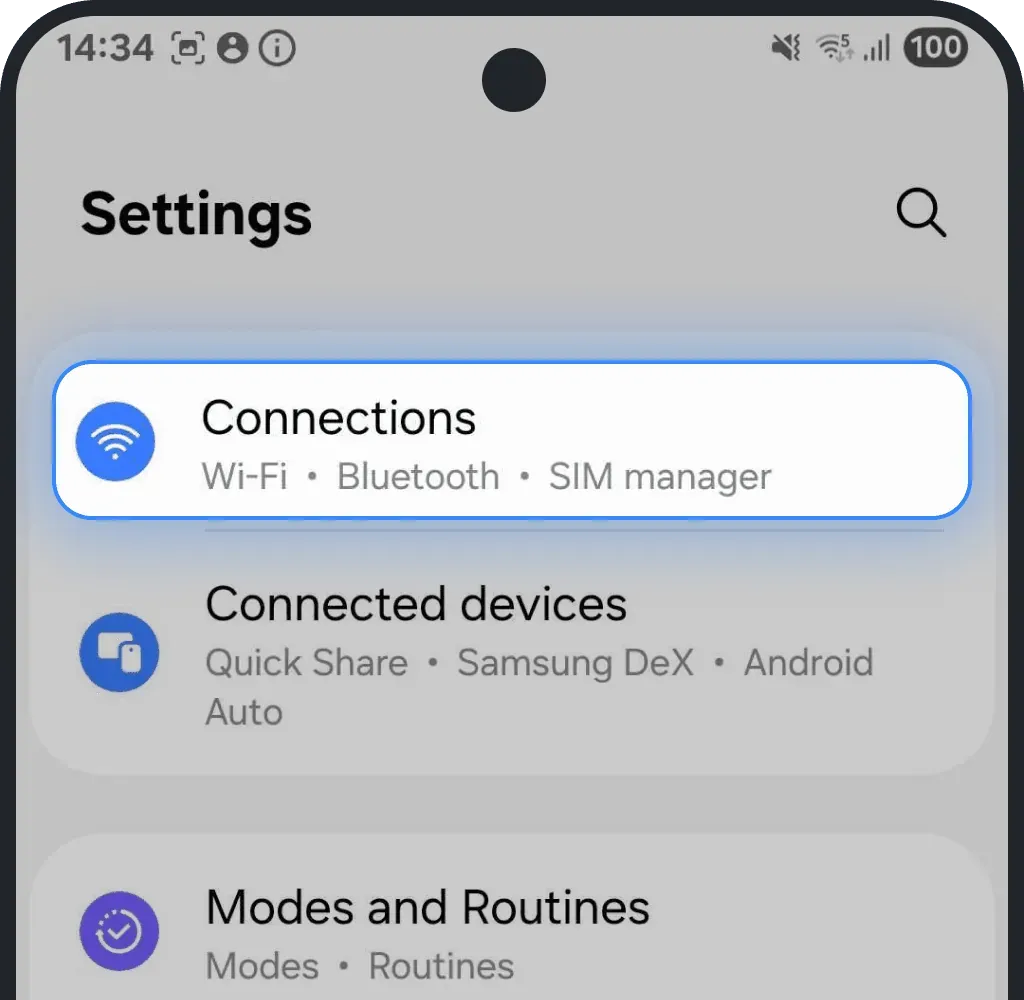
Tap SIM manager
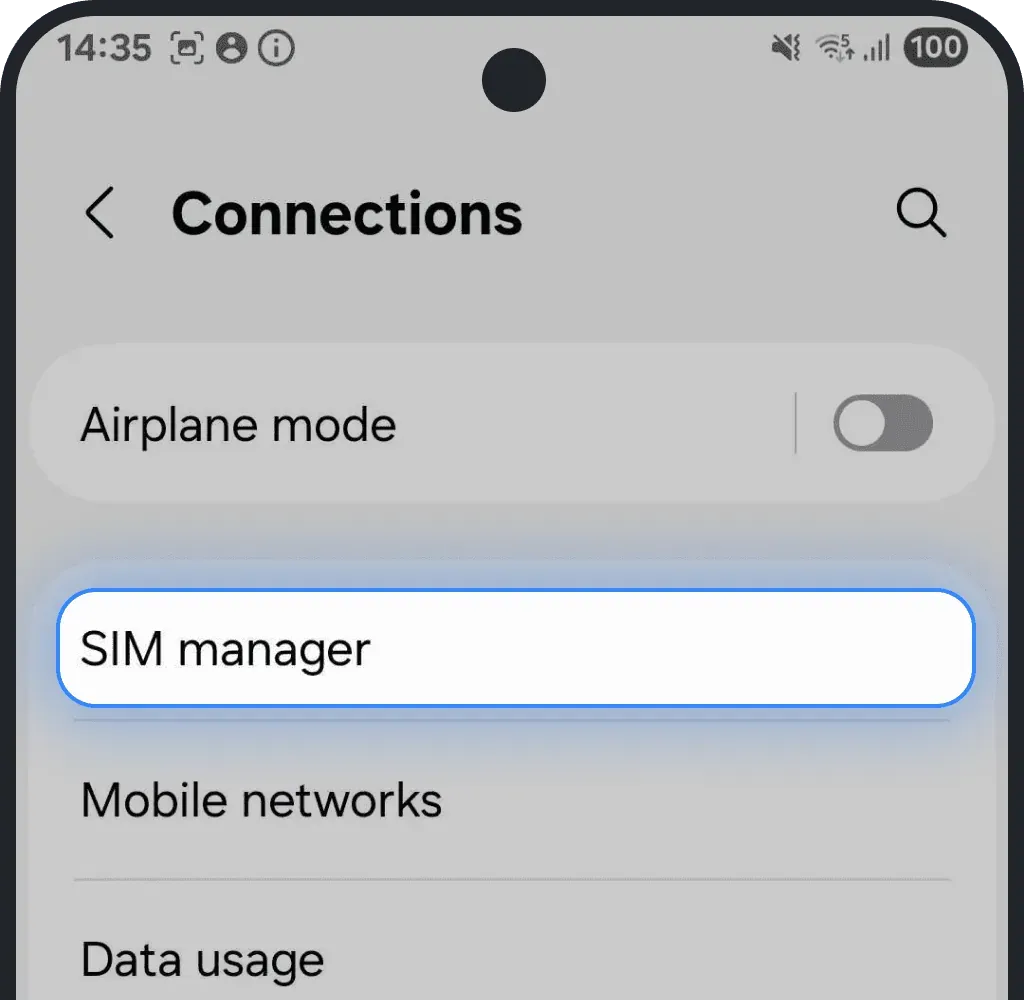
Tap on Mobile Data
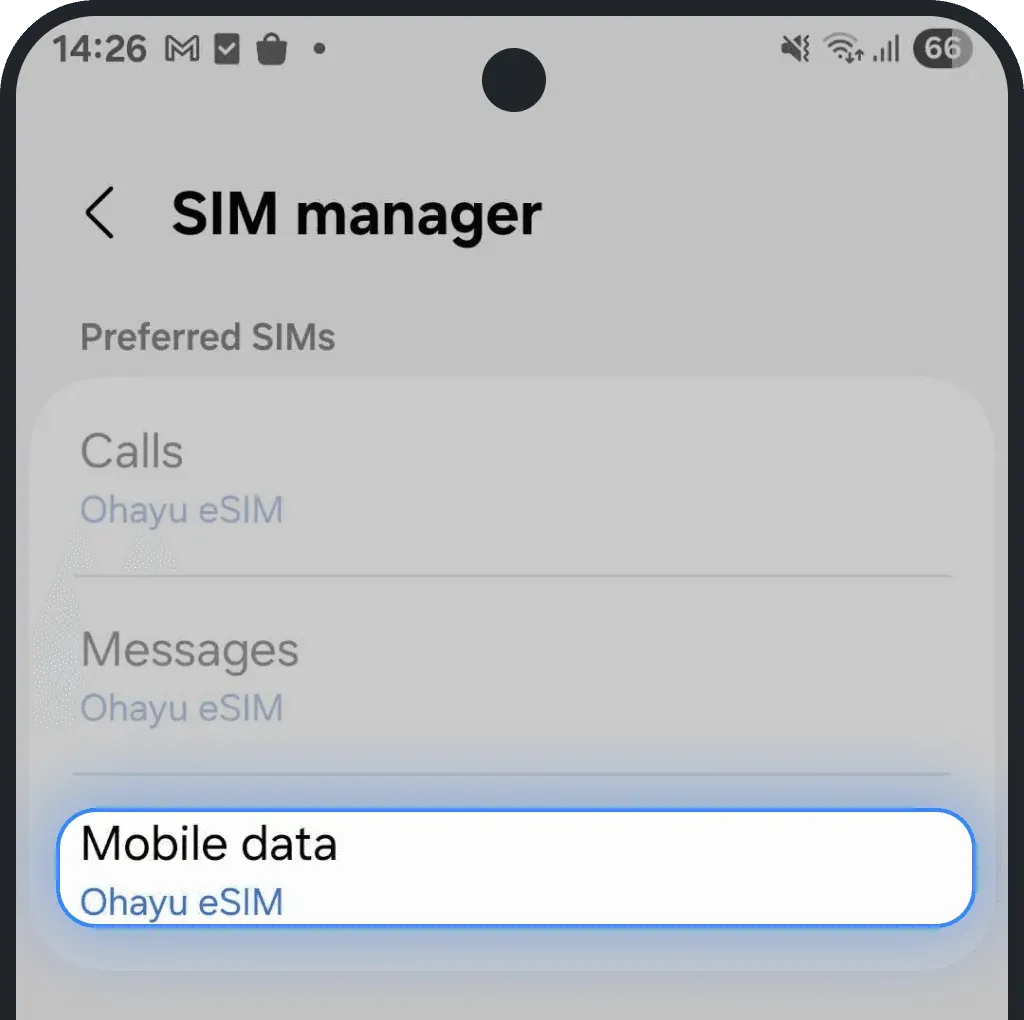
Select your eSIM (shown as Ohayu, Secondary, or another name you set up during the installation process)
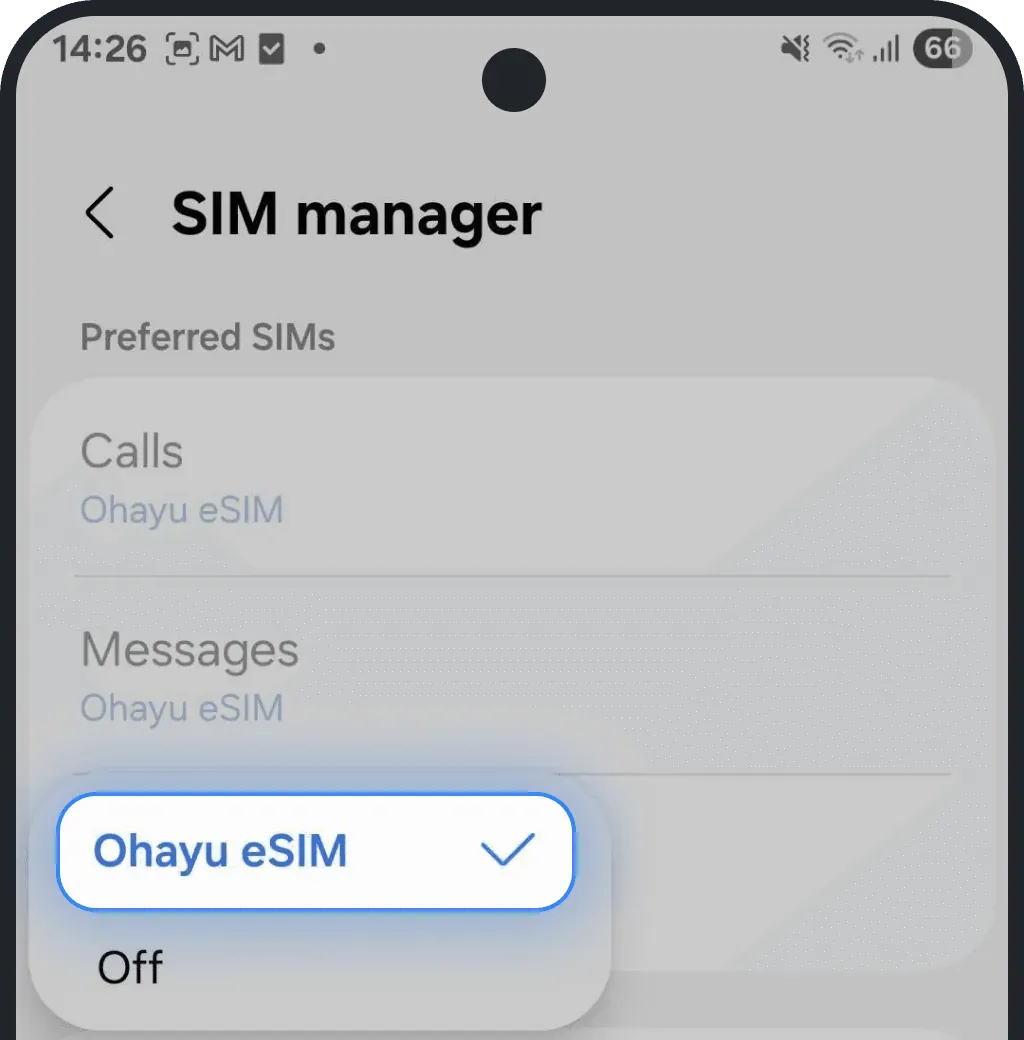
Also make sure Allow Data Switching is turned off so your device doesn’t fall back to another SIM.
4. Check if Data Roaming is enabled
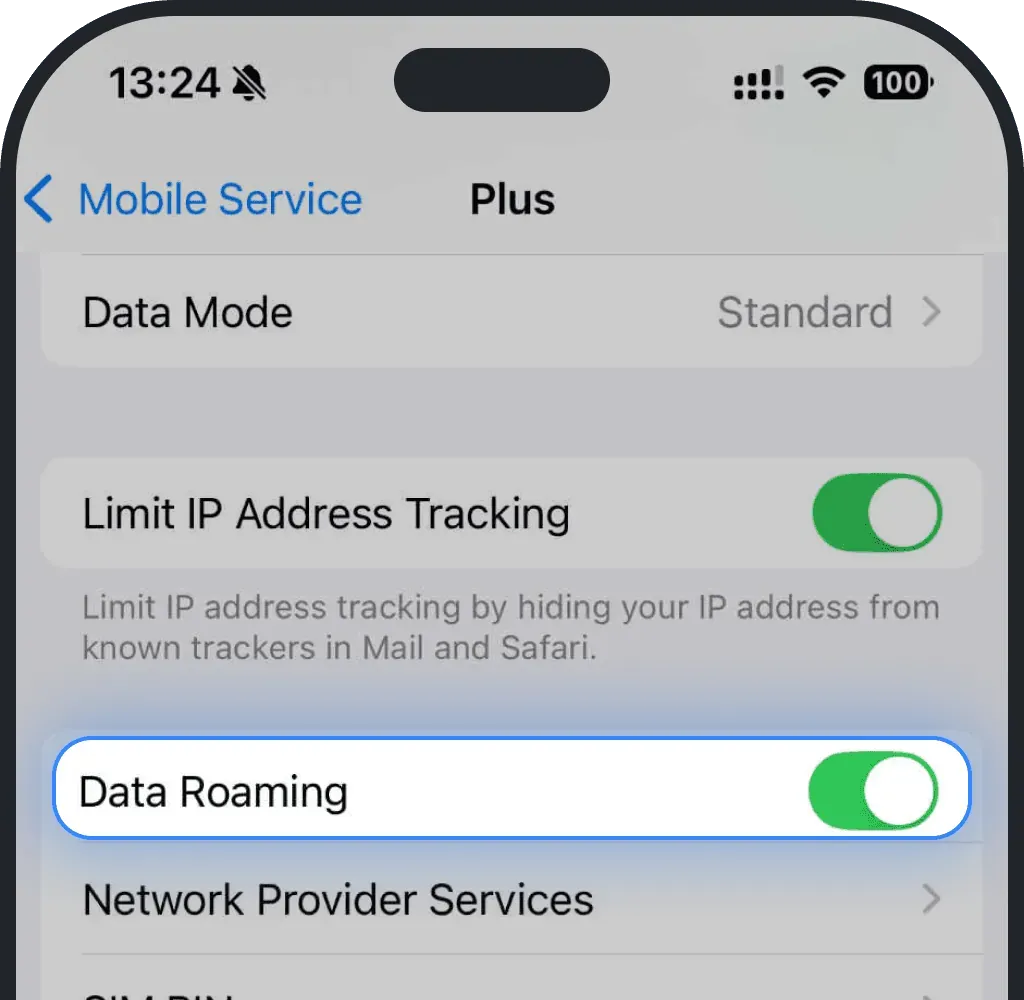
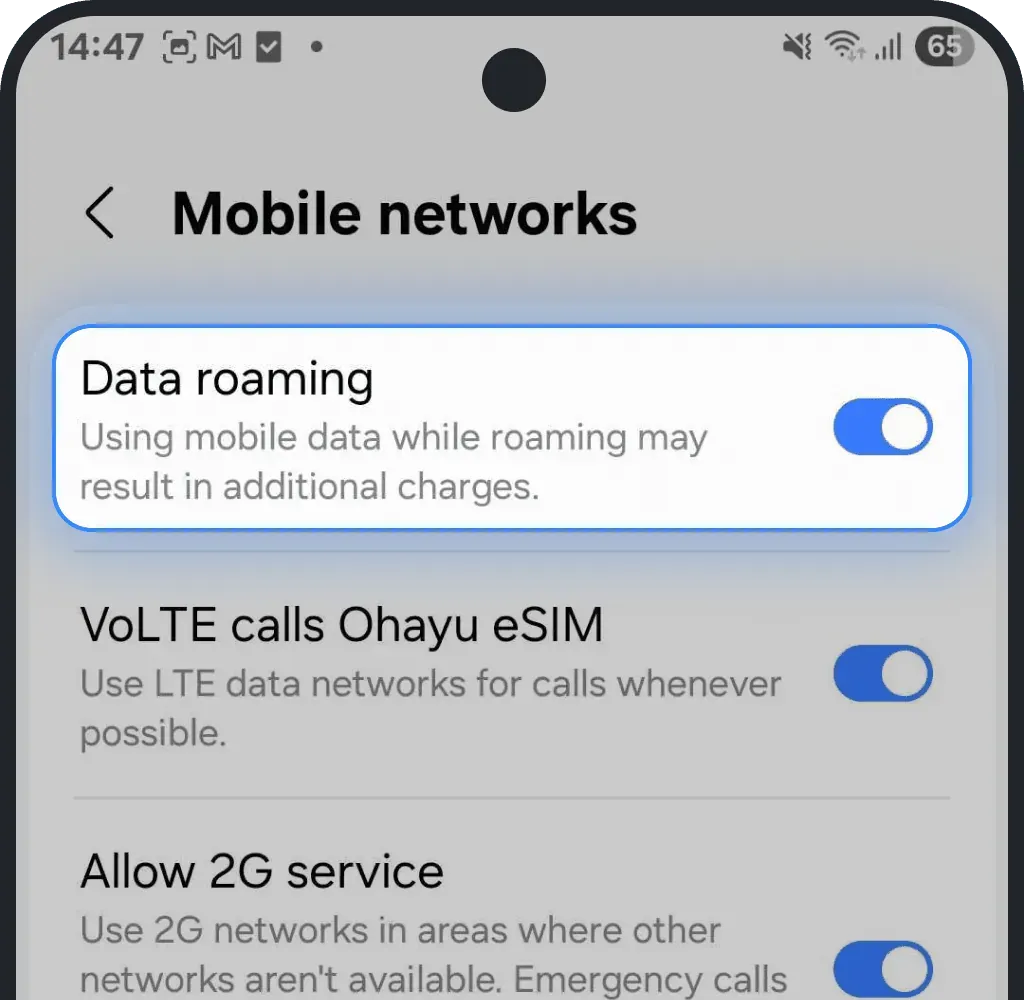
If your eSIM is installed but still shows no connection, make sure you turned on Data Roaming. Without it, your eSIM won’t connect abroad.
iOS (iPhone)
Go to Settings
Tap Mobile Service or Cellular
Select your eSIM (shown as Ohayu, Secondary, or another name you set up during the installation process)
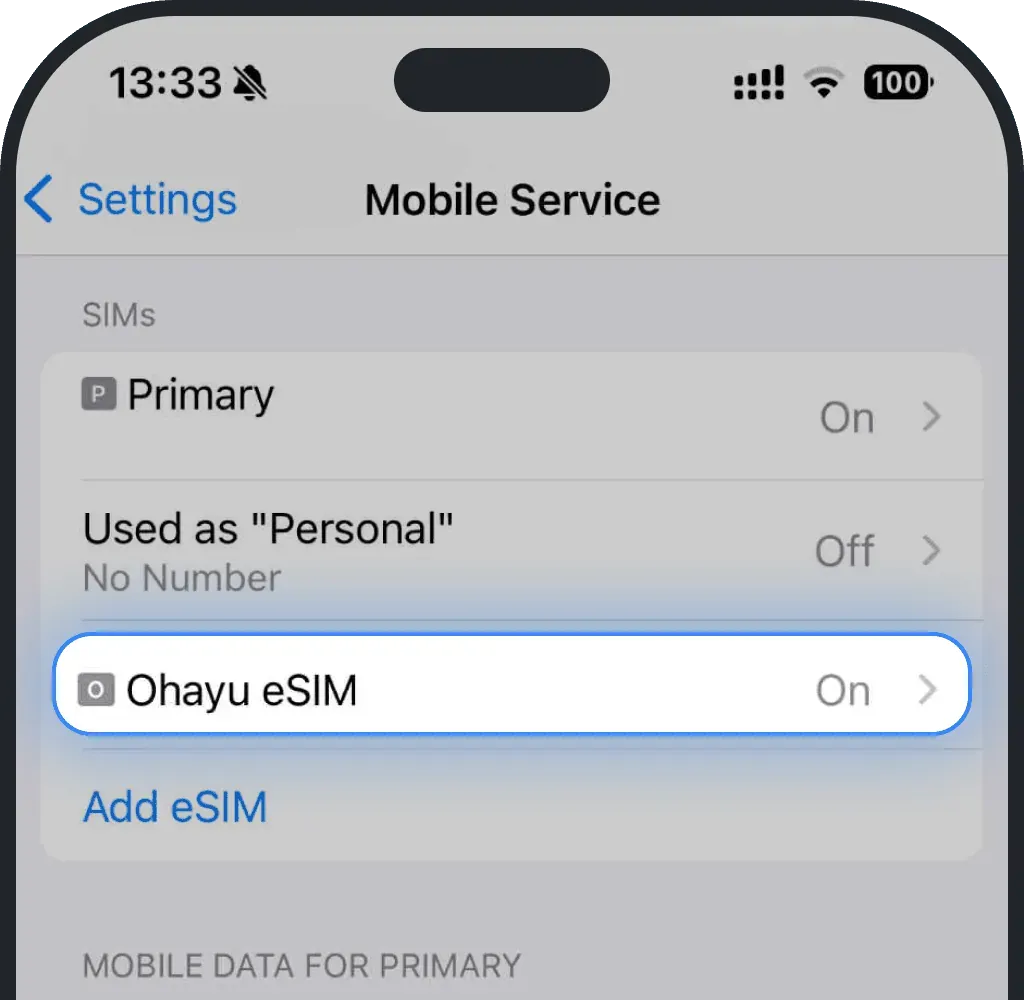
Data Roaming should be toggled on
Android
Go to Settings
Tap Connections
Tap Mobile networks
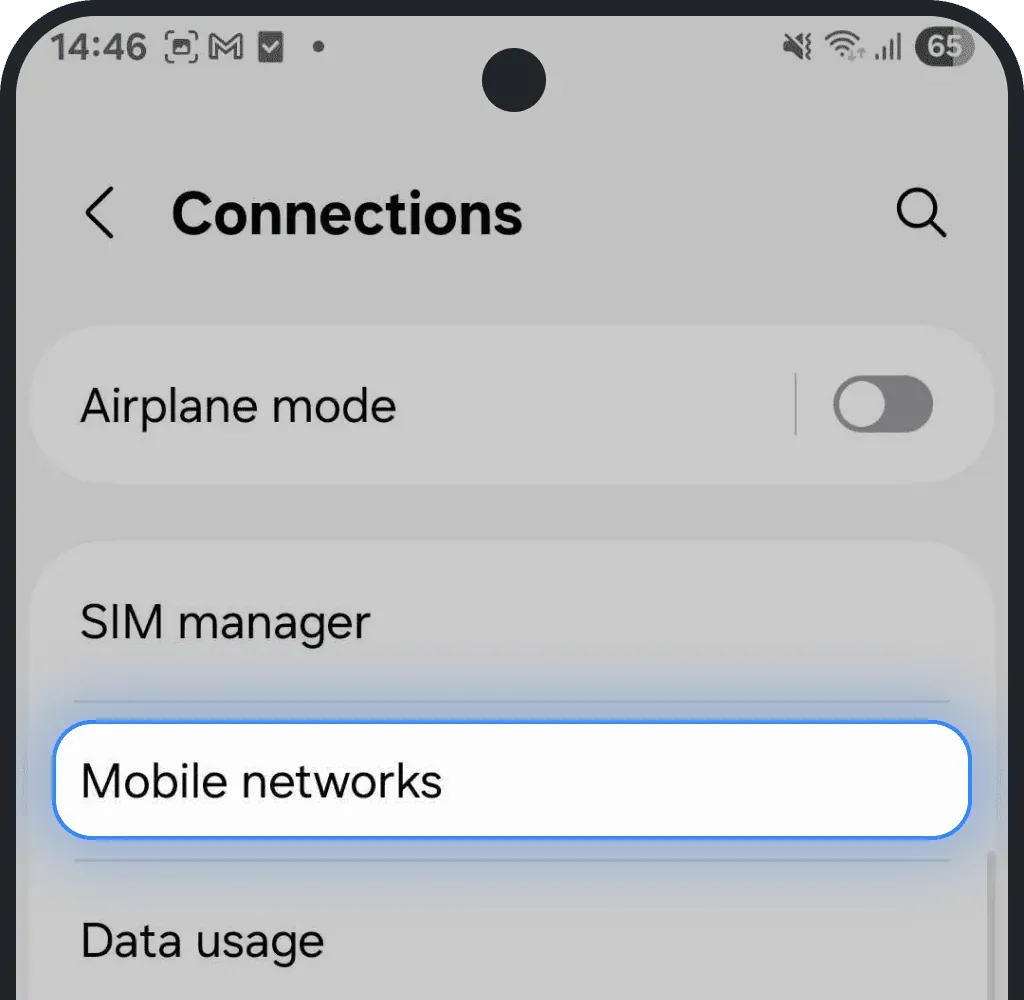
Data Roaming should be toggled on
5. You are in a weak or no-coverage area
If you’re in an area with a weak signal or no coverage, your eSIM won’t be able to connect. This often happens underground, inside large buildings, or in crowded places like concerts and stadiums where networks get overloaded.
If you suspect a coverage issue, check network availability on nperf.com/map or gsma.com/coverage. Select your destination country and local operator to see detailed coverage maps.
You can find the list of supported operators for your plan on the country page of our website or directly in your Ohayu profile. For example, if you’re using a United States plan, your eSIM connects through local partners such as AT&T, Verizon, or T-Mobile.
6. Check APN settings (Access Point Name)
If your eSIM is installed but you still don’t have internet access, the issue might be related to your APN (Access Point Name) settings.
You can easily verify and update them by following the steps below.
Step 1: Check your APN in the Ohayu app
- Open the Ohayu app and go to the My eSIMs tab
Tap your eSIM to open its details
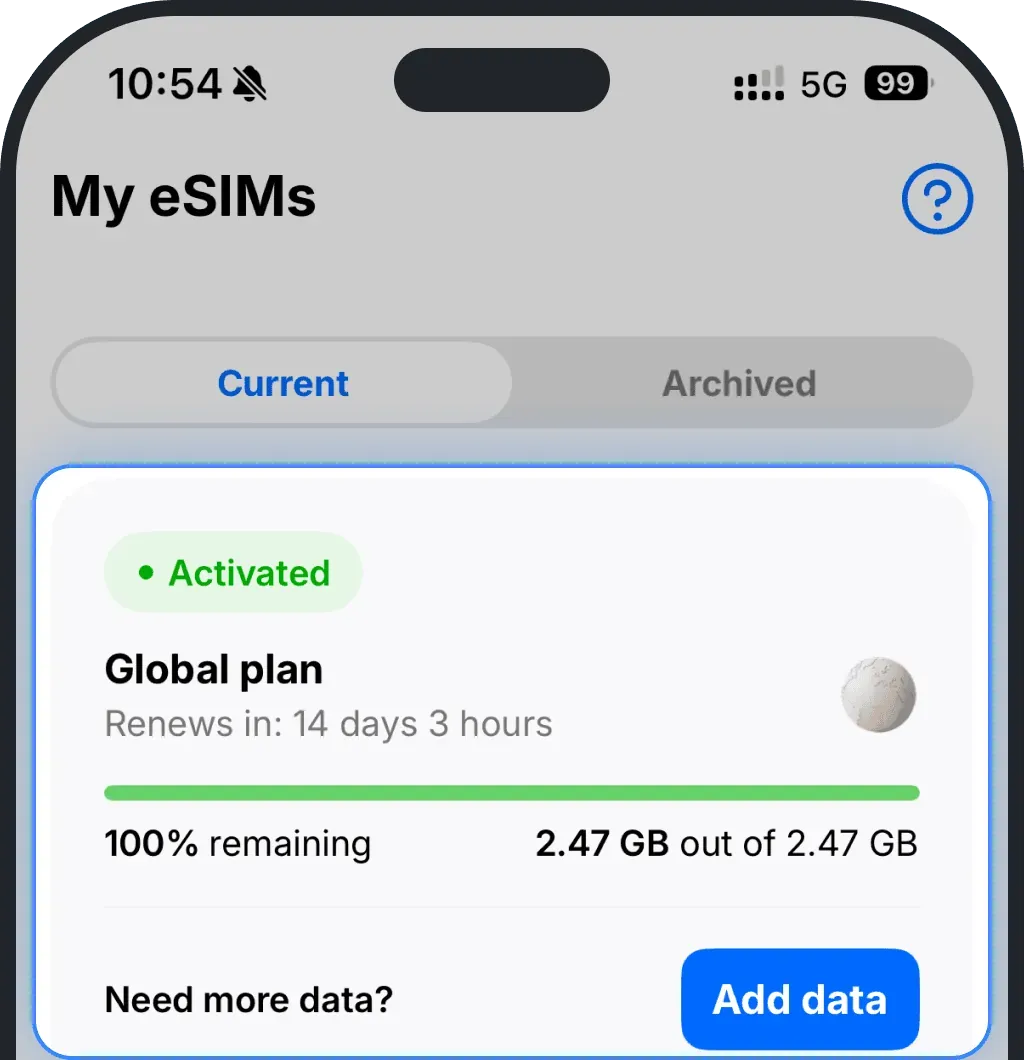
In the Plan details section, you’ll see your APN (Access Point Name) — copy it
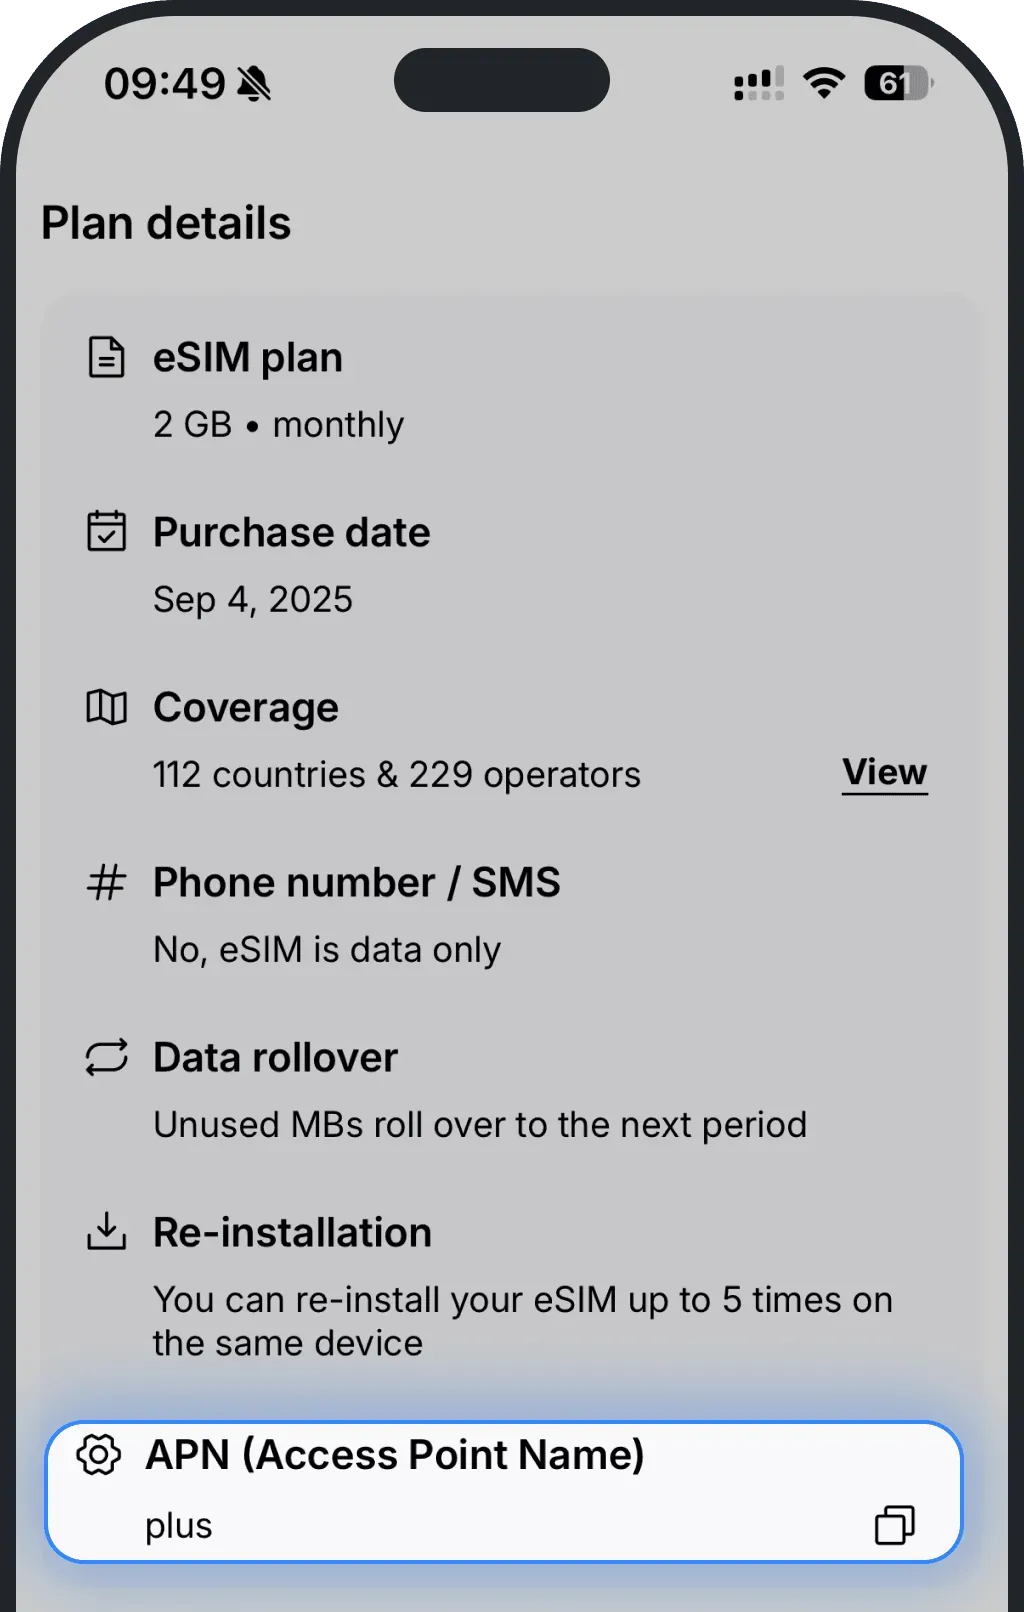
Step 2: Add or edit the APN on your device
iPhone
Go to Settings
Tap Mobile Service (or Cellular)
Select your Ohayu eSIM (shown as Ohayu, Secondary, or other)
Tap Mobile Data Network
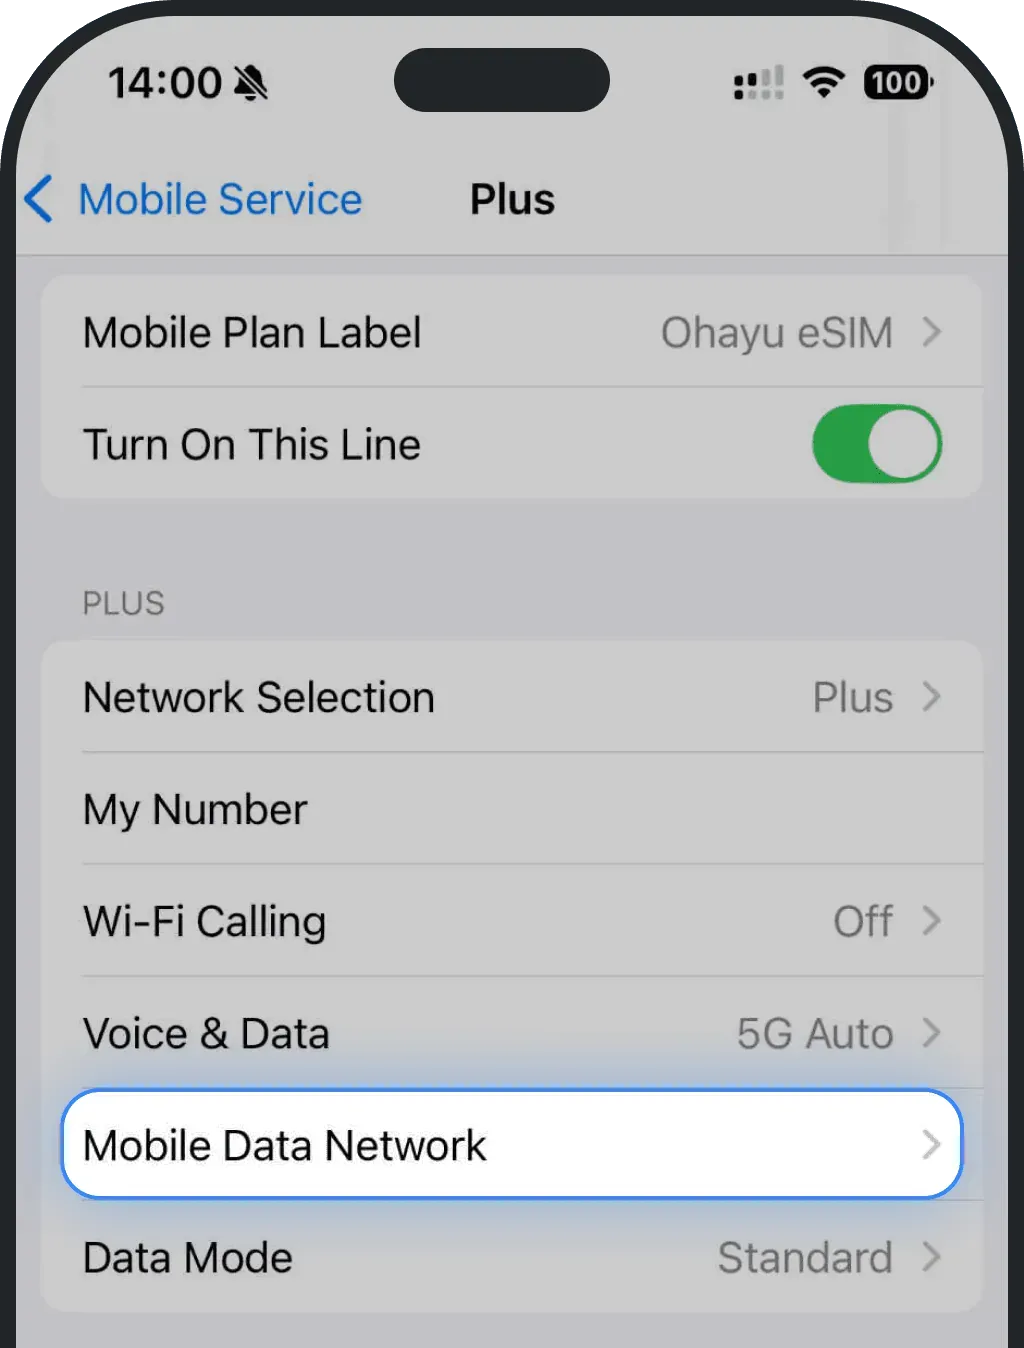
Paste the copied APN into all APN fields
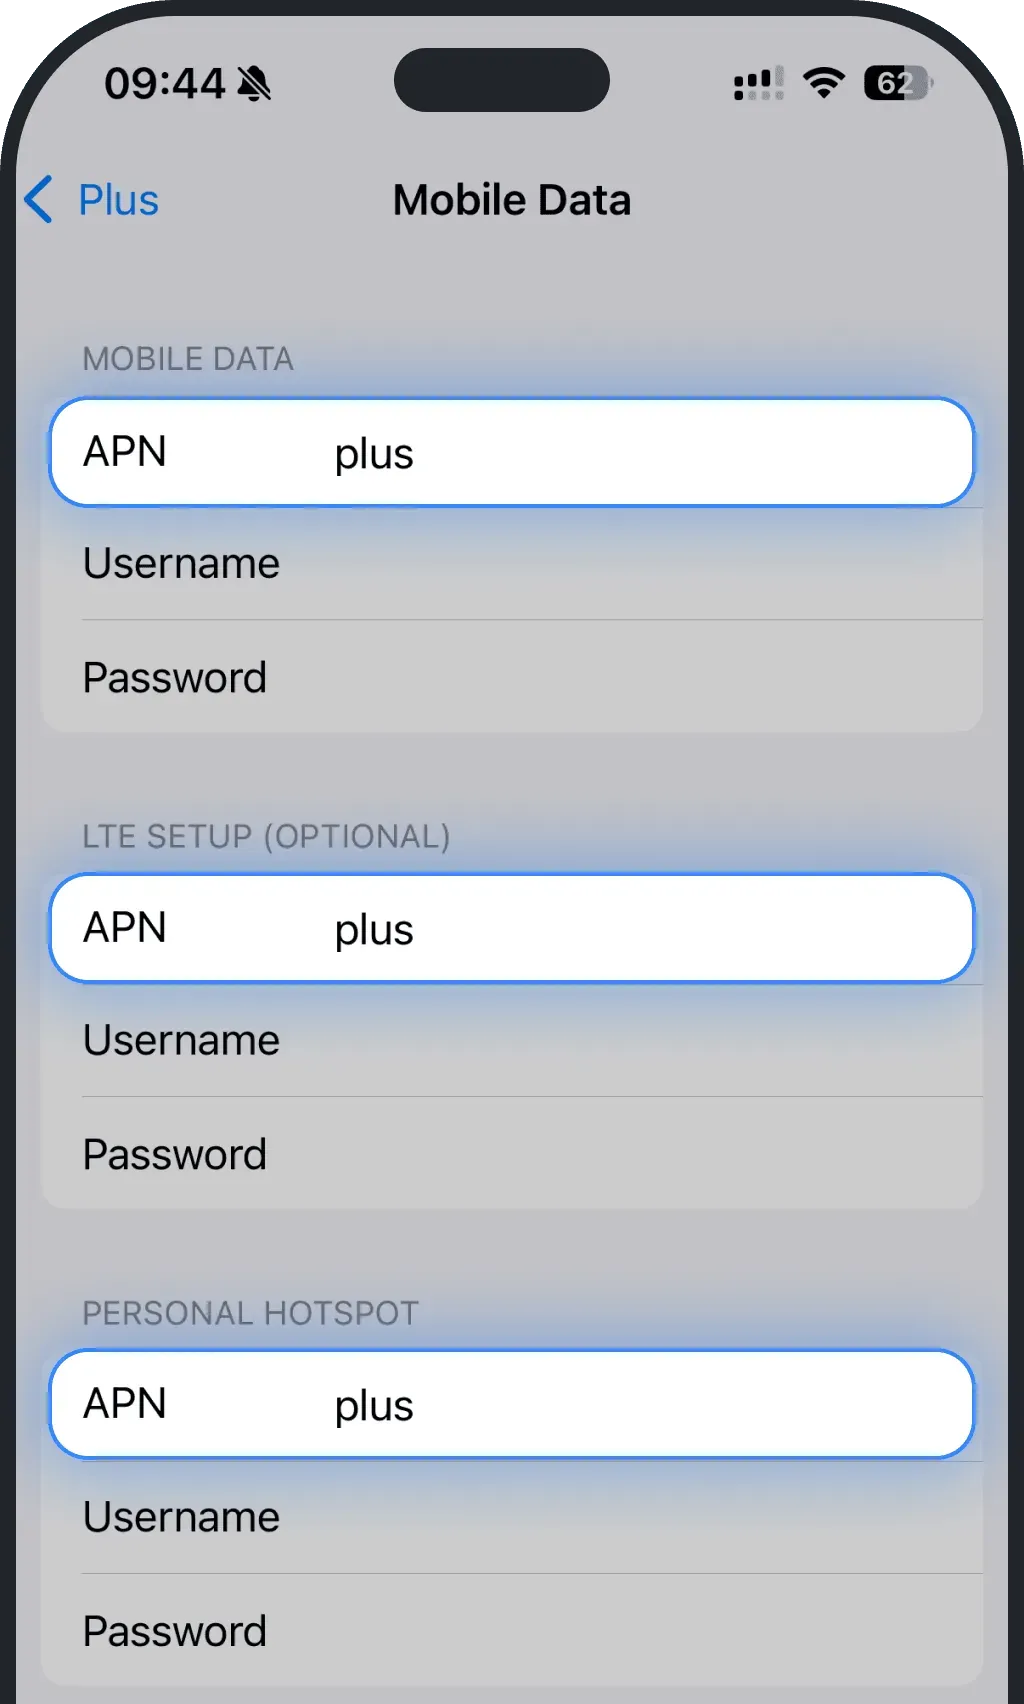
- Leave all other fields blank
Android
Go to Settings
Tap Connections
Choose Mobile networks
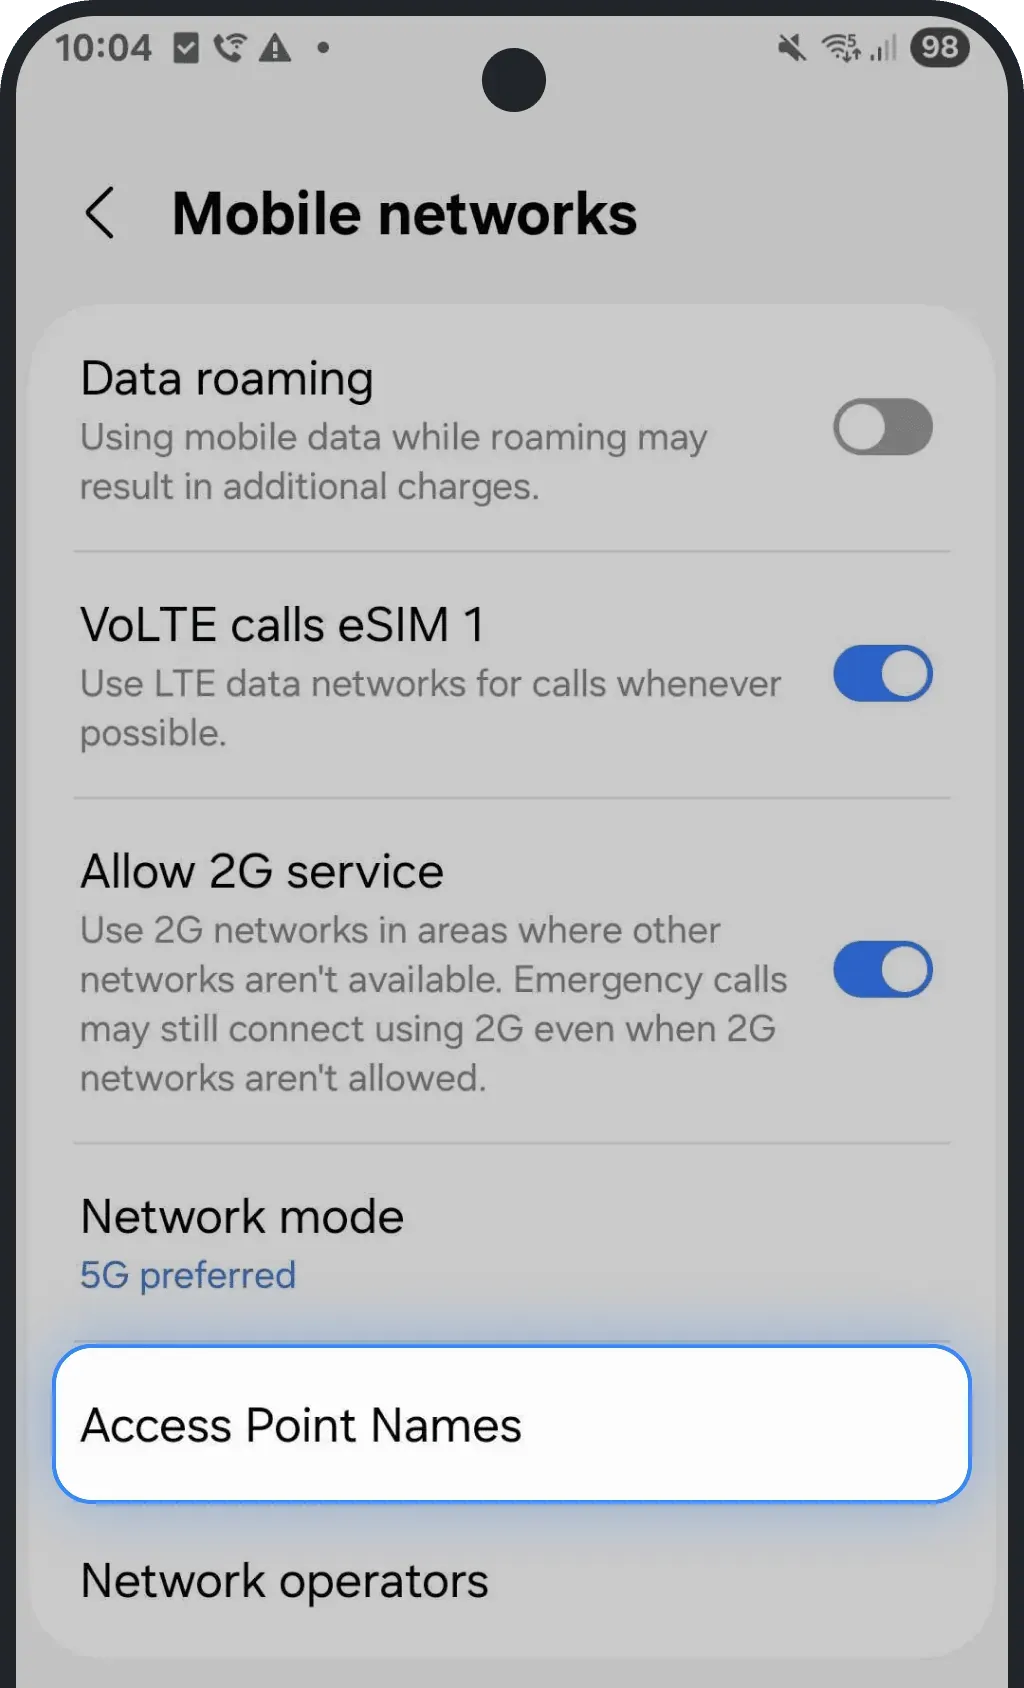
Tap Access Point Names
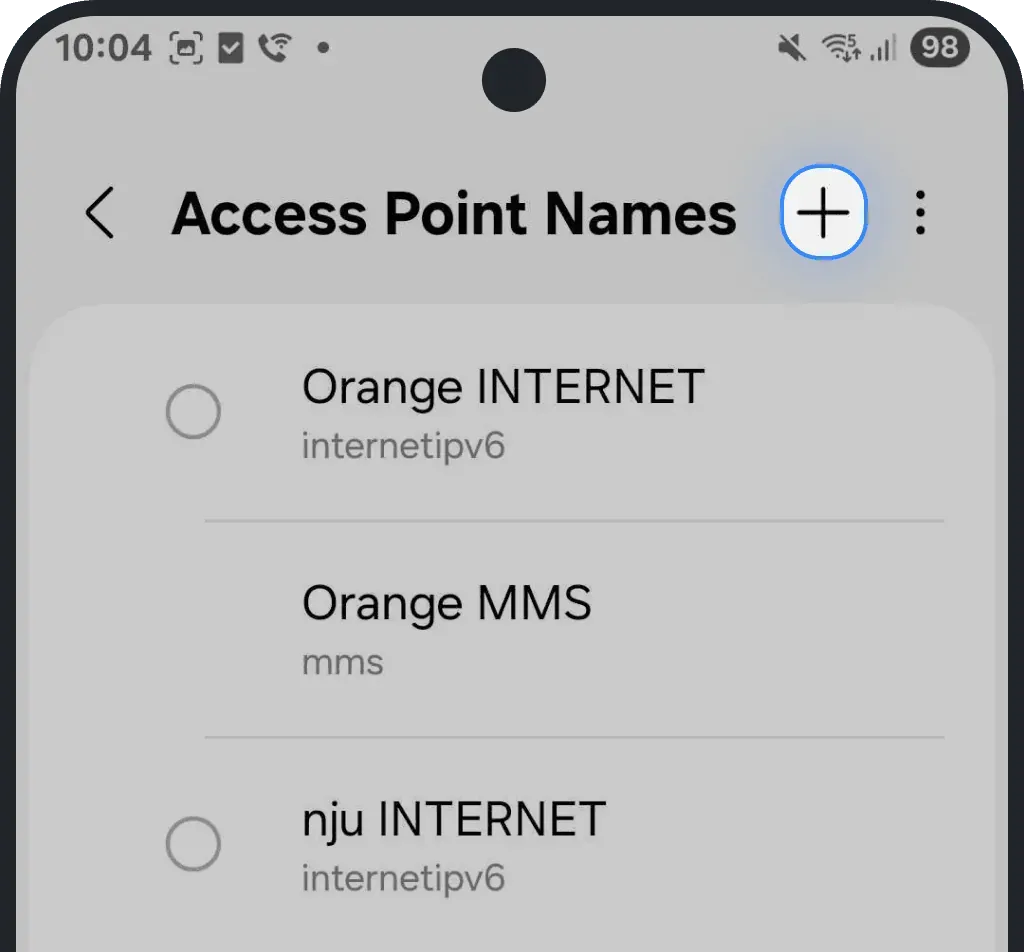
Tap Add (or the + icon)
Enter the copied APN in both the Name and APN fields
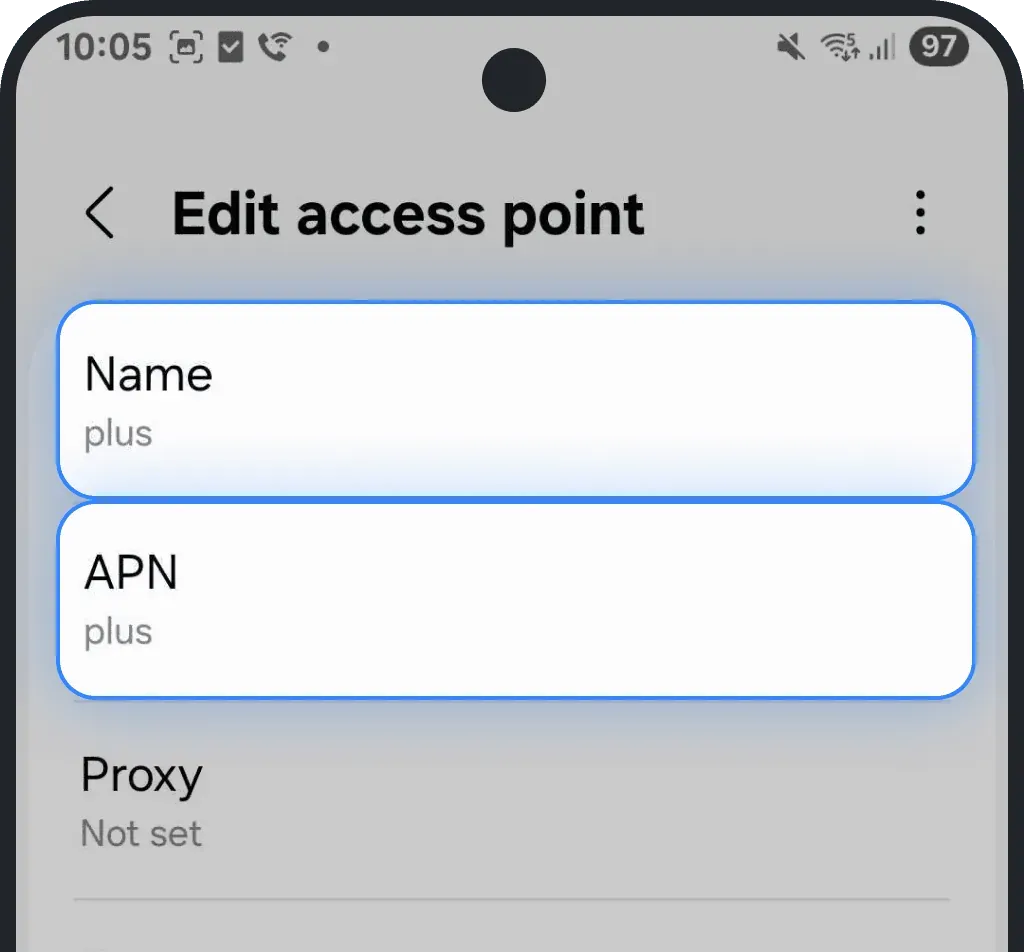
- Leave other fields blank
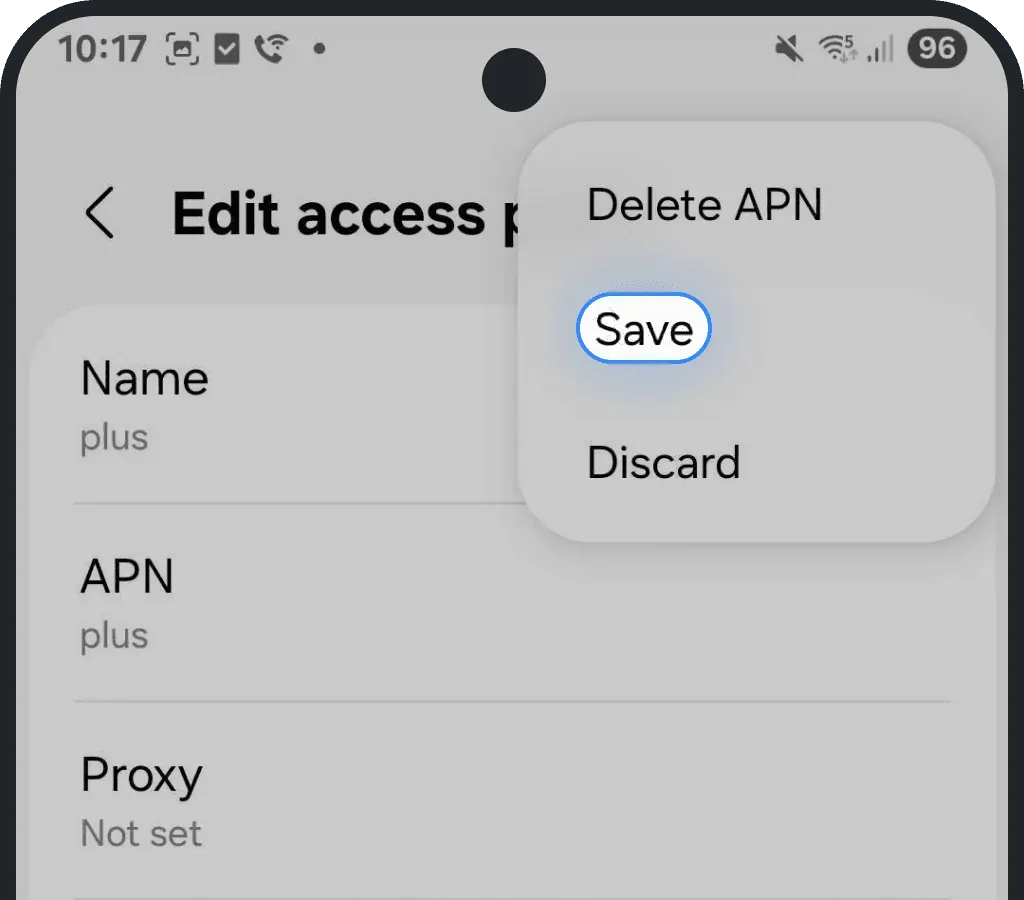
Tap the three dots in the top-right corner and press Save
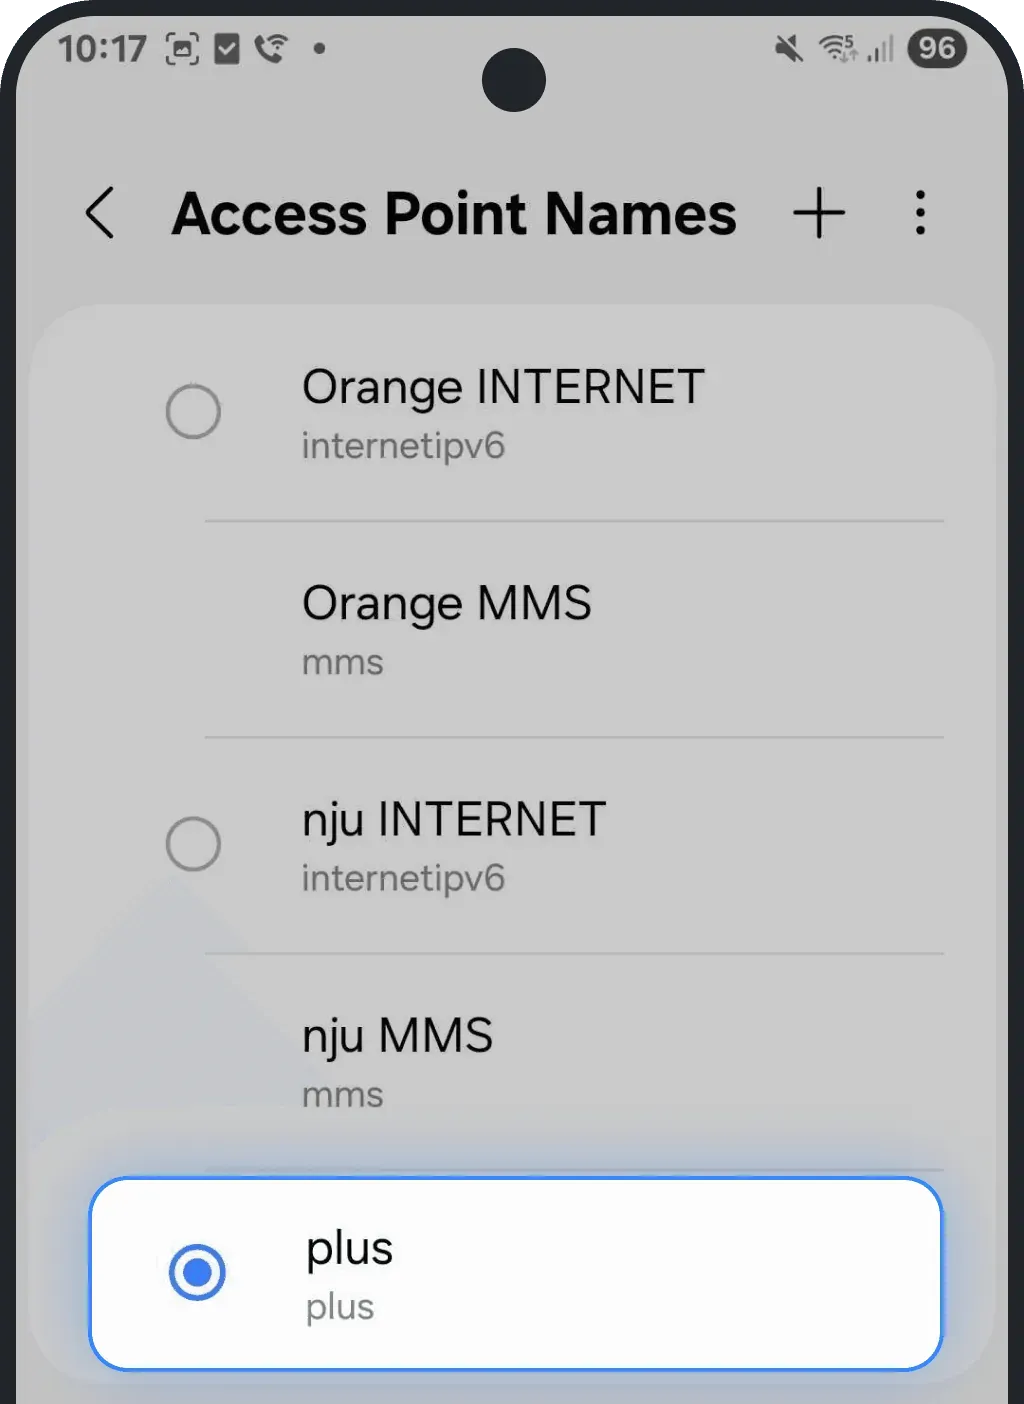
Select the new APN to enable it
7. Enable and disable Airplane Mode
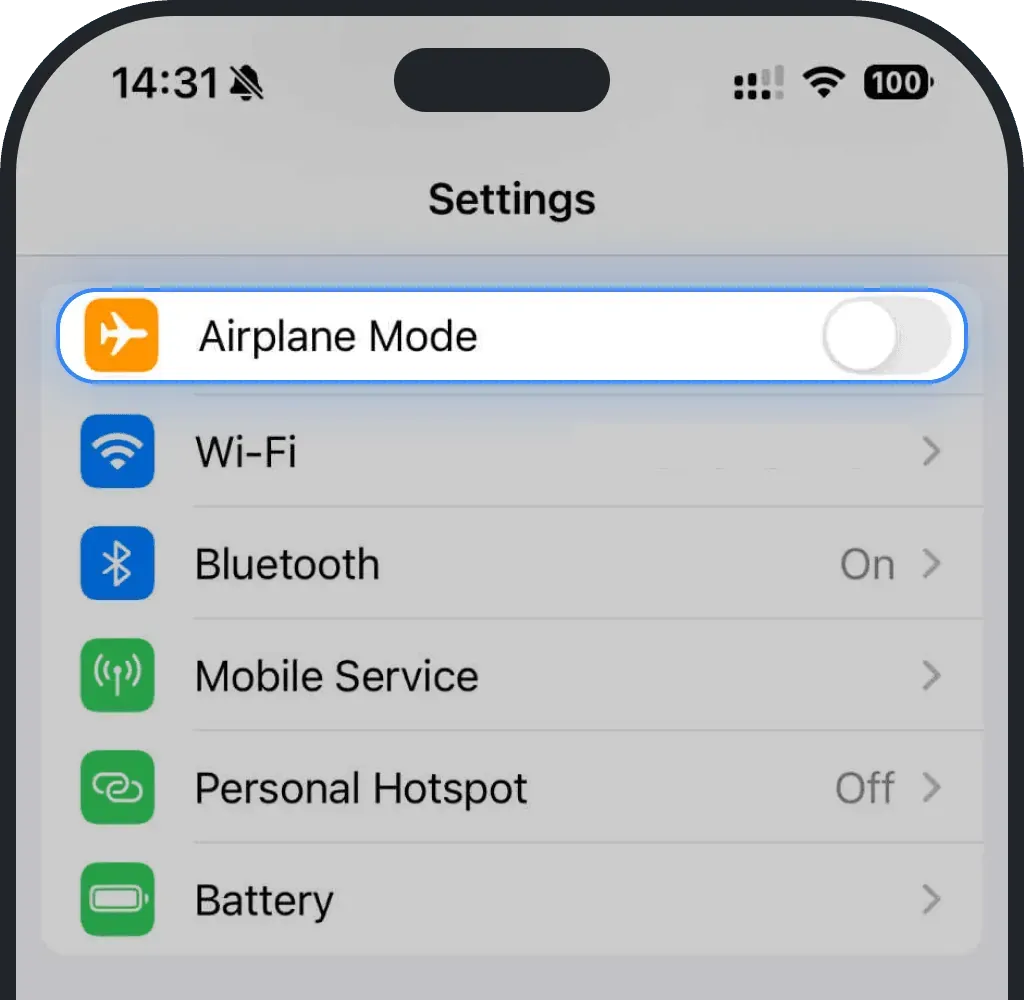
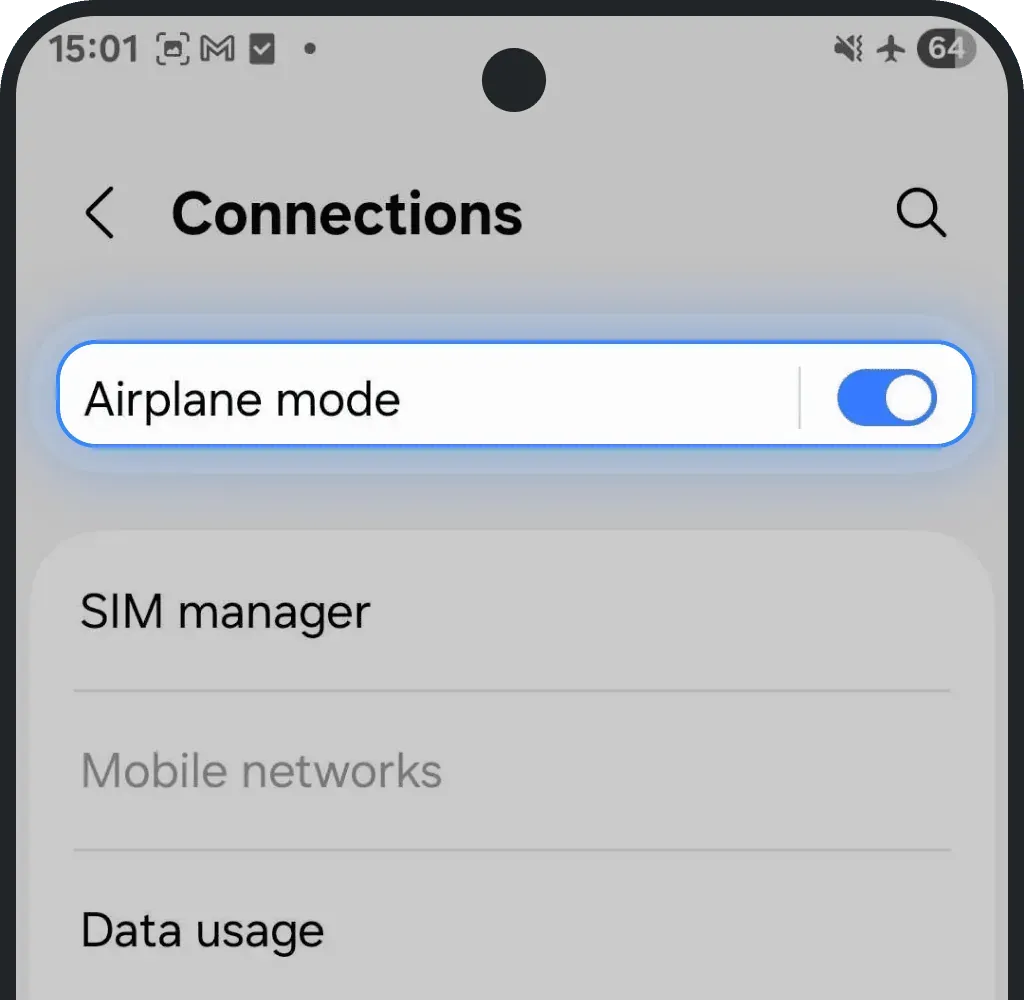
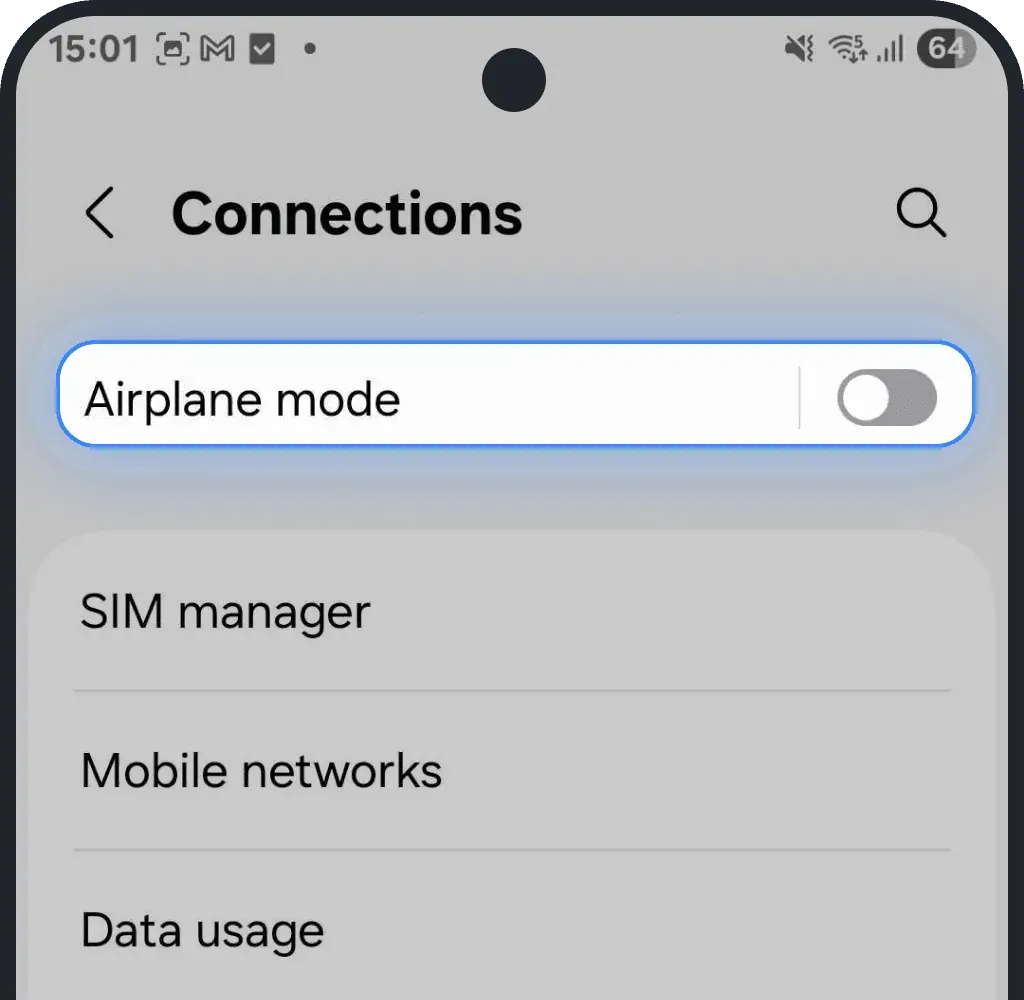
Sometimes your phone just needs a quick network refresh. Turn on Airplane Mode for a few seconds, then turn it off to reset the connection.
iOS (iPhone)
Go to Settings
Turn on Airplane Mode
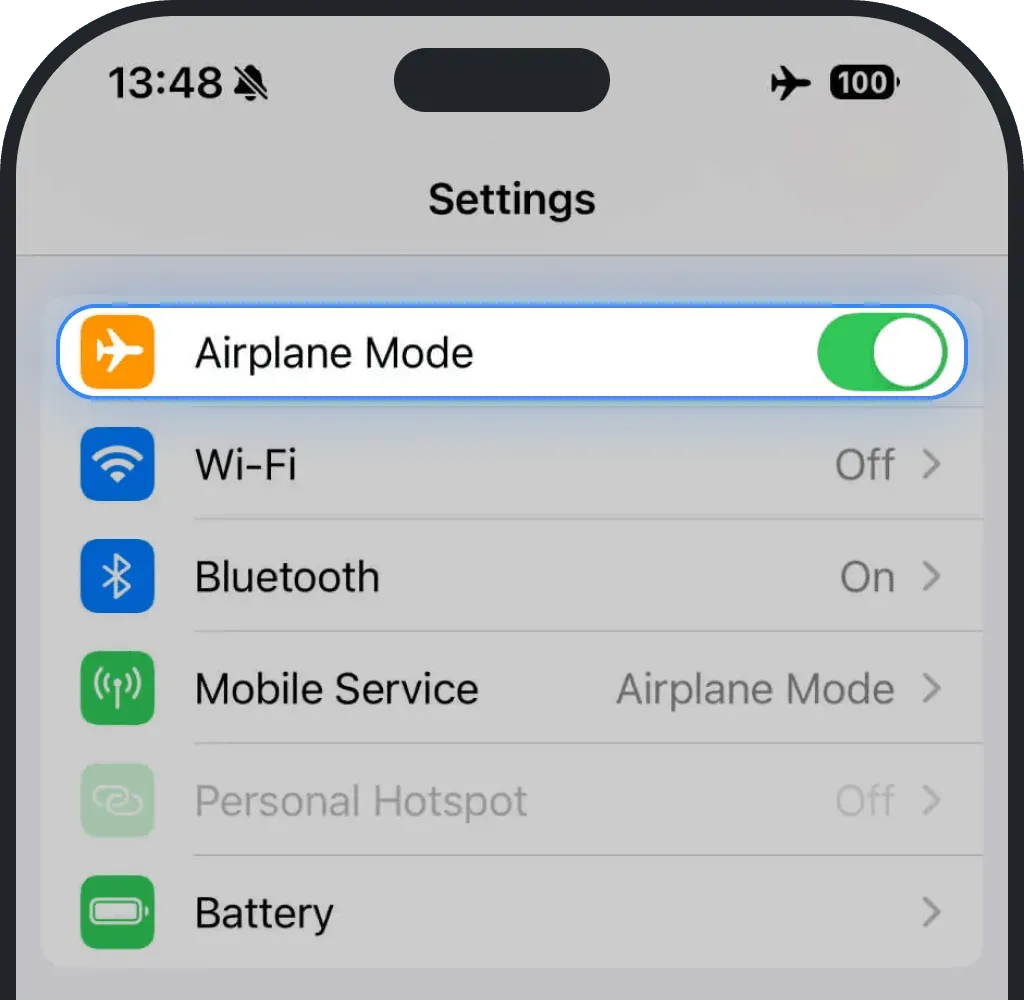
- Wait at least 10 seconds
Turn off Airplane Mode
Android
Go to Settings
Tap Connections
Turn on Airplane Mode
- Wait at least 10 seconds
Turn off Airplane Mode
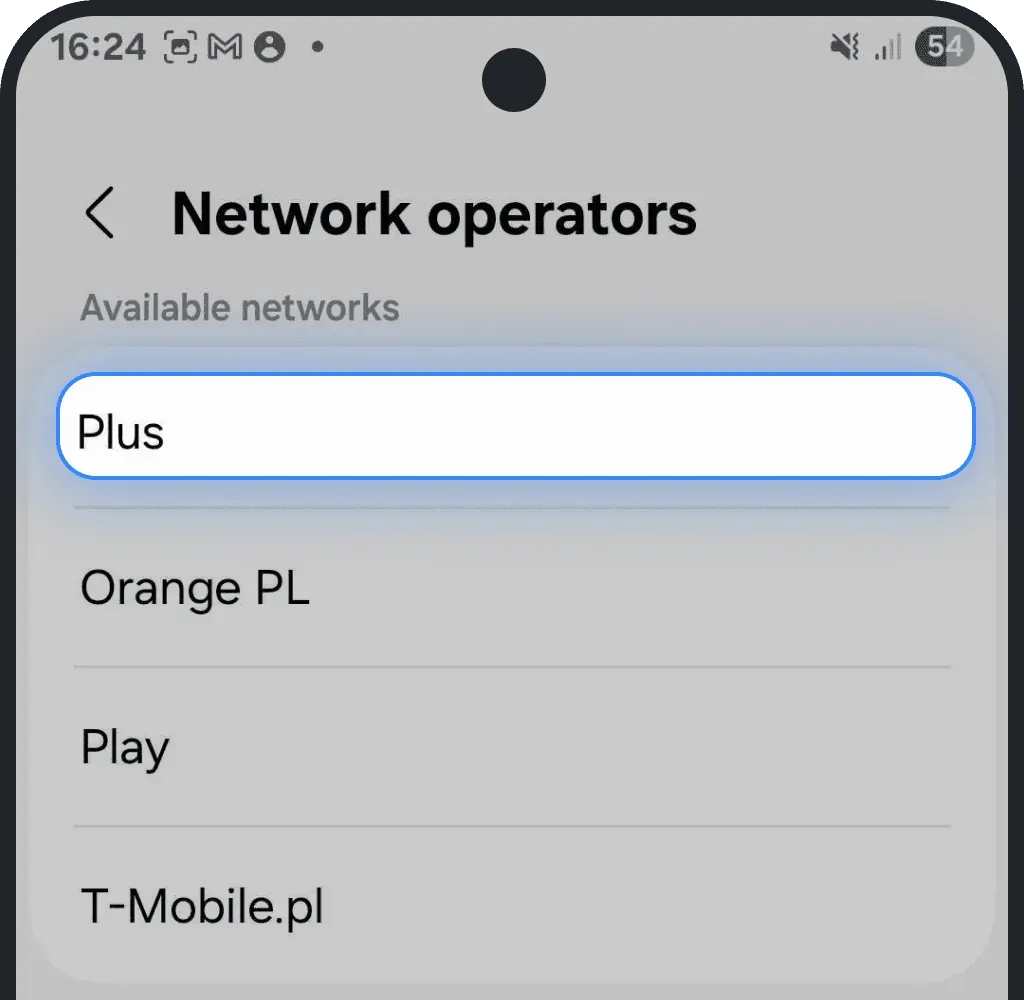
8. Select Network Operator manually
Try selecting the network yourself instead of letting the phone choose automatically. You will find all available networks in your eSIM plan details and country pages. For example, in the United States plan, you can connect to AT&T, Verizon, or T-Mobile.
iOS (iPhone)
Go to Settings
Tap Mobile Service or Cellular
Select your eSIM (shown as Ohayu, Secondary, or another name you set up during the installation process)
Click Network Selection
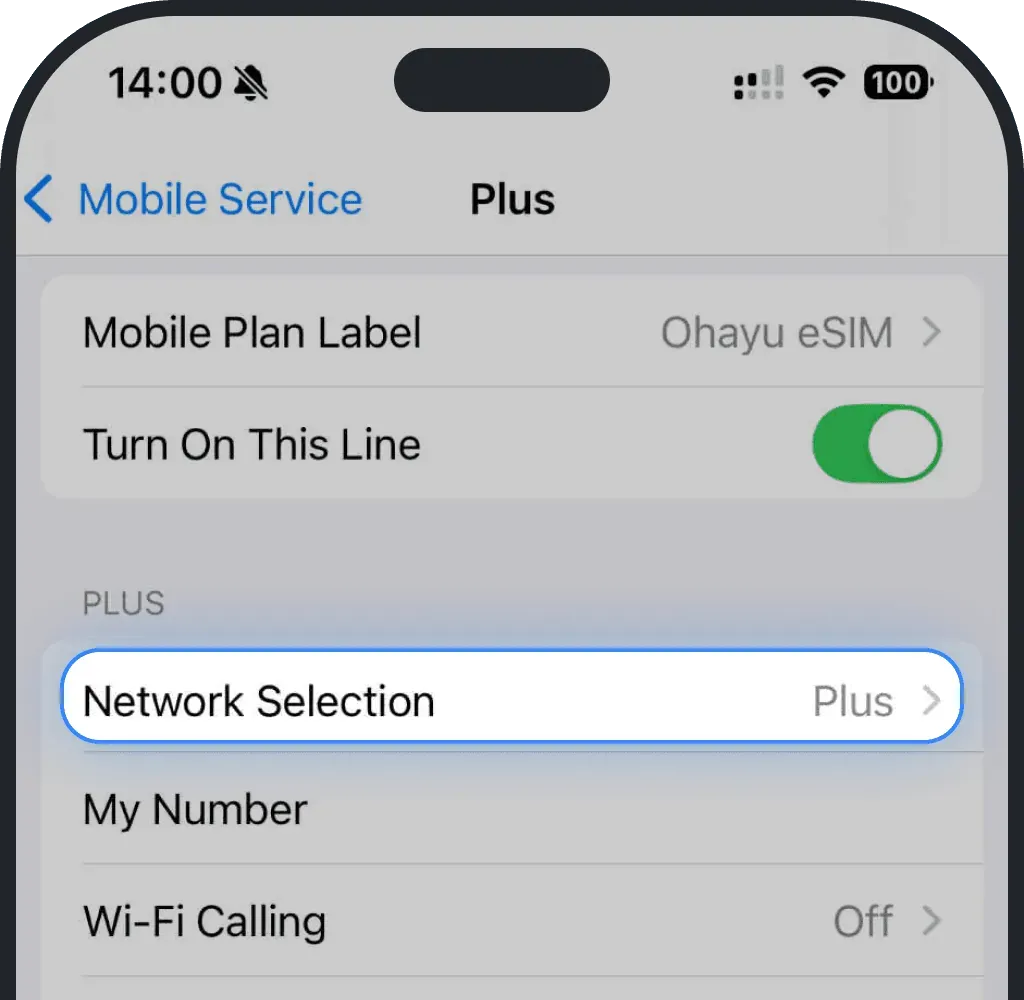
Turn off the automatic selection
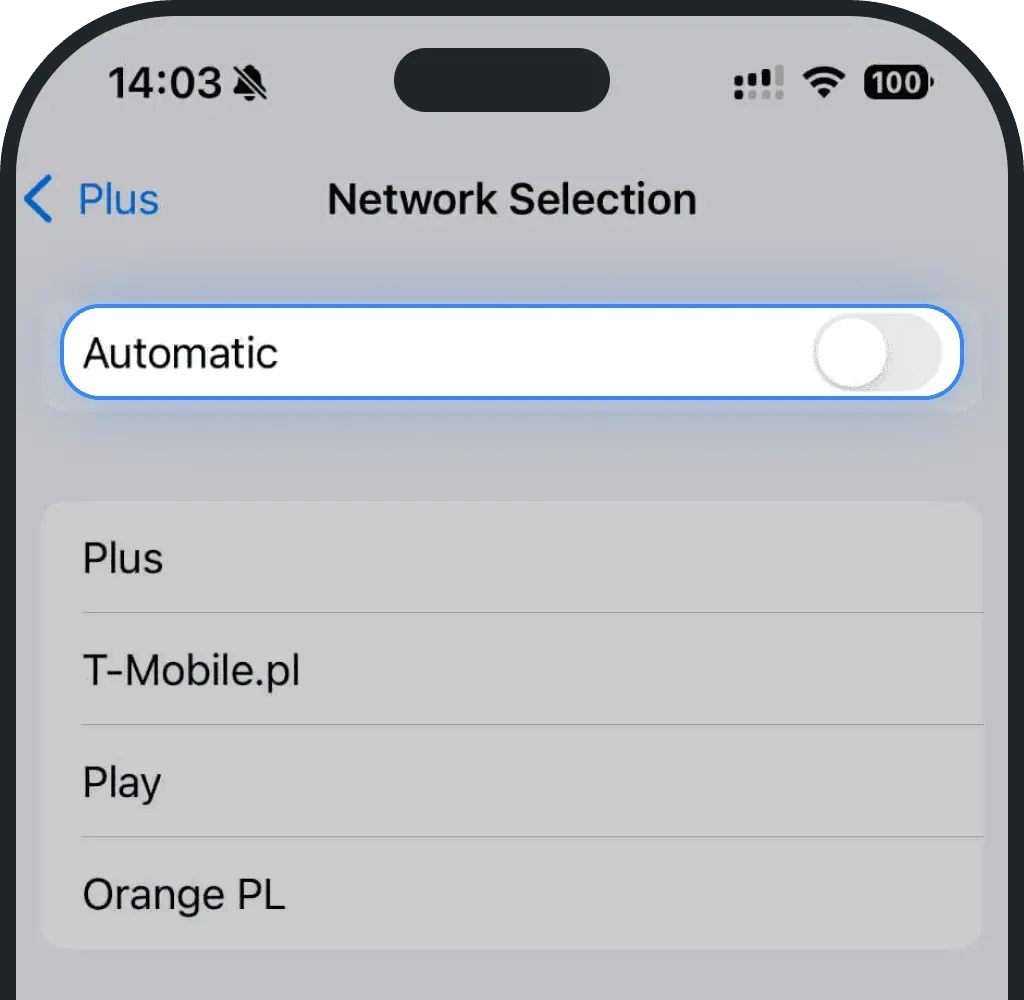
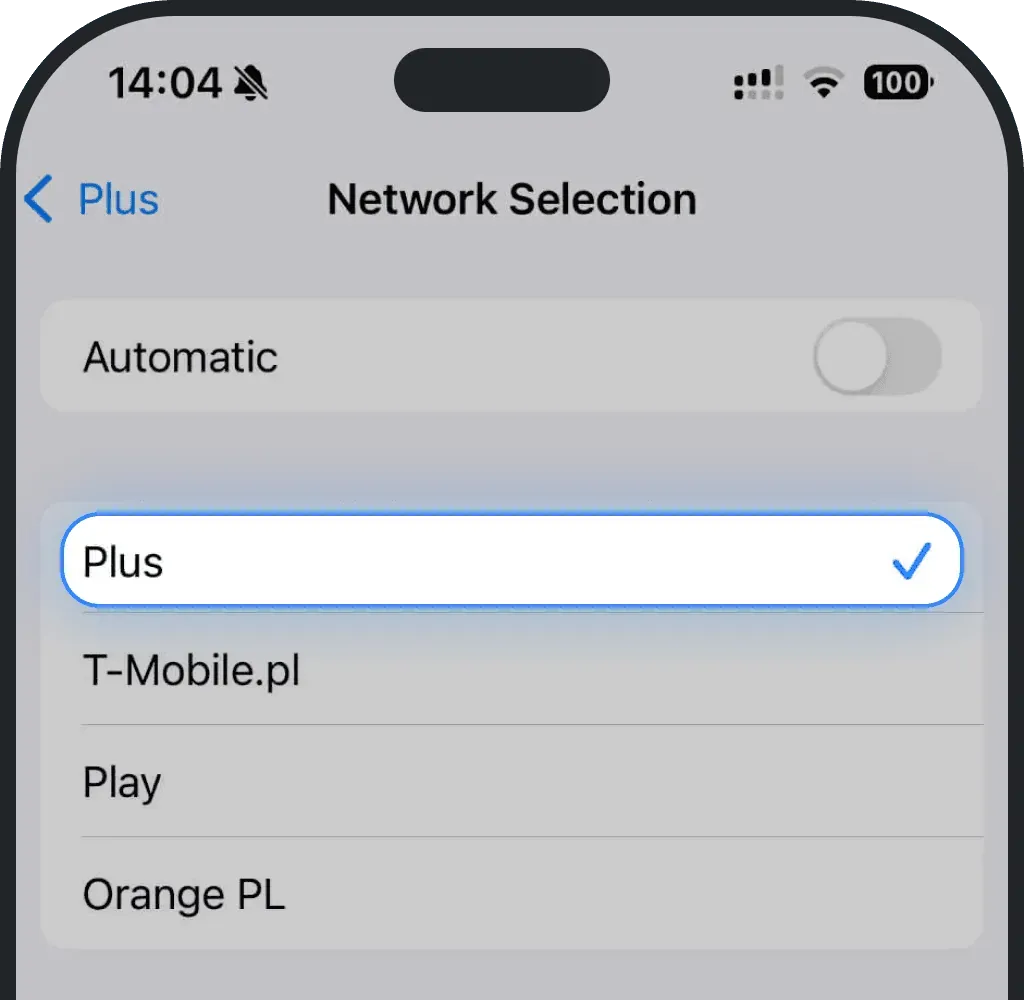
Try selecting the networks one by one and see which one works for you
Android
Go to Settings
Tap Connections
Tap Mobile networks
Select Network Operators
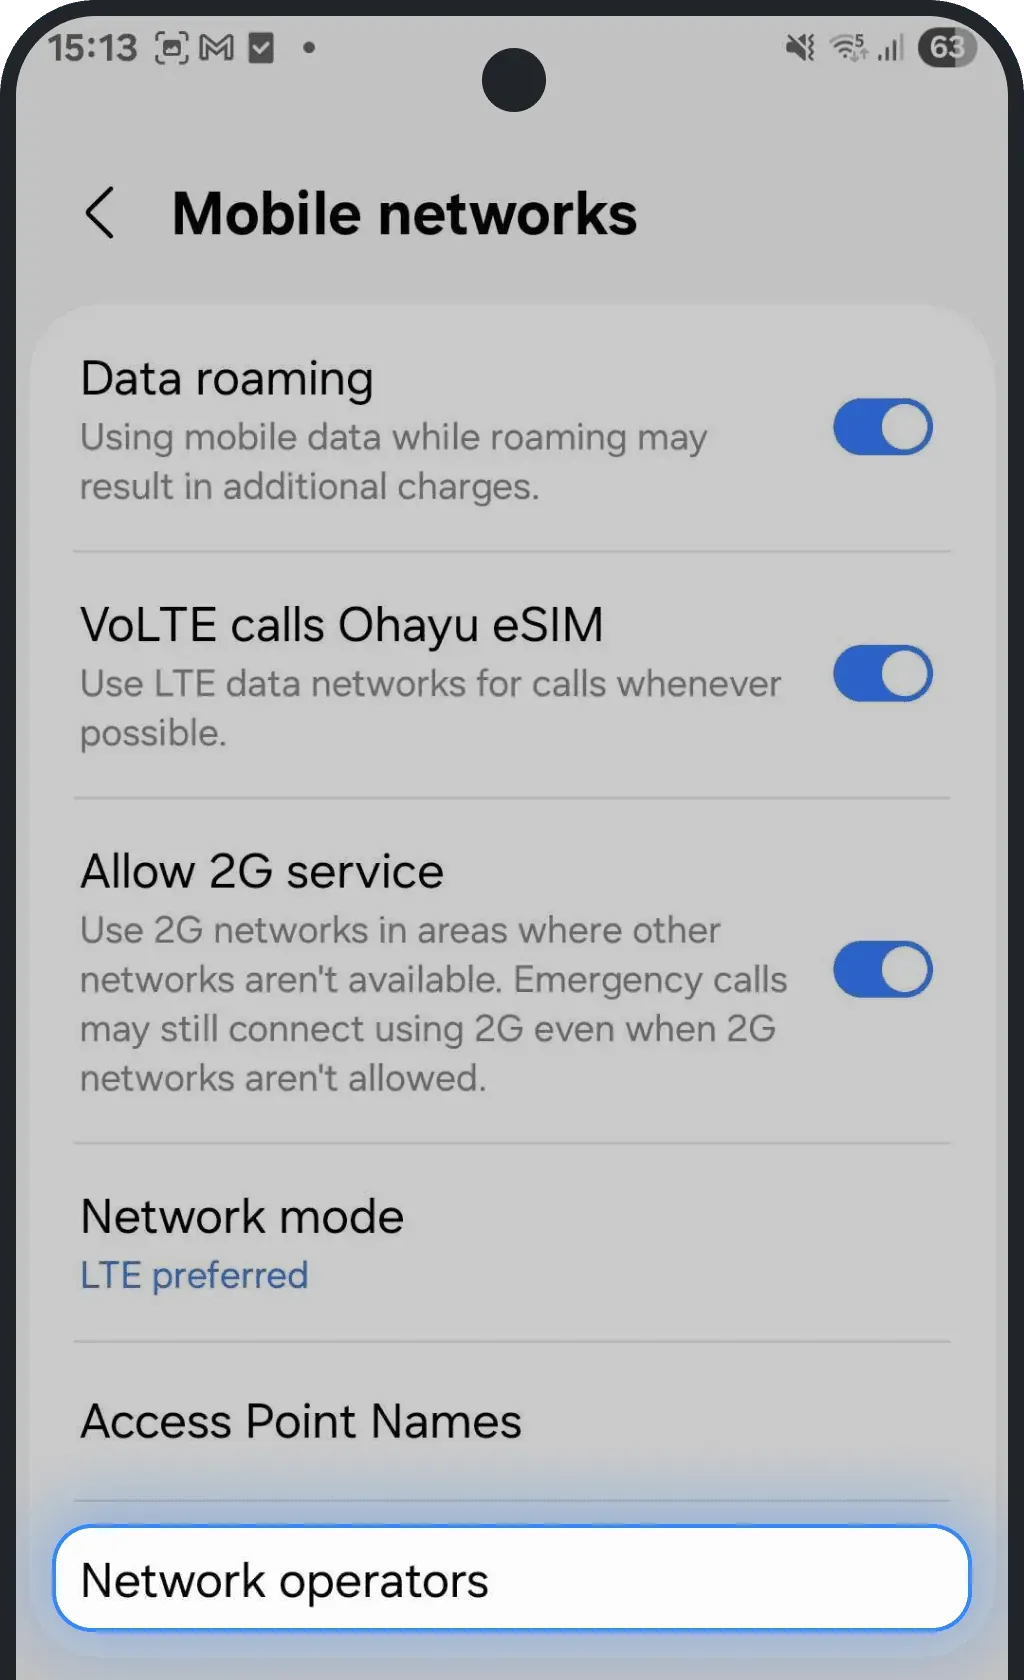
Turn off the automatic selection
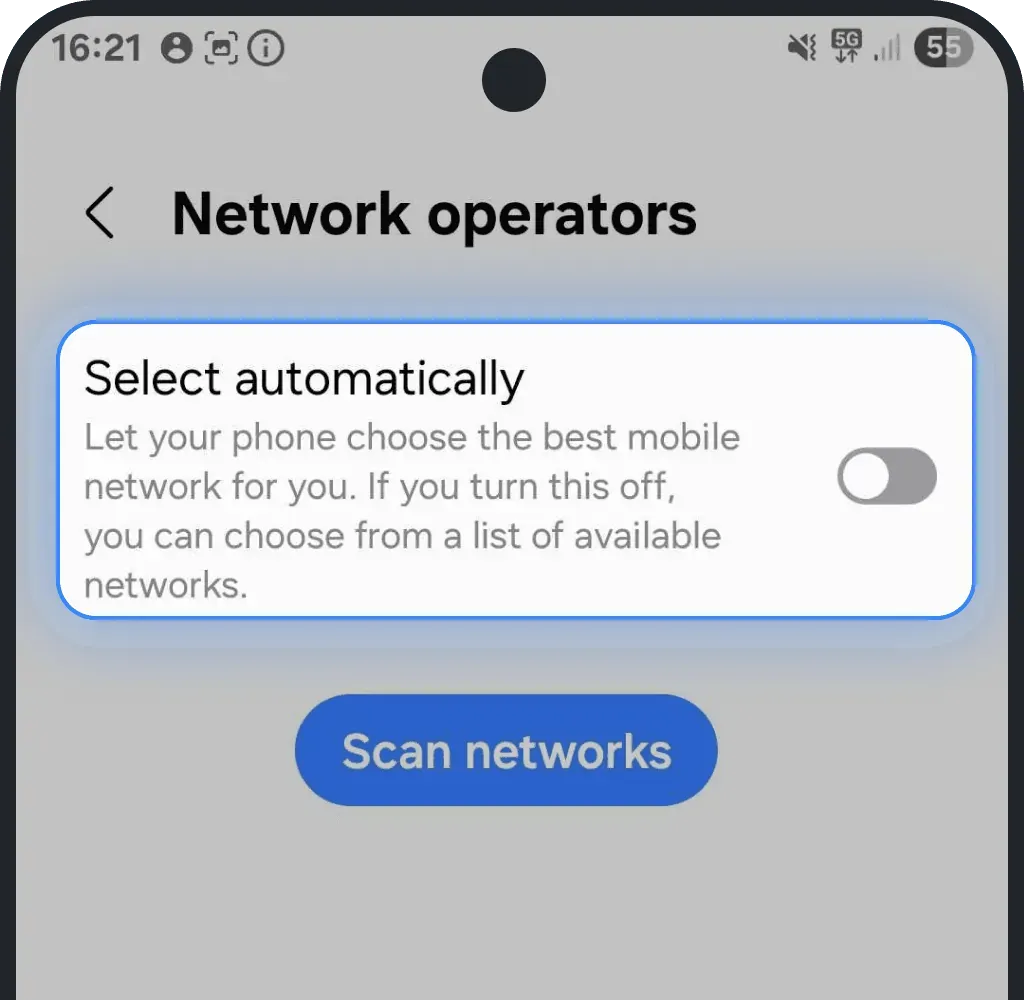
Try selecting the networks one by one and see which one works for you
9. Your VPN might be the reason why your eSIM is not working
VPNs or proxy apps often break the connection your phone needs to activate an eSIM. When you use a VPN, your traffic takes a different route, and the carrier’s server might never receive the activation request. Here is how to fix it:
- Turn off your VPN, proxy, or Apple’s Private Relay feature.
- Wait 10-15 seconds for your device to refresh the network connection.
- Try installing or activating the eSIM again.
Once activation is complete, you can safely turn your VPN back on.
10. Disconnect from Wi-Fi
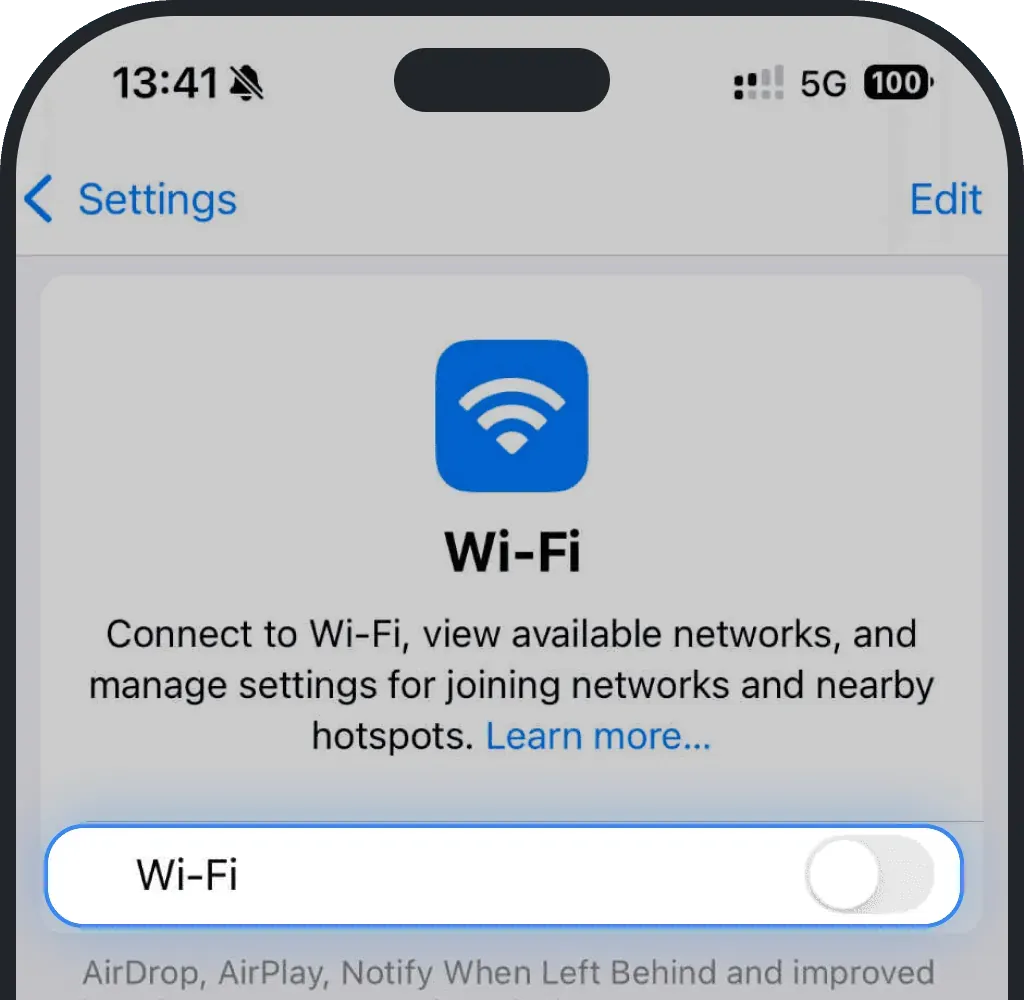
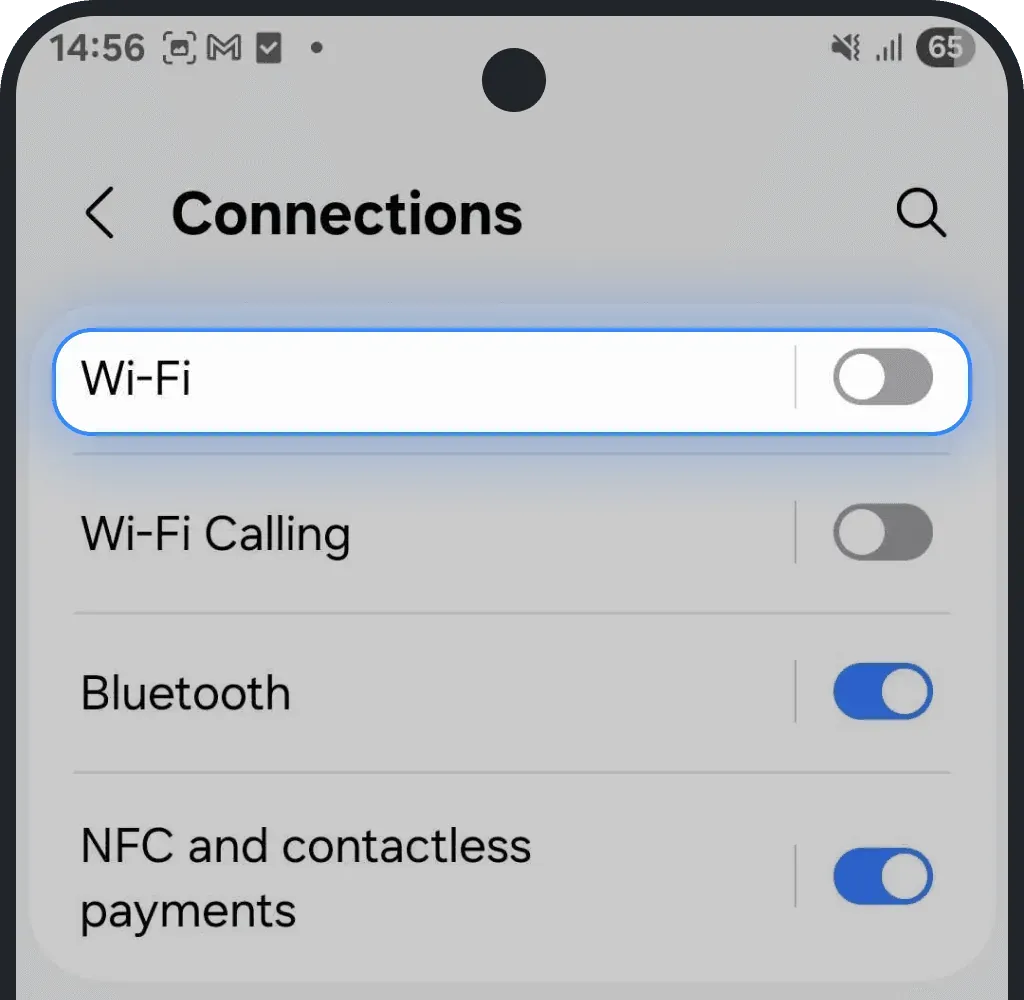
If your phone stays on Wi-Fi, it uses that connection instead of your eSIM. Turn Wi-Fi off so your phone connects through mobile data.
iOS (iPhone)
Go to Settings
Tap Wi-Fi
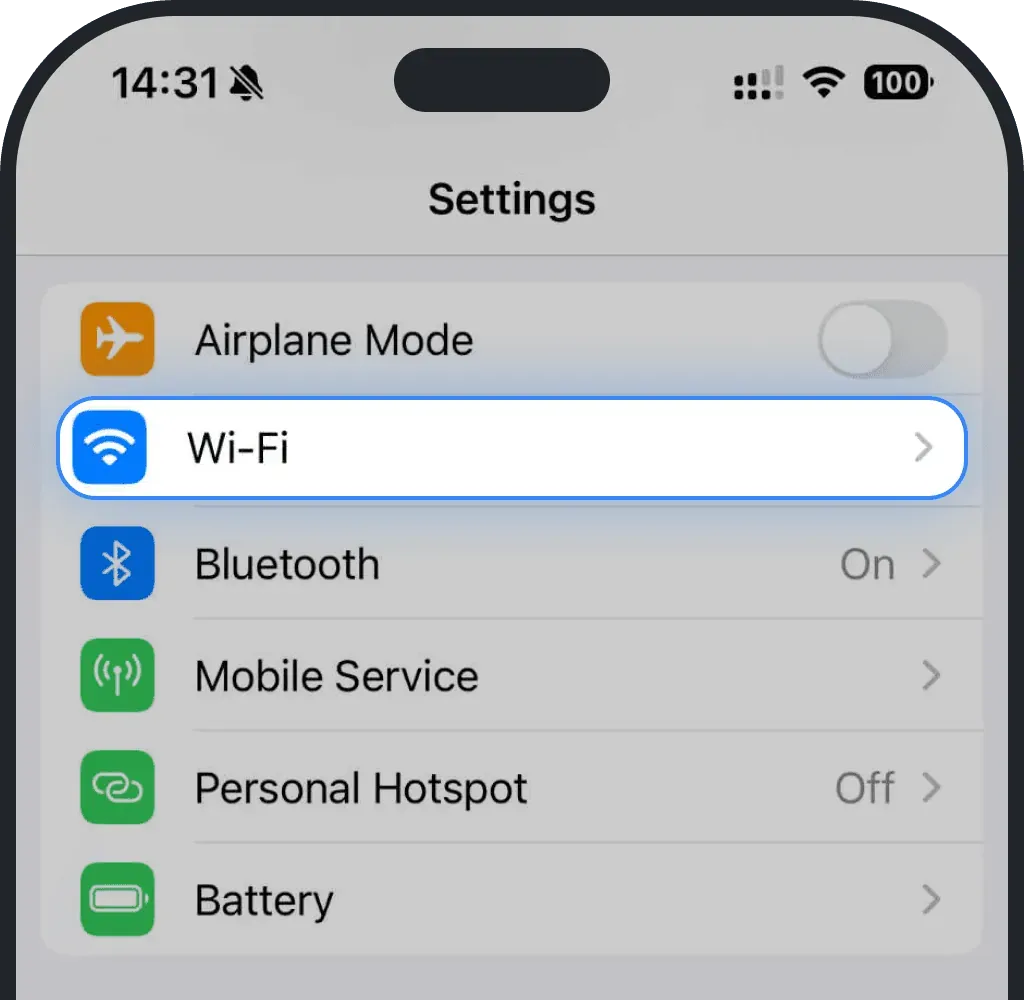
Turn off Wi-Fi
Android
Go to Settings
Tap Connections
Turn off Wi-Fi
11. Restart your device
A simple restart often solves temporary problems with eSIM not working. Rebooting refreshes the system and clears small network issues that might block your eSIM from connecting.
iOS (iPhone)
- Hold the side button and either volume button until the power slider appears.
- Drag the slider to turn the iPhone off.
- After the screen goes black, hold the side button again until the Apple logo shows.
Android
- Press and hold the power button, or power + volume down together until the power menu appears.
- Tap Restart or Power Off
- Press and hold the power button until the device turns on
12. Uninstall and install eSIM again in the target country
This step is for country plans. On a Global plan one eSIM covers every country in the plan, so crossing a border is normal and there is nothing to reinstall. Rarely, a country eSIM struggles to connect with local networks if the installation happened in a different country.
Important: You can reinstall your eSIM up to five times.
iOS (iPhone)
Go to Settings
Tap Mobile Service or Cellular
Select the eSIM you want to delete
Click “Delete eSIM”
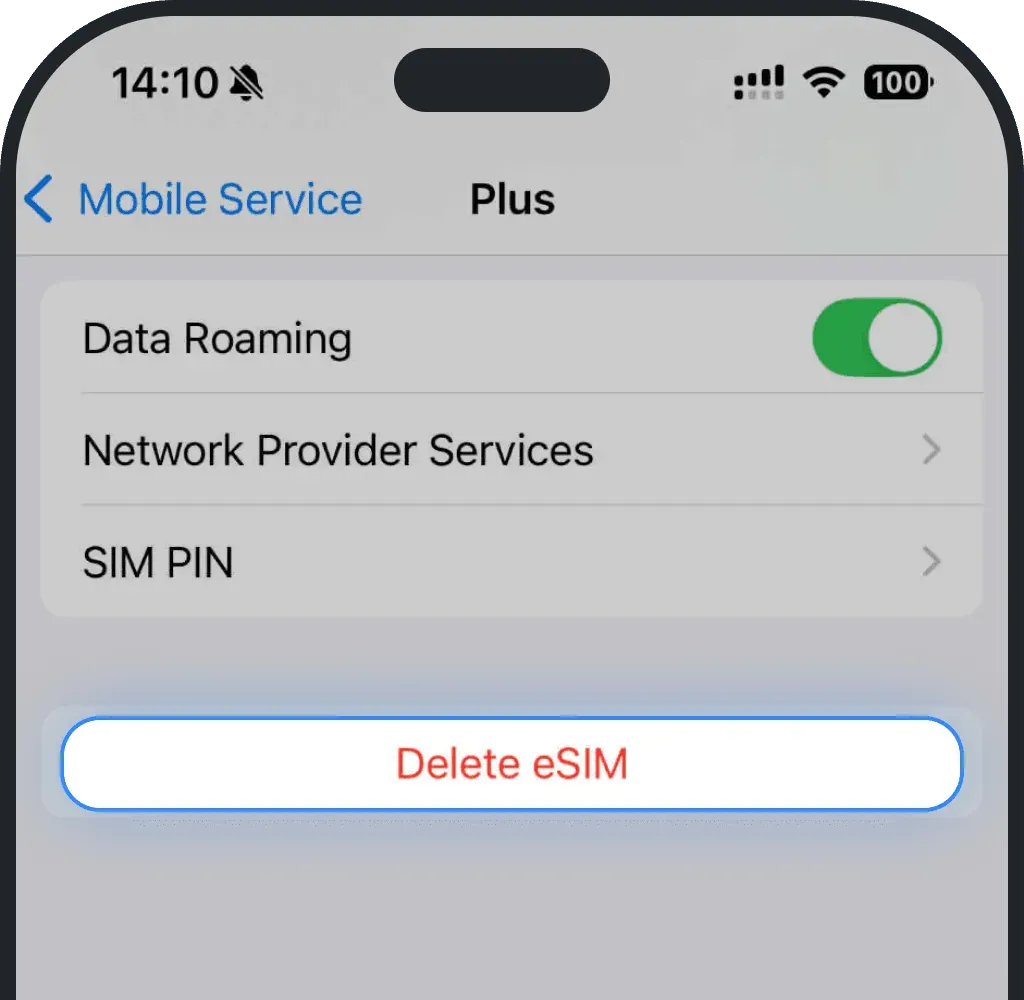
- Confirm the deletion
- Return to our Installation Guide and follow the steps carefully
Android
Go to Settings
Tap Connections
Tap SIM manager
Select the eSIM you want to delete
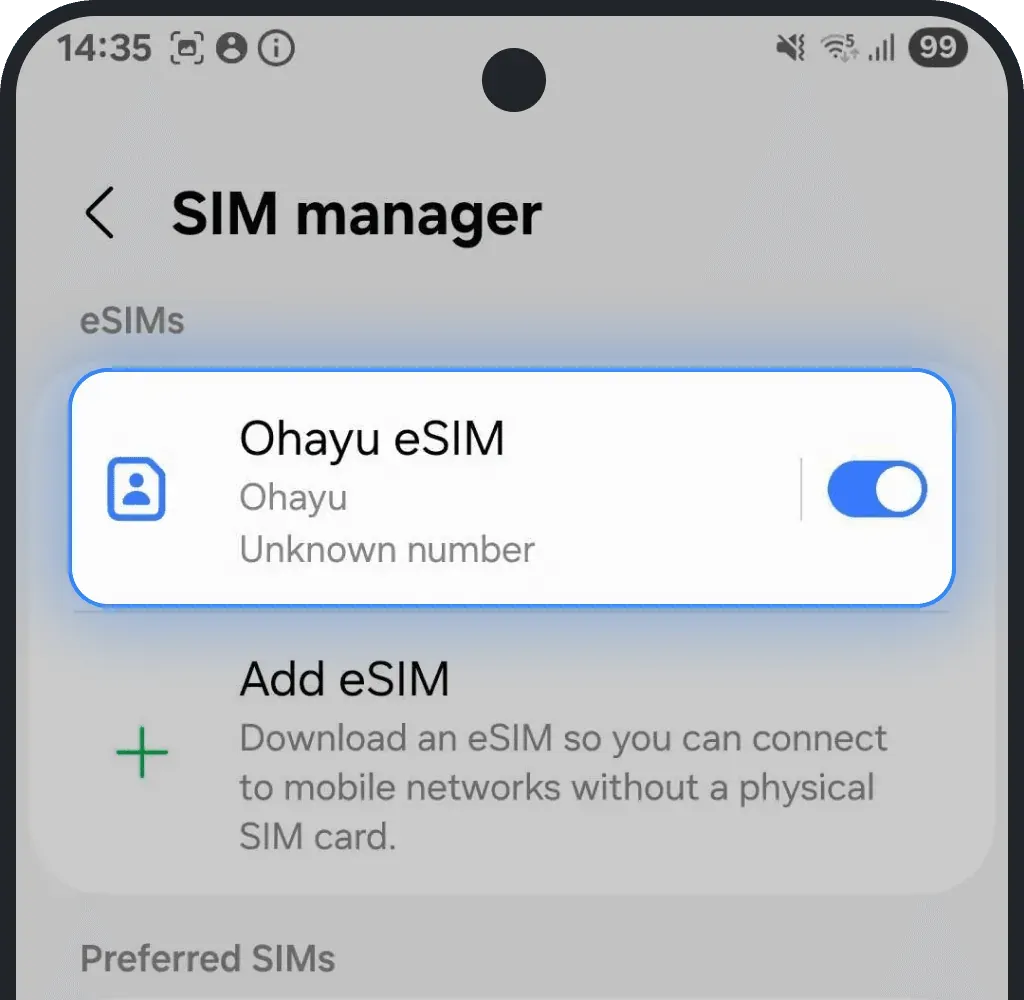
Click “Remove”
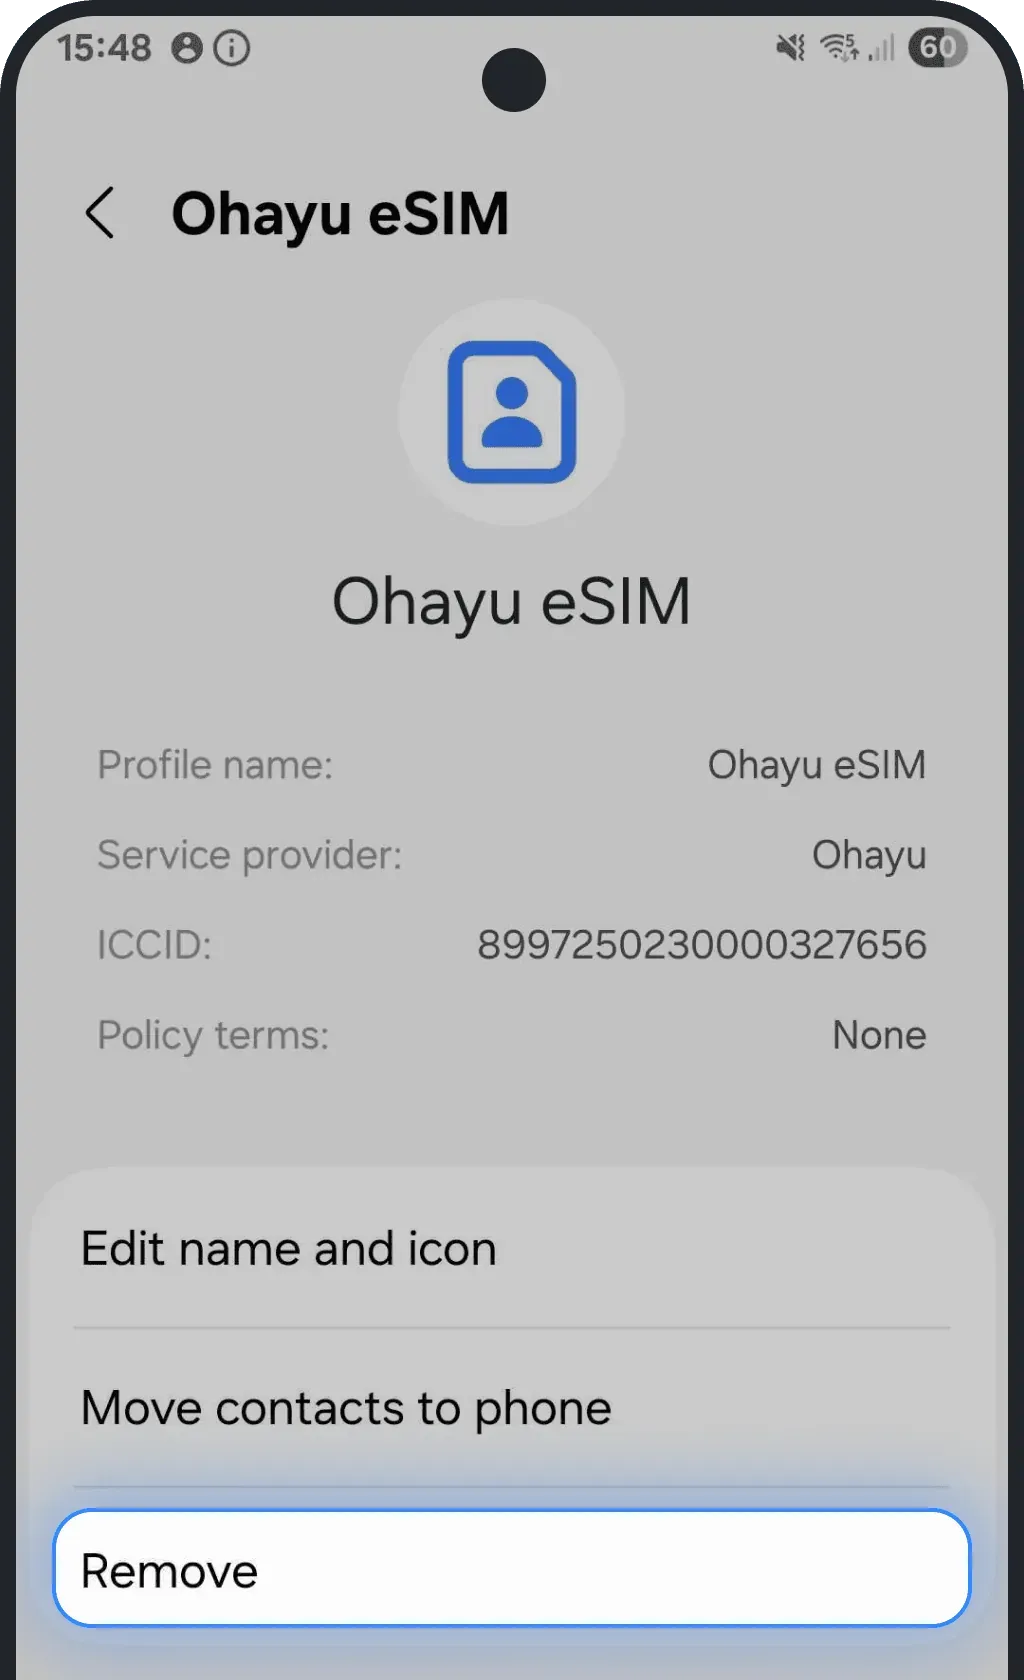
- Confirm the deletion
- Return to our Installation Guide and follow the steps carefully
Have you gone through all these steps and still having issues? Get in touch with us — our 24/7 support team will help you get your eSIM up and running.
Was this article helpful?
Your feedback helps us improve our FAQ